
- Prep: 10 Minutes
- Cook: 10 Minutes
- Total: 20 Minutes
- Servings: 4 servings
A Quick Note Before You Start
Use cold, crisp romaine straight from the fridge — warm lettuce makes the wrap soggy fast. And don’t skip drying your romaine after washing it. That one step keeps everything crisp and delicious.
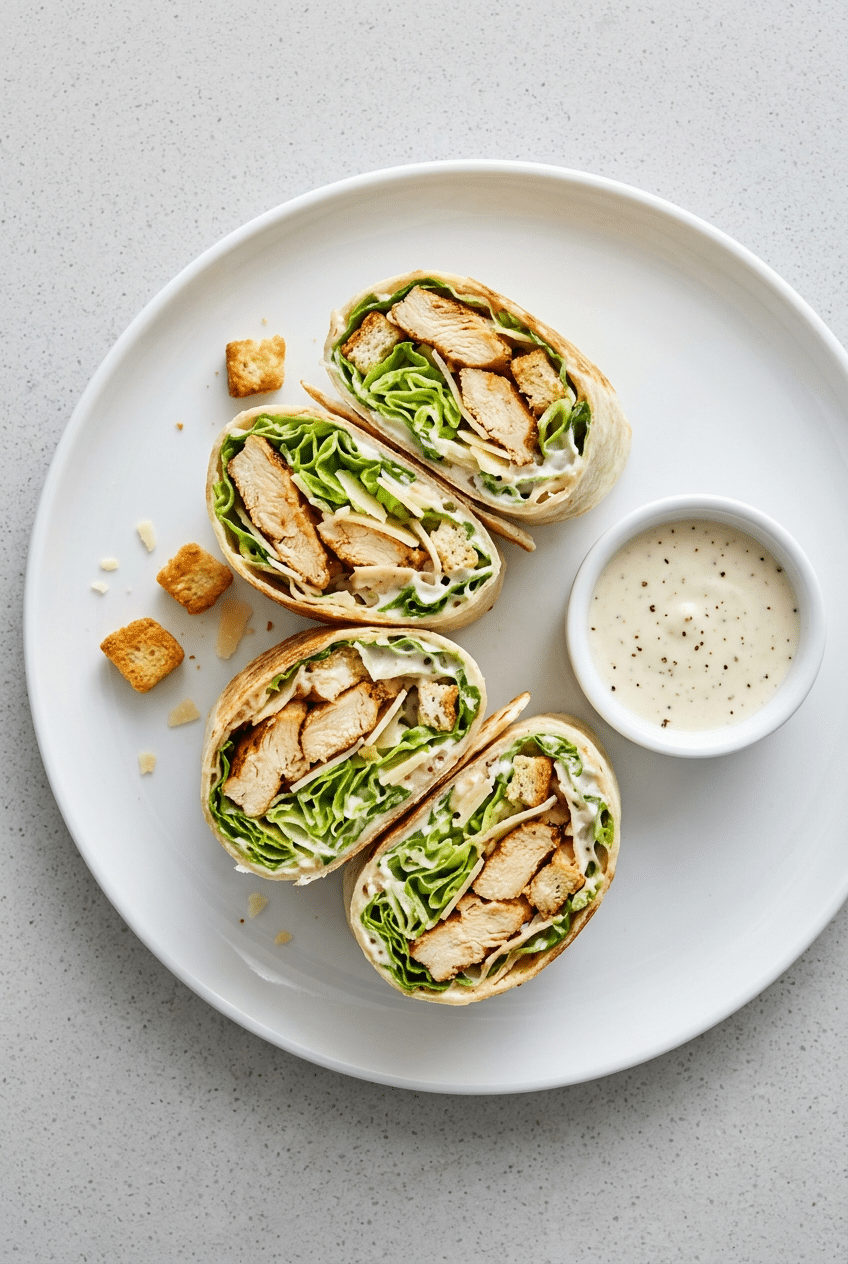
Chicken caesar wraps are the kind of lunch that feels like you ordered from a good café — and they come together in under 20 minutes. Juicy seasoned chicken, crunchy romaine, shaved parmesan, and creamy caesar dressing all rolled into a toasted flour tortilla.
The secret is layering ingredients in the right order so nothing gets soggy, and using a quick pan-sear on the wrap seam-side down to lock everything in place. These techniques make all the difference between a wrap that holds together and one that falls apart.
Ingredients for Chicken Caesar Wraps
For the Chicken
- 1.5 lbs boneless, skinless chicken breasts — sliced thin for faster, even cooking
- 1 tsp garlic powder
- 1 tsp onion powder
- 1/2 tsp smoked paprika — adds subtle color and depth
- 1/2 tsp salt
- 1/4 tsp black pepper
- 1 tbsp olive oil — for searing
For the Wraps
- 4 large (10-inch) flour tortillas — burrito-size gives you enough room to fold without tearing
- 3 cups chopped romaine lettuce — cold and very dry
- 1/2 cup shaved or shredded parmesan cheese — shaved gives a better texture than pre-grated powder
- 1 cup plain croutons — crushed slightly so they don’t poke through the tortilla
- Ken’s Steak House Caesar Dressing (13 oz) — thick, tangy, and exactly the right consistency for wraps without making them soggy
Optional Add-Ins
- 1/2 avocado, sliced thin
- 4 strips crispy bacon, crumbled
- 1/4 cup sun-dried tomatoes
- 1 tsp lemon zest stirred into the dressing
- Red pepper flakes for heat
How to Make Chicken Caesar Wraps Step by Step
Step 1: Season and Slice the Chicken
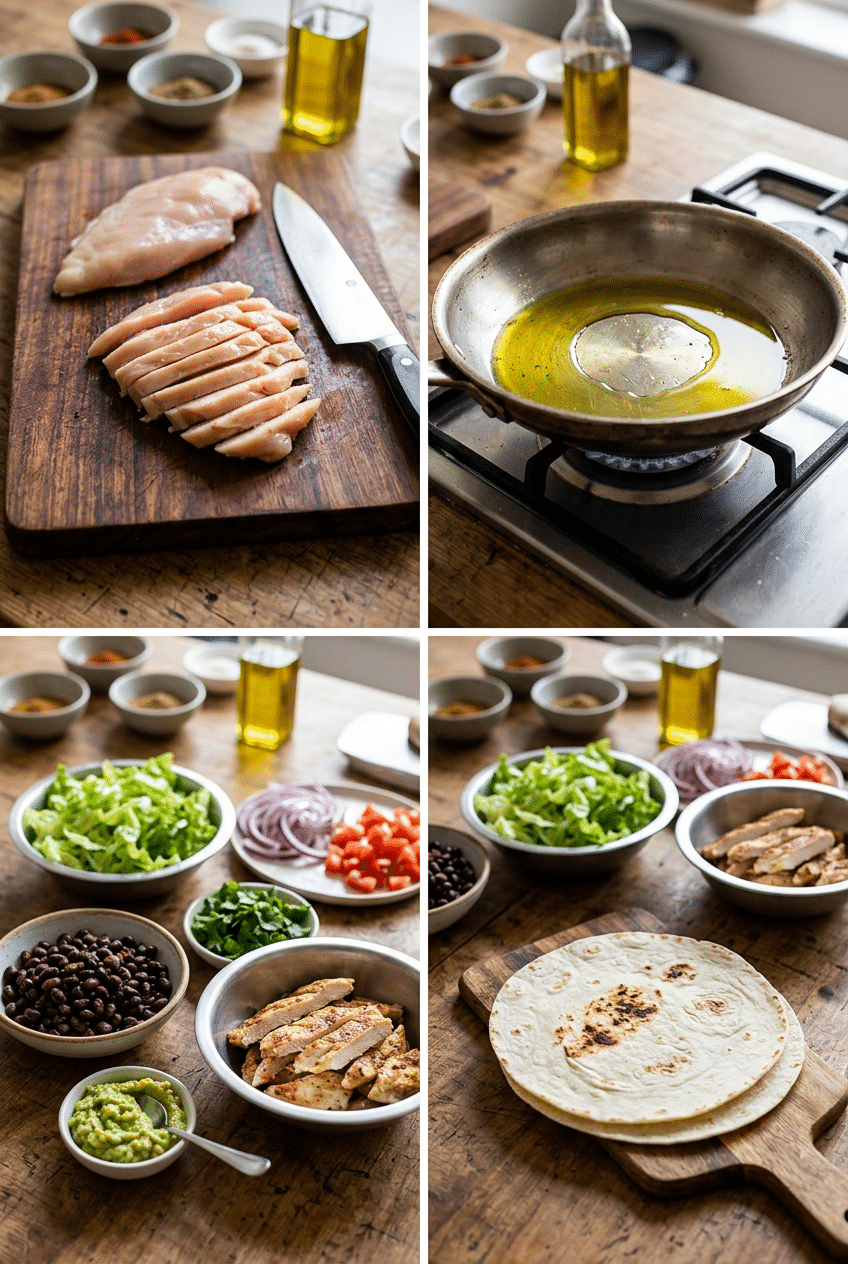
Start by slicing your chicken breasts horizontally into thin cutlets, about half an inch thick. Thin cuts cook faster and give you more surface area for seasoning, which means more flavor in every bite. Place them on a plate or cutting board and pat them dry with a paper towel — moisture is the enemy of a good sear.
In a small bowl, mix together the garlic powder, onion powder, smoked paprika, salt, and black pepper. Sprinkle the seasoning mixture evenly over both sides of the chicken and press it lightly so it adheres. Don’t skip the pressing step — it helps the seasoning form a proper crust on the pan instead of just steaming off.
Step 2: Sear the Chicken Until Golden
Heat a large skillet over medium-high heat and add your tablespoon of olive oil. You want the pan genuinely hot before the chicken goes in — if the oil shimmers and a drop of water flicked in sizzles immediately, you’re ready. Lay the chicken pieces in a single layer, pressing them down gently so full contact happens with the pan.
Cook for 4 to 5 minutes per side without moving them — resist the urge to poke and flip early. That undisturbed time is exactly what builds the golden crust. The chicken is done when it reads 165°F on an instant-read thermometer and the juices run clear. Transfer to a cutting board and let it rest for 3 minutes before slicing — resting keeps all those juices inside the meat instead of running onto your board.
👉 Instant Read Meat Thermometer — Takes the guesswork out of chicken doneness — never cut into dry, overcooked chicken again.
Step 3: Slice Chicken and Prep the Fillings
While the chicken rests, get your remaining fillings ready to go. Chop your romaine into roughly one-inch pieces and make absolutely sure it’s dry — spin it in a salad spinner or pat it firmly with paper towels. Wet lettuce releases water the second it hits dressing, and that water soaks straight through your tortilla.
Slice the rested chicken into strips across the grain. Cutting against the grain shortens the muscle fibers, which makes each bite tender instead of stringy. Lightly crush your croutons by pressing them in your hand or giving them a few quick chops on the board — whole croutons are too bulky and will tear your wrap when you roll it.
👉 OXO Good Grips Salad Spinner — Spins romaine bone-dry in 10 seconds — wet lettuce is the number one wrap-killer.
Step 4: Warm the Tortillas
Warm your tortillas before building the wraps — cold tortillas crack and tear when you try to roll them. You can do this two ways: hold them directly over a gas flame for about 15 seconds per side until soft and slightly charred in spots, or wrap all four in a damp paper towel and microwave for 30 seconds. Either method works, but the flame method gives you a slightly better texture and a nice smoky edge.
Work quickly once the tortillas are warm — they’re pliable for about 2 minutes before they start to stiffen again. If you’re making multiple wraps, keep the others stacked and covered with a clean kitchen towel to hold the heat while you assemble them one by one.
Step 5: Build and Roll the Wraps
Lay a warm tortilla flat on your counter. Spread about 1.5 tablespoons of Ken’s Caesar dressing in the center, leaving a 2-inch border all the way around — that border is what gives you clean edges when you fold. Layer on your romaine first, then the chicken strips, then the parmesan, then the crushed croutons. Add the dressing on top of the fillings rather than mixing it in beforehand, so the romaine stays crunchy longer.
To roll, fold the two side edges in first, then bring the bottom edge up and over the filling, tucking it snugly around everything. Roll forward firmly while keeping the sides tucked in. A tight roll is the goal — loose wraps fall apart on the first bite. If you want a clean cut, use a sharp serrated knife and slice on a diagonal in one clean press-and-pull motion rather than a sawing motion.
👉 Ken’s Steak House Caesar Dressing 13 oz — Thick enough to coat without making the tortilla soggy — the exact consistency wraps need.
Step 6: Toast the Wrap Seam-Side Down
This is the step most people skip and the one that makes the biggest difference. Place the finished wrap seam-side down in a dry skillet over medium heat for about 60 to 90 seconds. The heat seals the seam so it doesn’t unravel, crisps the outside of the tortilla, and warms the whole wrap through so the cheese softens slightly against the chicken.
You don’t need any oil in the pan for this step — a dry pan gives you a better toast and prevents the tortilla from going greasy. Flip once and toast the other side for another 30 seconds. You’re looking for light golden spots on the outside, not a full crispy taco shell. Let it cool for a minute before cutting — if you cut immediately the filling shifts and everything spills out.
👉 Reusable Beeswax Wrap Set for Food Storage — Wrap assembled caesar wraps for meal prep — keeps them neat without plastic waste.
Nutrition Information
- Per serving: 480 cal
- 18g fat
- 38g carbs
- 42g protein
Pro Tips
Dry your romaine completely: This is the most important step in the whole recipe. Wet lettuce releases liquid the second it meets dressing, and that liquid saturates your tortilla within minutes. After washing, either use a salad spinner or lay the leaves on a clean kitchen towel and press firmly. If you’re meal prepping, store the dried romaine in a paper towel-lined container in the fridge — it stays crisp for days.
Season your chicken right before cooking, not ahead of time: Salt draws moisture out of meat when it sits. If you season and let the chicken sit for 20+ minutes, you’ll end up with steam-cooked chicken instead of a properly seared crust. Season, press, pan — keep that sequence tight.
Use room temperature tortillas or warm them fresh: Cold, stiff tortillas crack at the fold points and the whole wrap splits open. The 30-second microwave trick is the fastest fix. If you’re making these for meal prep, wrap the assembled rolls tightly in foil — the foil holds the shape and keeps everything together in the fridge.
The seam-side toast is non-negotiable: Pressing the seam against a hot dry pan for 60 to 90 seconds essentially glues the wrap shut. It also crisps the outside just enough to give you a pleasant contrast against the cool, creamy filling inside. Skipping this step means a wrap that unravels before you’re halfway through.
Don’t dress the salad ahead of time: Add dressing to the romaine inside the wrap right before rolling, not in a bowl beforehand. Pre-dressed greens go limp in minutes. If you’re making these for lunch boxes, pack dressing in a small separate container and drizzle it in just before eating.
Delicious Variations
Rotisserie Chicken Caesar Wraps
Skip the stovetop entirely and use shredded rotisserie chicken. Pull the breast meat into rough pieces, season lightly with garlic powder and a pinch of smoked paprika, and you’ve cut your prep time to about 5 minutes. This is the weeknight version when you’re short on time and still want something that tastes homemade. The rotisserie seasoning adds a layer of flavor the fresh-cooked chicken doesn’t have.
Grilled Chicken Caesar Wraps
Take the chicken outside to the grill for a smokier, charred version. Pound the breasts to an even half-inch thickness, brush with olive oil, season the same way, and grill over direct heat for 4 to 5 minutes per side. The char marks add a visual appeal that’s hard to beat, and the wood-smoke flavor makes the whole wrap taste more complex. This version is ideal for summer entertaining.
Crispy Chicken Caesar Wraps
Bread the chicken cutlets in seasoned panko and pan-fry them for a crispy, almost chicken-tender texture inside the wrap. The crunch from the breaded chicken means you can skip the croutons entirely, and the contrast between crispy chicken and creamy dressing is genuinely addictive. Use the same seasonings — just mix them into the panko before coating. Fry in a quarter inch of vegetable oil, 3 minutes per side.
Buffalo Caesar Wraps
After cooking the chicken, toss the sliced strips in 2 tablespoons of your favorite buffalo sauce before building the wrap. The heat from the buffalo sauce cuts through the richness of the caesar dressing in the best possible way. Add a drizzle of ranch alongside the caesar for a creamy, tangy, spicy combination that’s completely different from the original but just as addictive. Blue cheese crumbles instead of parmesan work beautifully here.
Low-Carb Caesar Wrap (Lettuce Wrap Version)
Swap the flour tortilla for large, whole romaine or butter lettuce leaves for a satisfying low-carb version. Lay two or three leaves together to form a cup, then pile in all the same fillings. You lose the portability of the rolled wrap but gain a lighter, brighter dish that’s ideal for warm-weather lunches. The freshness of the lettuce against the rich caesar dressing is a great balance — this version also works as a starter or side.
Storage Instructions
Refrigerator
Assembled chicken caesar wraps are best eaten within 2 hours of making them because the dressing softens the romaine and the tortilla absorbs moisture over time. That said, if you need to store them, wrap each one tightly in aluminum foil and refrigerate for up to 24 hours. The foil holds the shape and slows moisture transfer better than plastic wrap does. For best results the next day, give the wrap a 45-second dry toast in a skillet to re-crisp the outside before eating.
Freezer
Chicken caesar wraps don’t freeze well once assembled — the romaine turns mushy and the tortilla gets soggy and falls apart. However, the cooked seasoned chicken freezes beautifully on its own. Slice it into strips, let it cool completely, then freeze flat in a zip-lock bag for up to 2 months. Thaw overnight in the fridge and use it to assemble fresh wraps in under 5 minutes — this is a great meal prep shortcut.
Make-Ahead
For meal prep, the best approach is to store all components separately in the fridge and assemble right before eating. Keep the sliced chicken in one container, the dry romaine in a paper towel-lined container, and the parmesan and crushed croutons together in a small bag or jar. The dressing keeps in its bottle. Everything holds for 4 to 5 days this way, and each morning you can build a fresh wrap in under 3 minutes — faster than most takeout lines.
For food safety guidelines, visit FDA Safe Food Handling Guidelines.
Frequently Asked Questions
What tortillas work best for chicken caesar wraps?
Use 10-inch burrito-size flour tortillas — they’re large enough to hold a generous filling without tearing, and they roll without cracking when warmed. Avoid corn tortillas for this recipe since they’re too small and break easily under a wet filling. Whole wheat and spinach tortillas both work as healthier alternatives and add a slight flavor of their own that pairs nicely with the caesar dressing. Just make sure to warm any tortilla before rolling or it will split at the fold.
Can I use store-bought grilled chicken for chicken caesar wraps?
Absolutely — rotisserie chicken or pre-cooked grilled chicken strips from the deli section are great shortcuts. Rotisserie chicken in particular has a rich, seasoned flavor that works really well with the caesar dressing. Just shred or slice the meat, season it with a quick pinch of garlic powder and paprika to freshen it up, and you can have the whole wrap assembled in under 5 minutes. This is the best version for busy weekday lunches when you don’t want to cook at all.
How do I keep chicken caesar wraps from getting soggy?
Three things prevent sogginess: dry your romaine completely before using it, don’t overdress the filling, and layer in the right order — romaine goes down first as a barrier between the tortilla and the dressing. If you’re packing a wrap for lunch, pack the dressing separately in a small container and drizzle it in right before eating. Toasting the wrap seam-side down in a dry skillet also creates a slight crust on the tortilla that resists moisture better than an untoasted wrap.
What caesar dressing is best for wraps?
For wraps specifically, you want a thicker dressing rather than a thin, pourable one — thin dressings soak through the tortilla too fast. Ken’s Steak House Caesar Dressing is consistently thick and tangy with a strong anchovy-garlic backbone that stands up to the other flavors. Brianna’s and Cardini’s are also excellent options. Avoid light or low-fat caesar dressings for this recipe — they tend to be thinner and more watery, which leads directly to a soggy wrap.
Can I make chicken caesar wraps ahead of time for a party or lunch box?
Yes, with a strategy. Prep all components separately and assemble no more than 2 hours before serving. Wrap each finished wrap tightly in aluminum foil and keep refrigerated. The foil holds them together and slows the moisture migration from the dressing. If you’re making them for a party spread, cut them in half on the diagonal and stand them cut-side up — they look great and the cross-section shows off the colorful filling. For lunch boxes, pack the dressing on the side for maximum freshness.
How many calories are in a chicken caesar wrap?
A homemade chicken caesar wrap made with this recipe comes in at approximately 480 calories per wrap, with 42 grams of protein, 38 grams of carbs, and 18 grams of fat. The biggest calorie variable is the amount of dressing you use — each tablespoon of caesar dressing adds roughly 70 to 80 calories, so measuring it rather than free-pouring makes a real difference if you’re tracking. Using a whole wheat tortilla saves about 20 calories and adds a few extra grams of fiber.
More Recipes You Will Love
👉 Perfect Ham And Cheese Wraps Recipe
👉 Chicken Quesadilla Strips Recipe
👉 Perfect Pasta Salad Cups Recipe (Easy)
👉 Perfect Turkey & Cheese Pinwheels Recipe
Chicken caesar wraps are genuinely one of the most satisfying meals you can put together in 20 minutes — restaurant quality with zero fuss. Give this recipe a try this week and let us know how yours turned out in the comments below. Did you go classic or try one of the variations? Share it and tag us — we love seeing your wraps!