
- Prep: 15 Minutes
- Cook: 20 Minutes
- Total: 35 Minutes
- Servings: 4 servings
A Quick Note Before You Start
Don’t skip the cornstarch in the sauce — it’s what gives you that thick, glossy glaze that coats every bite of chicken. Also, thighs beat breasts here every single time. Trust the process.
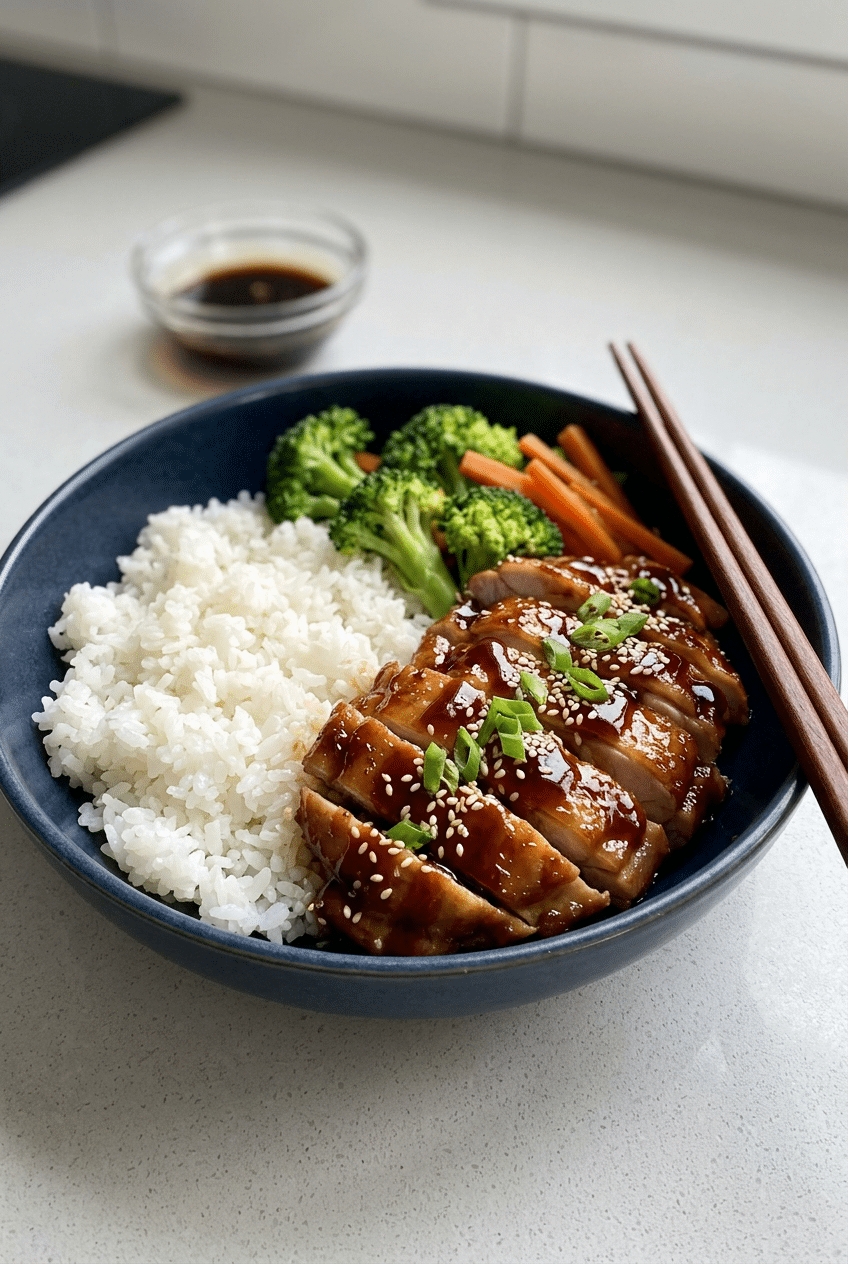
Teriyaki chicken bowls are the weeknight dinner that somehow feels like a treat. Sweet, salty, sticky glaze over juicy chicken with steamed rice and crisp veggies — it’s fast, filling, and wildly better than takeout.
The secret is a from-scratch teriyaki sauce that takes four minutes and four ingredients. We’ll build real depth of flavor by searing the chicken hard before glazing, so every piece gets golden edges and a lacquered finish.
Ingredients for Teriyaki Chicken Bowls
For the Teriyaki Sauce
- 1/3 cup soy sauce — use low-sodium so the sauce doesn’t turn salty when it reduces
- 1/4 cup mirin — this is what gives teriyaki its signature sweetness and shine
- 2 tablespoons sake — or dry sherry if you don’t have sake on hand
- 2 tablespoons brown sugar — packed, for a deeper caramel note
- 1 teaspoon sesame oil — added off heat so the aroma doesn’t cook off
- 1 tablespoon cornstarch + 1 tablespoon cold water — whisked into a slurry, this is what makes the sauce thick and glossy instead of watery
- 2 garlic cloves, minced
- 1 teaspoon fresh ginger, grated
For the Chicken
- 1.5 lbs boneless, skinless chicken thighs — thighs stay juicy under high heat; breasts dry out before the glaze sets
- 1 tablespoon neutral oil — avocado or vegetable oil for the sear
- Salt and pepper to taste
For the Bowls
- 2 cups jasmine rice, cooked — cook it in chicken broth instead of water for extra flavor
- 2 cups broccoli florets, steamed
- 1 cup shredded carrots
- 1 cup edamame, shelled and thawed — adds protein and a pop of color
- 3 green onions, thinly sliced
- 2 tablespoons sesame seeds — toasted if you have five extra minutes
- Kewpie Japanese mayonnaise for drizzling (optional) — Kewpie mayo adds a creamy, umami-rich finish that takes the bowl over the top
Optional Add-Ins
- 1 avocado, sliced
- Pickled cucumber or pickled ginger
- Sriracha or chili garlic sauce
- Crispy fried shallots for crunch
- Baby spinach or shredded cabbage as a base instead of rice
How to Make Teriyaki Chicken Bowls Step by Step
Step 1: Start Your Rice First
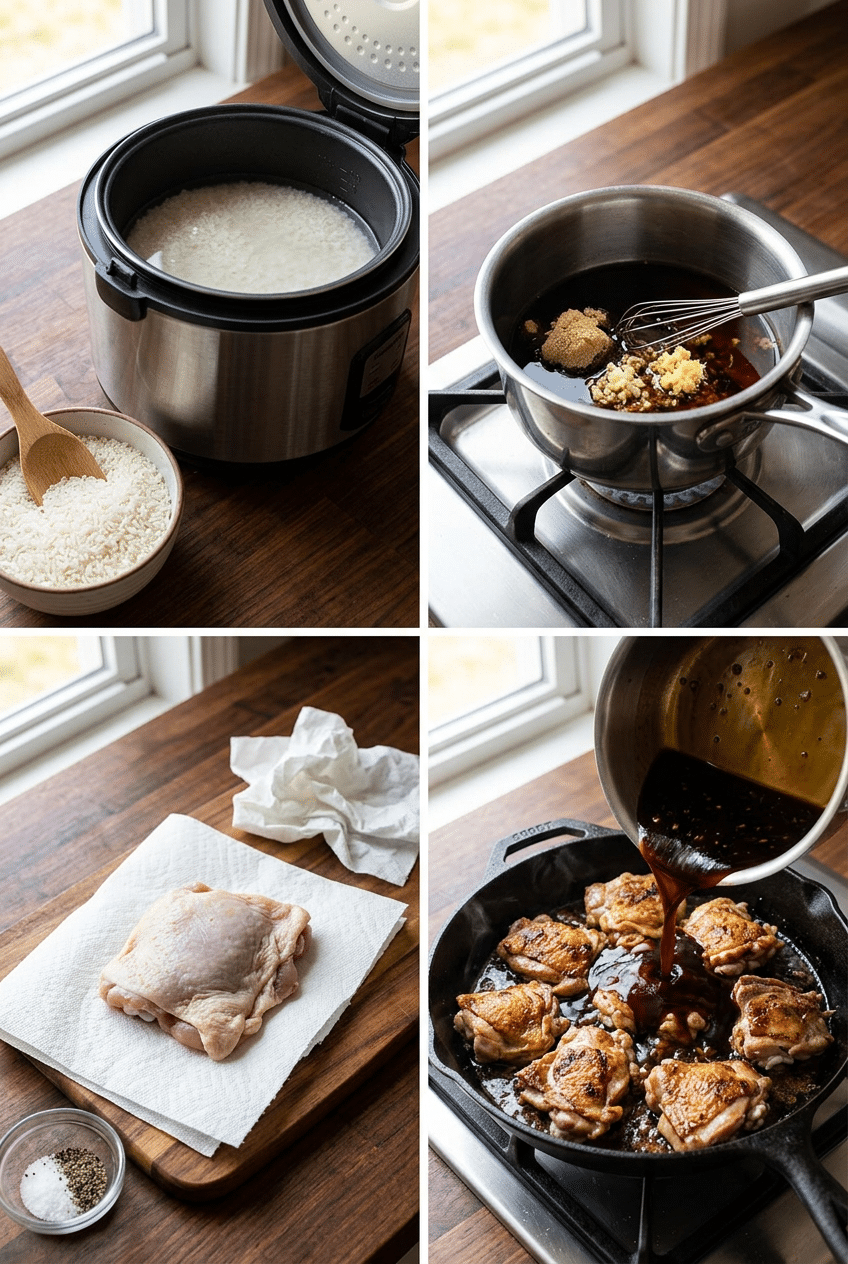
Get your rice going before anything else — it takes the longest and will stay warm while you cook the chicken. Rinse 2 cups of jasmine rice under cold water until the water runs clear, then cook it in chicken broth instead of plain water using whatever method you prefer (rice cooker, stovetop, or Instant Pot). That one swap adds a savory depth that makes plain rice taste like it belongs in a restaurant bowl.
While the rice cooks, you have about 15 minutes of hands-off time to prep everything else. This is the power move of the whole recipe — layering your tasks so dinner comes together at the same time without any scrambling.
Step 2: Mix the Teriyaki Sauce
In a small saucepan over medium heat, combine the soy sauce, mirin, sake, brown sugar, minced garlic, and grated ginger. Whisk everything together and bring it to a gentle simmer, stirring until the sugar fully dissolves — this takes about 2 minutes. You’ll notice the sauce smells incredible immediately because the heat is releasing the aromatics from the garlic and ginger.
In a small bowl, whisk together the cornstarch and cold water until completely smooth, then pour that slurry into the simmering sauce while whisking constantly. Cook for another 60 to 90 seconds until the sauce thickens and turns glossy and deeply caramel-colored. Pull it off the heat and stir in the sesame oil. Set aside — the sauce will thicken a bit more as it cools, and that’s exactly what you want.
👉 Kikkoman Mirin Sweet Cooking Rice Wine — Kikkoman mirin is the most reliable brand for authentic teriyaki flavor — sweet, clean, and perfectly balanced.
Step 3: Sear the Chicken
Pat your chicken thighs completely dry with paper towels before seasoning — this is non-negotiable. Any surface moisture will steam the chicken instead of searing it, and you’ll lose that golden crust that holds the glaze. Season both sides with a pinch of salt and pepper, then heat a large skillet or cast iron pan over medium-high heat until it’s properly hot before adding your oil.
Lay the chicken thighs down in a single layer without touching — work in batches if needed. Let them cook completely undisturbed for 5 to 6 minutes until they release naturally from the pan with a deep golden-brown crust underneath. Flip and cook another 4 to 5 minutes until cooked through (internal temp of 165°F). A meat thermometer takes all the guesswork out of this step.
👉 ThermoPro TP03 Instant Read Meat Thermometer — A $15 instant-read thermometer means you’ll never cut into a chicken thigh to guess if it’s done again.
Step 4: Glaze and Rest the Chicken
Reduce the heat to medium-low and pour about two-thirds of your teriyaki sauce directly into the pan with the chicken. Using tongs, toss and turn the chicken so every piece gets completely coated, and let it simmer in the sauce for 1 to 2 minutes. The sauce will bubble and reduce further, concentrating onto the chicken and creating that sticky, lacquered finish you’re after.
Transfer the glazed chicken to a cutting board and let it rest for 5 minutes before slicing. Resting lets the juices redistribute through the meat so they don’t all pour out the moment you cut into it. Slice the thighs against the grain into thick, diagonal strips — this cut gives you the most surface area for sauce to cling to and looks beautiful fanned out over the bowl.
Step 5: Steam Your Vegetables
While the chicken rests, quickly steam your broccoli florets either in the microwave (covered with a damp paper towel for 2 to 3 minutes) or in a steamer basket over boiling water for about 4 minutes. You want them bright green and tender-crisp — soft enough to eat easily but still with a little bite so they don’t turn the bowl soggy. A pinch of salt on the broccoli right after steaming makes a real difference.
The shredded carrots and thawed edamame don’t need any cooking — they go straight into the bowl raw. The contrast of cold and fresh against the warm rice and hot glazed chicken is actually part of what makes these bowls so satisfying. Temperature contrast in a bowl is an underrated trick.
Step 6: Assemble Your Bowls
Start with a generous scoop of rice as your base — about 3/4 cup per bowl. Arrange your broccoli, carrots, and edamame around one side, then fan the sliced teriyaki chicken over the top. The goal is to show off every component rather than piling everything in a heap — bowls eat better and look better when you can see what’s in them.
Drizzle the reserved teriyaki sauce over the chicken and scatter sliced green onions and sesame seeds across the top. If you’re using Kewpie mayo, drizzle it in a thin zigzag across the bowl — it adds creaminess and a rich umami note that makes the whole thing taste like it came from a proper Japanese rice bowl restaurant. Serve immediately.
👉 Japanese Ceramic Rice Bowl Set — Deep ceramic rice bowls make these look exactly like a restaurant — and they’re way more satisfying to eat from than a flat plate.
Nutrition Information
- Per serving: 520 cal
- 14g fat
- 58g carbs
- 38g protein
Pro Tips
Dry your chicken completely: Pat the thighs dry with paper towels right before seasoning — even 30 minutes out of the fridge builds surface moisture. Wet chicken steams in the pan instead of searing, and you’ll end up with grey, sad chicken instead of that deep golden crust that holds all the glaze.
Make a double batch of teriyaki sauce: The sauce keeps in a sealed jar in the fridge for up to two weeks and works on salmon, pork, tofu, and roasted vegetables. Doubling the sauce recipe takes exactly zero extra effort and gives you a head start on three or four future dinners.
Let the pan get properly hot before oil: A cold pan means the chicken sticks and tears before the crust forms. Heat your skillet for 2 full minutes over medium-high before adding oil — the oil should shimmer and move like water the second it hits the pan. That’s when you know you’re ready.
Cook rice in broth, not water: Swapping water for chicken broth when cooking your jasmine rice costs you nothing extra and adds a savory background note that makes the whole bowl taste more complete. It’s the kind of small habit that separates good home cooks from great ones.
Slice against the grain at a diagonal: Cutting chicken thighs against the grain shortens the muscle fibers so each bite is tender instead of chewy. The diagonal angle isn’t just for looks — wider slices hold more sauce and stack beautifully in the bowl.
Delicious Variations
Salmon Teriyaki Bowl
Swap the chicken thighs for 4 salmon fillets (about 6 oz each) and follow the same sear-then-glaze method. Salmon needs only 3 to 4 minutes per side over medium-high heat. The rich fat in the salmon actually makes it absorb the teriyaki glaze even better than chicken — it’s arguably the better bowl. Serve with avocado slices and pickled ginger.
Tofu Teriyaki Bowl (Vegan)
Use a 14 oz block of extra-firm tofu pressed dry for at least 30 minutes, then cut into 1-inch cubes. Toss in a tablespoon of cornstarch before pan-frying in oil until crispy on all sides — this step is essential because unseasoned tofu won’t absorb the glaze nearly as well. Swap the chicken broth for vegetable broth in the rice and use tamari instead of regular soy sauce to keep it gluten-free.
Spicy Teriyaki Bowl
Add 1 to 2 teaspoons of gochujang (Korean chili paste) directly into the teriyaki sauce when you combine the soy sauce and mirin. Gochujang adds a deep, fermented heat that’s more complex than just adding sriracha — it blends into the sauce seamlessly and gives the glaze a beautiful reddish-amber color. Finish with a drizzle of chili oil and extra sesame seeds.
Teriyaki Chicken Bowl with Cauliflower Rice
Replace the jasmine rice with cauliflower rice for a lower-carb version that still feels like a complete, filling meal. Buy pre-riced cauliflower from the freezer section to save time, and cook it in a dry skillet over medium-high heat for 5 to 6 minutes until the moisture evaporates — wet cauliflower rice makes a soggy bowl. Season with salt, garlic powder, and a few drops of sesame oil.
Storage Instructions
Refrigerator
Store each component separately in airtight containers for the best results. The glazed chicken keeps in the fridge for up to 4 days — reheat it in a skillet over medium heat with a splash of water to loosen the glaze and bring it back to life. Cooked rice lasts 4 days as well; sprinkle a few drops of water over it before microwaving, covered, so it steams back to fluffy rather than drying out. The teriyaki sauce stores separately in a sealed jar for up to 2 weeks.
Freezer
The cooked teriyaki chicken freezes beautifully for up to 3 months. Let it cool completely, then portion it into freezer-safe bags and lay flat to freeze. Thaw overnight in the fridge and reheat in a skillet — the glaze reconstitutes well with just a little added heat. Cooked rice also freezes well in individual portions; let it cool, portion into freezer bags, press flat, and freeze for up to 1 month. Microwave from frozen, still sealed in the bag, for 2 to 3 minutes.
Make-Ahead
This recipe was practically designed for meal prep. Cook a full batch of rice and chicken on Sunday and divide into containers with your veggies for 4 ready-to-go lunches or dinners throughout the week. Make a double batch of teriyaki sauce and keep it in a mason jar in the fridge — it’s ready to pour over anything all week. For best texture, keep the sauce separate and drizzle it on just before eating so the rice doesn’t get soggy sitting in sauce for days.
For food safety guidelines, visit FDA Safe Food Handling Guidelines.
Frequently Asked Questions
Can I make teriyaki chicken bowls with chicken breast instead of thighs?
You can, but you’ll need to be careful about timing. Chicken breasts cook faster and dry out quickly under high heat. Pound them to an even thickness of about 3/4 inch before cooking, reduce the sear time to 4 minutes per side, and pull them off the heat the moment they hit 165°F. Thighs are more forgiving because the higher fat content keeps them juicy even if they cook a minute longer than planned.
What can I use instead of mirin in teriyaki sauce?
The closest substitute is 2 tablespoons of dry sherry or dry white wine plus 1 teaspoon of extra sugar. In a real pinch, sweet rice wine vinegar works but adds a bit of acidity. The honest truth is that mirin is worth buying — it’s inexpensive, keeps in the pantry for months, and shows up in dozens of Japanese recipes. Once you have a bottle, you’ll use it constantly.
How do I get the teriyaki sauce to be thicker and stickier?
Two things matter here. First, make sure your cornstarch slurry is made with cold water — hot water causes cornstarch to clump before it can do its job. Second, keep simmering the sauce after adding the slurry for a full 60 to 90 seconds — the thickening reaction needs heat to activate completely. If the sauce still seems thin, mix another half teaspoon of cornstarch with cold water and whisk it in, then simmer again.
Are teriyaki chicken bowls good for meal prep?
They’re one of the best meal prep recipes there is. The chicken reheats without drying out (especially thighs), the sauce actually gets better after a day in the fridge as the flavors meld, and the components are easy to portion into individual containers. The only thing to keep separate is the sauce — drizzle it on right before eating so the rice stays fluffy and the veggies don’t get waterlogged.
What vegetables go well in teriyaki chicken bowls?
Beyond the classic broccoli and carrots, try snap peas, sliced bell peppers, cucumber ribbons, baby bok choy, shelled edamame, corn, or shredded purple cabbage. For a warm bowl, stick to steamed or lightly sautéed vegetables. For a more salad-style bowl, keep everything raw and crunchy. Mixing textures — something steamed, something raw, something pickled — makes every bite more interesting.
Can I cook the chicken in the air fryer instead?
Yes — and it works great for getting crispy edges without monitoring a skillet. Season the thighs and air fry at 400°F for 16 to 18 minutes, flipping halfway through. Brush the teriyaki sauce onto the chicken in the last 3 minutes of cooking so it caramelizes onto the surface. Then finish with an extra drizzle of sauce when assembling the bowl. You won’t get the same pan sauce, so make sure to cook a full batch of sauce separately.
More Recipes You Will Love
👉 Perfect BBQ Baby Back Ribs Recipe (Fall-Off-Bone)
👉 Chicken Quesadilla Strips Recipe
👉 Perfect Pasta Salad Cups Recipe (Easy)
👉 Perfect Ham And Cheese Wraps Recipe
These teriyaki chicken bowls are the kind of recipe that earns a permanent spot in your weeknight rotation — fast enough for Tuesday, impressive enough for company, and endlessly customizable. Make it once and you’ll be tweaking the sauce and swapping the veggies for the next year. Try it this week and drop a comment below — I want to know what you put in your bowl!