
- Prep: 15 Minutes
- Cook: 20 Minutes
- Total: 35 Minutes
- Servings: 4 servings
A Quick Note Before You Start
Don’t skip blanching the vegetables separately — it keeps their color bright and their texture just right. Use whatever vegetables look best at the market. This dish is forgiving, flexible, and honestly better than most restaurant versions.
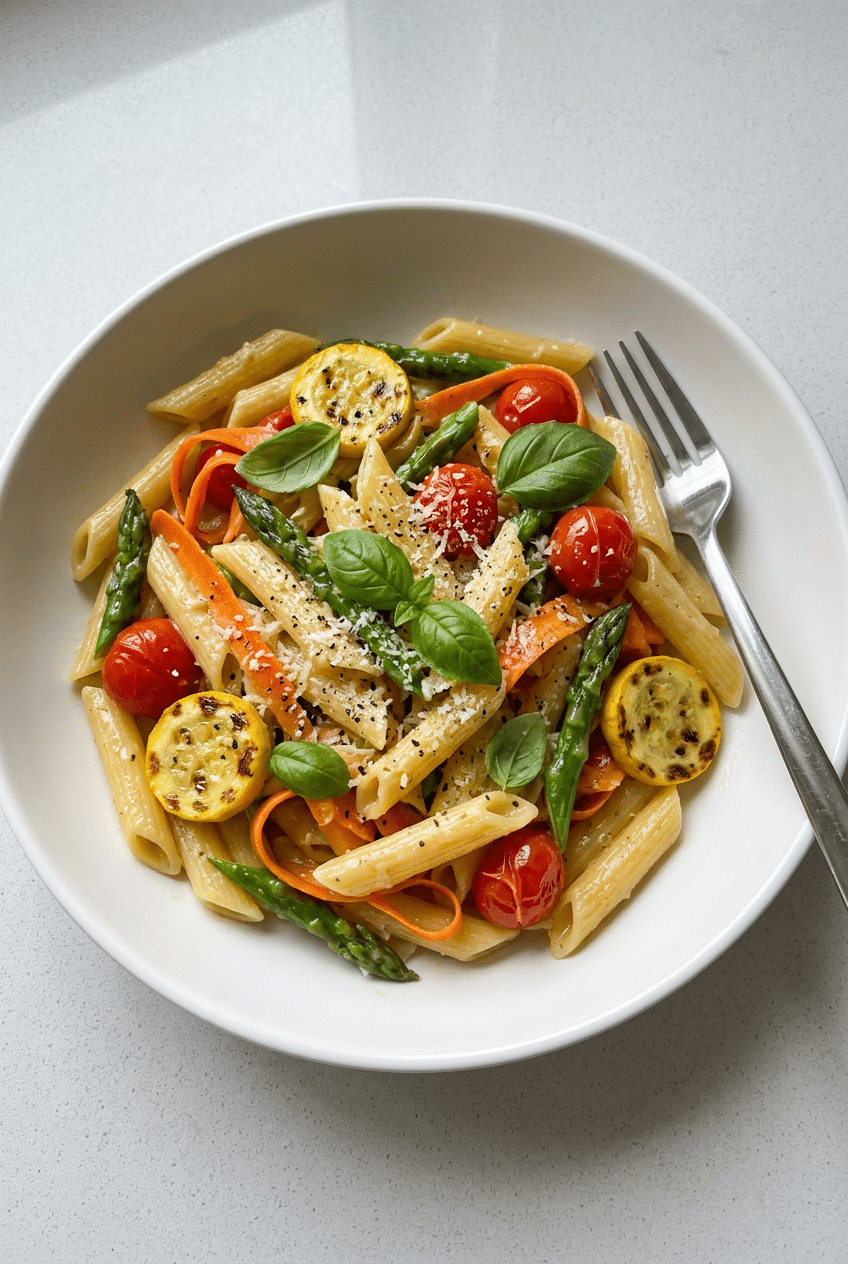
Pasta primavera is that rare weeknight dinner that feels fancy without asking much from you. Fresh vegetables, a glossy garlic-parmesan sauce, and perfectly cooked pasta — it’s simple food done beautifully.
The technique here matters more than the ingredient list. We’re building real flavor by sautéing aromatics, using pasta water as a sauce thickener, and finishing everything in the pan together so every strand gets coated.
Ingredients for Pasta Primavera
For the Pasta
- 12 oz penne or rigatoni pasta — the ridges grab the sauce perfectly
- 1 tablespoon kosher salt — for pasta water
For the Vegetables
- 1 cup asparagus — trimmed and cut into 1-inch pieces
- 1 cup cherry tomatoes — halved
- 1 medium zucchini — sliced into half-moons
- 1 cup broccoli florets — cut small so they cook fast
- 1 medium yellow squash — sliced into half-moons
- 1 medium carrot — peeled and thinly sliced or ribboned
- 1/2 cup frozen peas — thawed, no cooking needed
For the Sauce
- 3 tablespoons extra virgin olive oil — divided
- 4 cloves garlic — minced
- 1/2 teaspoon red pepper flakes — adds gentle heat without overpowering
- 1/2 cup dry white wine — or substitute with extra pasta water
- 1/2 cup reserved pasta water — this is the secret to silky sauce
- 1/2 cup heavy cream — optional, for a richer finish
- 3/4 cup freshly grated Parmigiano-Reggiano — freshly grated real Parm melts into the sauce far better than pre-shredded
- 1 tablespoon unsalted butter — stirred in at the end for gloss
- Juice of 1/2 lemon — brightens everything
- Salt and black pepper to taste
For Garnish
- Fresh basil leaves — torn, not chopped, for the best aroma
- Extra parmesan for serving
- Zest of 1 lemon — optional but excellent
Optional Add-Ins
- 1/2 cup sun-dried tomatoes (oil-packed, drained)
- 1/4 cup toasted pine nuts
- 8 oz sautéed shrimp or grilled chicken
- 1/2 cup artichoke hearts (canned, drained)
- 1 tablespoon white miso paste (stirs into sauce for depth)
How to Make Pasta Primavera Step by Step
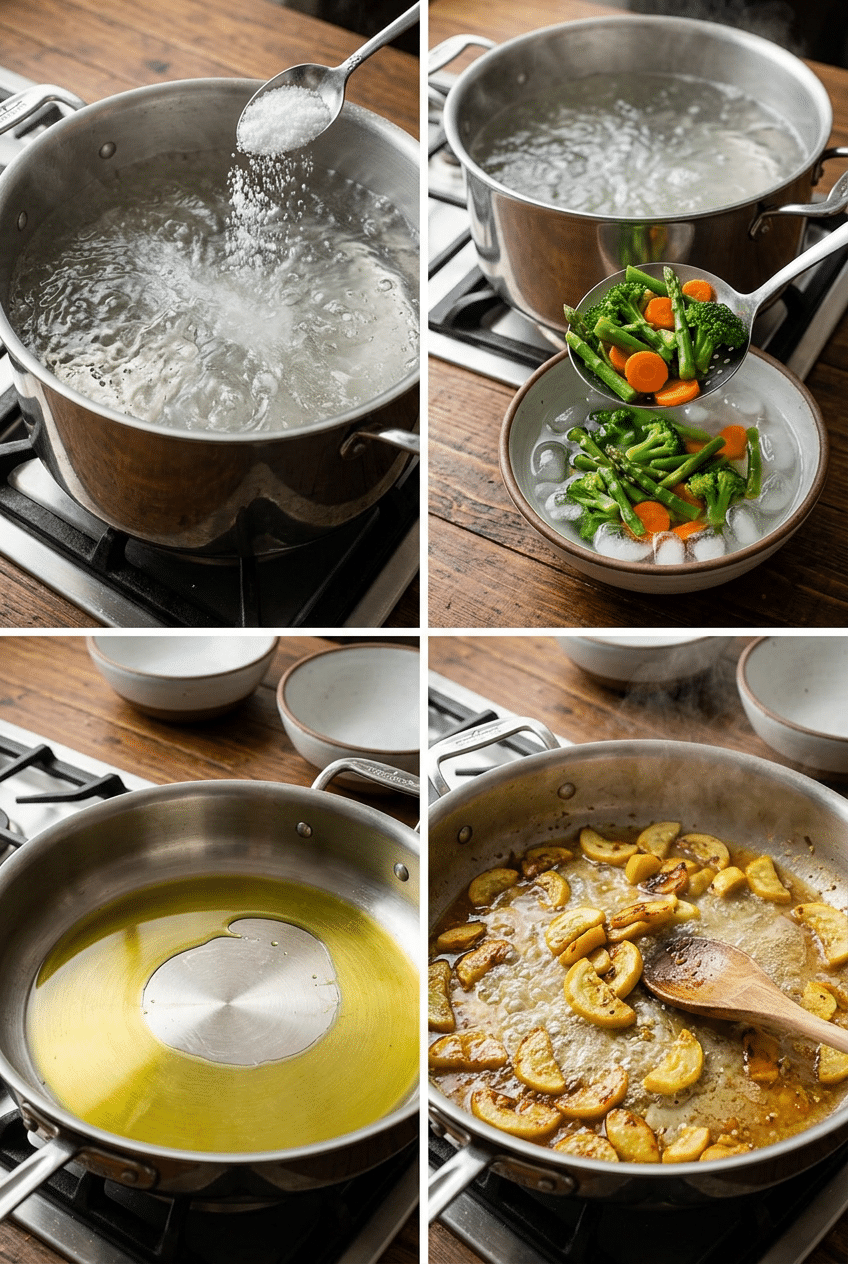
Step 1: Salt Your Pasta Water Properly
Bring a large pot of water to a rolling boil and add a full tablespoon of kosher salt — the water should taste like the sea. This is the only chance you have to season the pasta itself, not just the sauce around it. Drop in your penne or rigatoni and cook it two minutes less than the package says.
Pulling the pasta early is intentional — it finishes cooking in the sauce, where it absorbs flavor instead of just sitting in it. Before you drain, scoop out at least a full cup of pasta water and set it aside. That starchy, salty water is the backbone of your sauce.
Step 2: Blanch the Harder Vegetables
While the pasta cooks, blanch the broccoli, asparagus, and carrot in the same pasta water for just 90 seconds, then scoop them out with a slotted spoon directly into a bowl of ice water. This stops the cooking immediately and locks in that vivid green color. Skip this step and you’ll have drab, mushy vegetables by the time everything comes together.
The ice bath isn’t just about color — it also keeps the vegetables at the right texture. You want them tender-crisp, with just a little bite, because they’ll soften slightly more when they hit the hot pan. The zucchini, yellow squash, and cherry tomatoes don’t need blanching — they’re delicate enough to cook quickly right in the sauté pan.
Step 3: Build the Garlic Base
Heat two tablespoons of olive oil in a large, wide skillet — a 12-inch pan gives you the room you need — over medium heat. Add the minced garlic and red pepper flakes and let them sizzle for about 60 seconds, stirring constantly. You want the garlic fragrant and just barely golden, not brown, because bitter garlic ruins the whole dish.
Add the zucchini and yellow squash to the pan next, spreading them in a single layer. Let them sit untouched for about 2 minutes so they get a little color on one side before you toss them. That light char on the edges gives the vegetables a roasted depth that steaming or boiling just can’t match.
👉 Colavita Extra Virgin Olive Oil — Colavita is the finishing olive oil we actually use — bright, grassy flavor that makes a difference when you drizzle it at the end.
Step 4: Deglaze and Build the Sauce
Once the squash has some color, pour in the white wine and let it bubble and reduce for about 2 minutes, scraping up any golden bits from the bottom of the pan. Those browned bits are pure flavor. If you’re skipping the wine, just use an extra splash of pasta water here — it still works beautifully.
Add the cherry tomatoes now and let them blister and soften for another 2 minutes. They’ll release their juices into the pan and deepen the sauce naturally. Pour in about a third of your reserved pasta water and, if you’re using it, the heavy cream. Let the whole thing simmer gently for a minute so the liquids come together.
Step 5: Toss Everything Together
Add the blanched broccoli, asparagus, and carrots back to the pan along with the thawed peas. Toss gently to warm everything through — about one minute. Then add the drained pasta directly into the skillet and toss it hard so every piece gets coated in the sauce. If the sauce looks tight or dry, add pasta water a splash at a time until it’s loose and glossy.
Take the pan off the heat and stir in the butter, lemon juice, and about half the parmesan. The residual heat melts everything together without breaking the sauce. Add the rest of the parmesan gradually, tossing as you go, and taste for salt and pepper. You want the sauce to cling to the pasta — silky, not soupy, not dry.
👉 Microplane Premium Classic Zester — A Microplane turns hard parmesan into a cloud of fine flakes that melt into sauce instead of clumping.
Step 6: Finish and Serve
Divide the pasta primavera into warm bowls and top each one with torn fresh basil, a little extra parmesan, and a pinch of lemon zest if you have it. Serve immediately — this dish is at its best right out of the pan when the sauce is still fluid and the vegetables still have their color. A drizzle of your best olive oil over the top right before serving is absolutely worth it.
Pasta primavera doesn’t hold well once plated, so call everyone to the table before you plate it, not after. The pasta absorbs the sauce quickly as it cools, so if you’re serving a crowd, keep the pot on low and plate to order. Two minutes of patience here makes a real difference in what lands on the table.
👉 Large Wide Shallow Pasta Bowls (Set of 4) — Wide shallow bowls let you show off the vegetables — deep bowls hide everything at the bottom.
Nutrition Information
- Per serving: 520 cal
- 18g fat
- 72g carbs
- 18g protein
Pro Tips
Save More Pasta Water Than You Think: Most people save a quarter cup and run out mid-toss. Save a full cup minimum. Cold pasta water thickens the sauce, but the right amount of warm starchy water loosens it perfectly — add it one splash at a time until the sauce coats a spoon without dripping off.
Don’t Crowd the Vegetables: Dumping all your vegetables into the pan at once drops the temperature and they steam instead of sauté. Work in two batches if needed. You want each piece to make real contact with the hot pan — that’s where the flavor comes from.
Finish Off the Heat: Always remove the pan from the burner before adding parmesan. On the heat, the cheese seizes and turns grainy. Off the heat, with the right amount of pasta water, it melts into a smooth, glossy coating that clings to every strand.
Use Seasonal Vegetables: Pasta primavera literally means ‘spring pasta.’ In spring, use asparagus, peas, and snap peas. In summer, load it with zucchini, corn, and tomatoes. In fall, try butternut squash and kale. The technique stays the same — the vegetables change with what’s fresh.
Season in Layers: Salt the pasta water, season the vegetables as they cook, and taste the sauce before adding pasta. Waiting until the end to season means you’re masking rather than building flavor. Every layer should taste good on its own before you combine them.
Delicious Variations
Creamy Pasta Primavera
Double the heavy cream to one full cup and skip the white wine. Let the cream reduce in the pan for 3-4 minutes until it coats a spoon before adding pasta. Finish with a squeeze of lemon to cut through the richness. This version is more indulgent and works beautifully with fettuccine instead of penne.
Lemon Herb Pasta Primavera (Dairy-Free)
Skip the parmesan and butter entirely. Use a full quarter cup of really good olive oil as the base of the sauce, plus the zest and juice of a whole lemon, a handful of fresh herbs (basil, parsley, mint), and a pinch of nutritional yeast for a subtle savory note. Light, bright, and completely plant-based.
Shrimp Pasta Primavera
Add one pound of peeled, deveined shrimp to the pan after the garlic, before the squash. Cook them two minutes per side until just pink, then remove them and set aside. Build the rest of the dish as written, then add the shrimp back in the last toss with the pasta so they don’t overcook. This turns a side dish into a full weeknight protein.
Baked Pasta Primavera
Make the full recipe but reduce the pasta water so the sauce is thicker than usual. Pour everything into a greased baking dish, top with a mix of mozzarella and breadcrumbs, and bake at 400°F for 15-20 minutes until bubbling and golden. It’s essentially a lighter, vegetable-forward pasta bake — great for feeding a crowd.
Storage Instructions
Refrigerator
Store leftover pasta primavera in an airtight container in the refrigerator for up to 3 days. The pasta will absorb the sauce as it sits, so it’ll look drier when you pull it out — that’s normal. Reheat in a skillet over medium-low heat with a splash of water or broth to loosen everything back up. Avoid the microwave if you can; it makes the vegetables soft and sad.
Freezer
Pasta primavera doesn’t freeze particularly well — the vegetables lose their texture and the sauce tends to separate when thawed. If you need to freeze it, undercook the pasta and vegetables slightly before freezing, store flat in a zip-lock bag, and reheat from frozen in a skillet with a good splash of liquid. It’s edible but not the dish at its best — we recommend making a fresh batch instead.
Make-Ahead
You can do significant prep work ahead of time to make this a truly fast weeknight dinner. Blanch the vegetables and store them in the fridge for up to 24 hours. Mince the garlic, portion out the parmesan, and measure your liquids. When it’s time to cook, you’re 15 minutes from dinner with almost no active prep left. The sauce itself doesn’t store well, so don’t make that ahead.
For food safety guidelines, visit FDA Safe Food Handling Guidelines.
Frequently Asked Questions
What vegetables go in pasta primavera?
Traditionally, pasta primavera uses whatever spring vegetables are freshest — asparagus, peas, zucchini, broccoli, and cherry tomatoes are the most common. The dish was designed to be flexible, not rigid. The real rule is: use vegetables that cook quickly and hold their shape. Root vegetables like sweet potato or beets don’t work well here because they need too long to soften and they’ll overwhelm the light sauce.
Can I make pasta primavera without cream?
Absolutely. The cream is optional in this recipe. The sauce is built on pasta water, olive oil, garlic, and parmesan — which on their own create a beautifully silky, glossy coating. Without cream, the dish is lighter and lets the vegetable flavors come forward more clearly. If you want a little richness without cream, an extra tablespoon of butter and a touch more pasta water does the job.
What pasta shape works best for pasta primavera?
Penne rigate is the classic choice because the ridges and hollow center trap sauce and small vegetable pieces inside every bite. Rigatoni, farfalle, and fusilli all work for the same reason. Long noodles like fettuccine or spaghetti work too — especially in the creamy version — but they’re harder to eat when combined with chunky vegetables. Avoid tiny pasta shapes like orzo or ditalini, which get lost among the vegetables.
Where did pasta primavera originally come from?
Despite sounding classically Italian, pasta primavera was actually created in North America in the 1970s. The dish is widely credited to Sirio Maccioni, owner of Le Cirque restaurant in New York City, though the exact origin is debated. It became a phenomenon after being featured in the New York Times in 1977. Today it’s beloved on both sides of the Atlantic as a fresh, vegetable-forward pasta dish that feels light but satisfying.
Why does my pasta primavera turn out watery?
Watery pasta primavera almost always comes from vegetables releasing too much moisture in the pan. This happens when the pan is too crowded or not hot enough — the vegetables steam instead of sauté. Cook in batches, use a wide pan, and keep the heat at medium-high. Also, cherry tomatoes release a lot of liquid — let them reduce for a full two to three minutes before adding pasta water. The liquid they release becomes flavor when you let it cook down.
Can I use dried herbs instead of fresh basil?
You can, but fresh basil really is worth it here. Dried basil has a dusty, muted flavor that doesn’t have the same brightness as fresh leaves torn right before serving. If fresh basil isn’t available, fresh flat-leaf parsley makes a good substitute — it’s mild and green and adds a similar freshness. Dried Italian seasoning works in a pinch but add it during the sauté step so it has time to bloom in the oil, not at the end.
More Recipes You Will Love
👉 Perfect Pasta Salad Cups Recipe (Easy)
👉 Perfect BBQ Baby Back Ribs Recipe (Fall-Off-Bone)
👉 Perfect Pizza Roll Ups Recipe (Easy & Cheesy)
Pasta primavera is proof that simple food, done with a little care, beats complicated food every time. Bright vegetables, a glossy garlic-parmesan sauce, and pasta cooked just right — this is the kind of dinner you’ll put on weekly rotation without thinking twice. Make it tonight, then come back and tell me which vegetables you used. I’d love to know what’s in season where you are.