
- Prep: 15 Minutes
- Cook: 25 Minutes
- Total: 40 Minutes
- Servings: 6 servings
A Quick Note Before You Start
The biggest mashed potato mistake people make is over-mixing. Once you add your butter and cream, fold gently — working the potatoes too hard activates the starch and turns them into wallpaper paste. Gentle hands = fluffy potatoes.
Mashed potatoes are the side dish that can make or break a dinner table. The difference between a gluey, bland bowl and a silky, buttery cloud comes down to three things: the right potato, warm fat, and a light hand.
This recipe pulls the best techniques from classic French cooking and American comfort food — warm butter, hot cream, and a potato ricer that does all the heavy lifting. You’ll never go back to boxed.
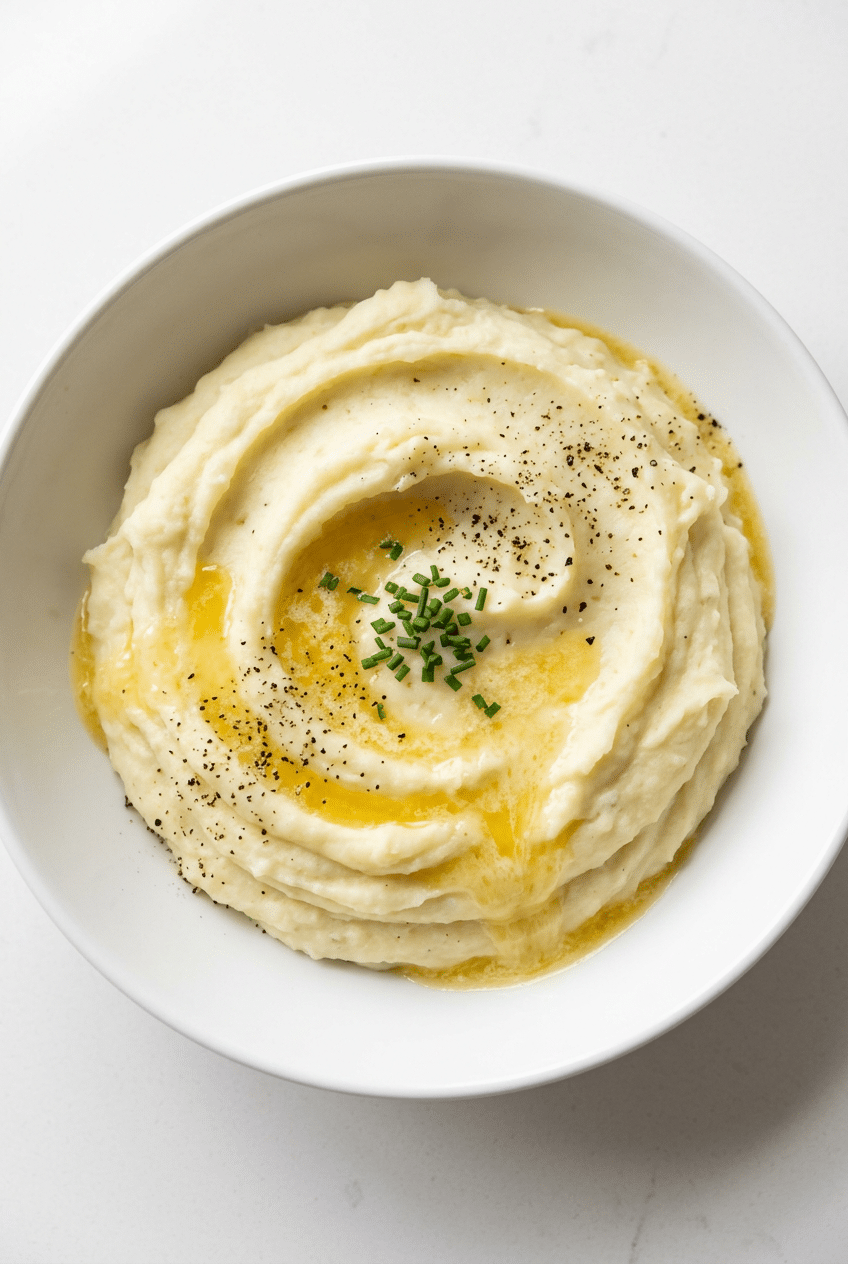
Ingredients for Perfect Mashed Potatoes
For the Potatoes
- 3 lbs Yukon Gold potatoes — their naturally buttery flavor and waxy-yet-creamy texture make them the gold standard for mashing
- 1 tbsp kosher salt — for the boiling water; under-salting the water is why most mashed potatoes taste flat
- Cold water — enough to cover the potatoes by 2 inches
For the Mash
- 8 tbsp (1 stick) unsalted butter, cut into cubes — European-style butter like Kerrygold Unsalted Butter has a higher fat content that makes these noticeably richer
- 3/4 cup heavy cream — warmed before adding; cold cream seizes the starch and makes the mash dense
- 1/2 cup sour cream — adds a subtle tang and keeps the texture velvety without making them heavy
- 1 tsp fine sea salt — taste and adjust at the end
- 1/2 tsp white pepper — blends in without the black flecks; use freshly cracked black pepper if you prefer the look
For Garnish
- 2 tbsp butter — melted, for that glossy top pool
- Fresh chives, finely chopped — adds color and a mild onion note
- Flaky sea salt — Maldon Sea Salt Flakes are perfect here; a pinch on top adds little bursts of salinity in every bite
Optional Add-Ins
- 4 cloves roasted garlic, mashed into a paste
- 1/2 cup shredded sharp cheddar cheese
- 4 oz cream cheese, softened
- 2 tbsp fresh chives or green onions
- 1/4 tsp smoked paprika stirred in
How to Make Mashed Potatoes Step by Step
Step 1: Prep and Cut the Potatoes
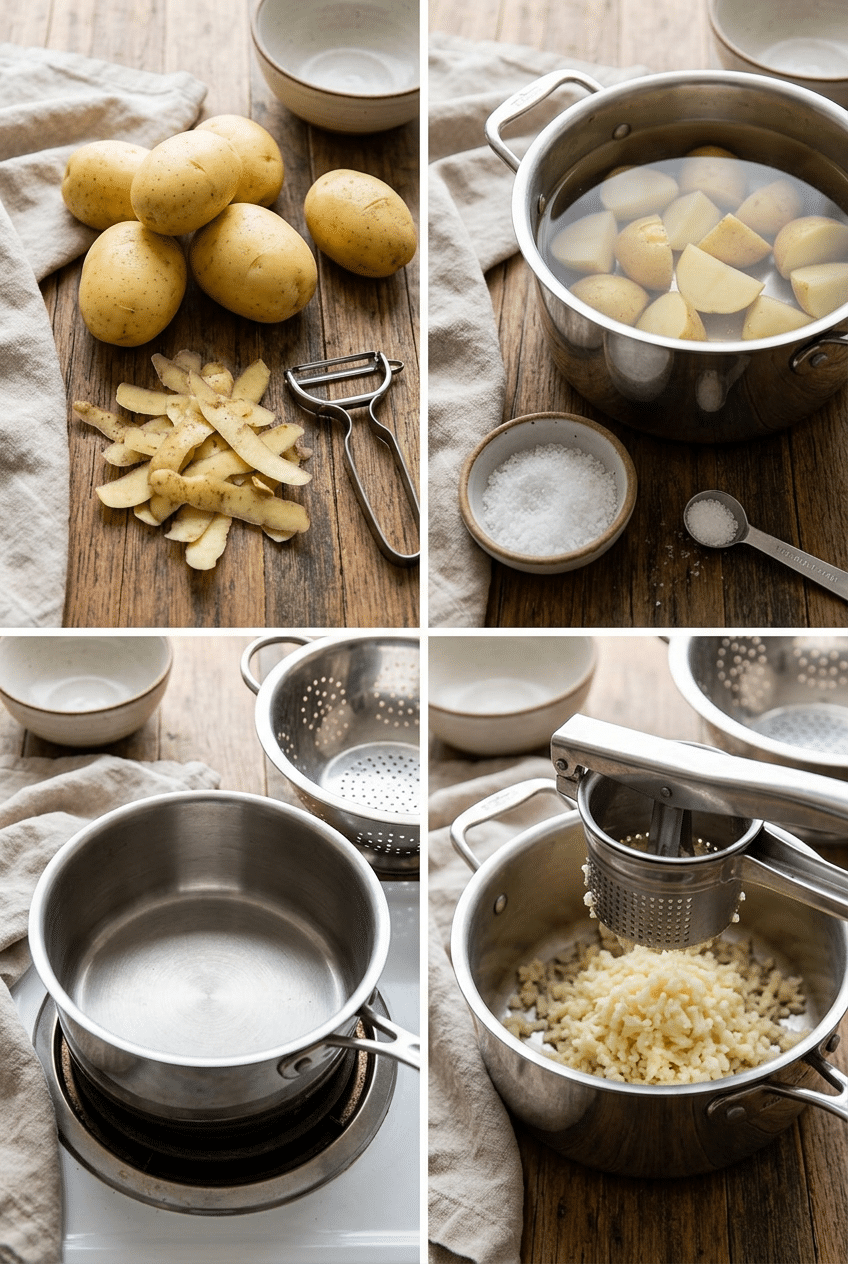
Scrub your Yukon Gold potatoes clean, then peel them — though if you prefer a more rustic mash, leaving the skins on is perfectly fine. Cut each potato into roughly 1.5-inch chunks so they cook evenly. Uneven pieces mean some will be mushy while others are still firm when you go to drain them, so take a minute to get them close in size.
Place the cut potatoes into a large pot and cover them with cold water by about 2 inches. Starting in cold water instead of boiling water matters — it lets the potatoes cook evenly from the outside in, rather than shocking the exterior while the center stays raw.
Step 2: Salt the Water and Boil
Add 1 tablespoon of kosher salt to the cold water before you turn on the heat. This is one of the most overlooked steps in the entire recipe. The potatoes absorb salt as they cook, and seasoning only at the end never catches up — the flavor sits on the surface instead of running through every bite.
Bring the pot to a boil over high heat, then reduce to a steady medium boil. Cook for 18 to 22 minutes, or until a fork slides into the largest piece with zero resistance. If you have to push, they need more time. Drain them thoroughly — any water left in the pot makes the mash watery.
Step 3: Dry Out the Potatoes
After draining, return the empty pot to the stove over low heat for about 60 seconds. Add the drained potatoes back in and shake the pot gently — you’ll see steam rising from them as the residual surface moisture evaporates. This one extra minute makes a real difference in final texture.
This step is called ‘drying out’ and it’s a trick from professional kitchens. Removing that extra moisture means your butter and cream go into the potato — not into diluting standing water. Drier potato equals creamier mash.
Step 4: Rice or Mash the Potatoes
Now press the hot potatoes through a potato ricer directly back into the warm pot. A ricer breaks down the potato cells gently and consistently, giving you that ultra-smooth, fluffy texture without overworking the starch. If you don’t have a ricer, use a hand masher and stop the moment no large lumps remain — do not use a food processor or stand mixer.
The ricer is genuinely the single best tool upgrade you can make for this recipe. It takes about 90 seconds to press everything through and the result is a completely different texture than hand-mashing — lighter, more uniform, and far less likely to turn gluey. An OXO Good Grips Potato Ricer runs about $20 and lasts forever.
👉 OXO Good Grips Potato Ricer — The single tool that guarantees lump-free, fluffy mashed potatoes every single time — worth every penny.
Step 5: Fold In Butter and Cream
Warm your heavy cream in a small saucepan or microwave until just steaming — not boiling. Add your cold butter cubes directly to the riced potatoes first and fold them in gently with a rubber spatula. The residual heat from the hot potatoes melts the butter slowly, which keeps the fat emulsified into the starch rather than separating into greasy pools.
Pour in the warm cream gradually, folding as you go. You may not need every drop — watch the texture. Then fold in the sour cream. Season with salt and white pepper, taste, and adjust. The goal is a texture that holds a soft peak on a spoon but slowly settles — not stiff, not soupy.
👉 Kerrygold Pure Irish Unsalted Butter — Higher butterfat than standard American butter — you’ll taste the difference in the first bite.
Step 6: Plate and Garnish
Spoon the finished mashed potatoes into a warm serving bowl — running hot water inside the bowl for 30 seconds then drying it keeps the mash hot longer. Use the back of a spoon to create a gentle swirl on top, then press a small well in the center for the melted butter to pool.
Drizzle 2 tablespoons of melted butter into that well and let it run naturally down the sides. Scatter fresh chives and a pinch of Maldon flaky salt over the top. Serve immediately — mashed potatoes wait for no one.
👉 Maldon Sea Salt Flakes — Those delicate flaky crystals on top add a finishing crunch that table salt simply can’t replicate.
Nutrition Information
- Per serving: 320 cal
- 19g fat
- 34g carbs
- 5g protein
Pro Tips
Choose Yukon Golds over Russets: Russet potatoes have more starch and dry out easily, making them better for baking. Yukon Golds have a naturally buttery flavor and a medium starch content that produces a mash that’s creamy without being dense. If you can only find russets, use a little extra cream and fold very gently.
Warm everything that goes in: Cold butter, cold cream, and cold sour cream all shock the starch in hot potatoes and cause them to seize up. Thirty seconds in the microwave for your cream and letting your butter sit at room temperature for 20 minutes before cooking makes the folding process smoother and the final texture noticeably silkier.
Never use a hand mixer or food processor: Electric mixers work the potato starch too aggressively and break the cell walls in a way that releases excess starch — the result is thick, sticky, gluey mash that no amount of cream will fix. A ricer or a manual masher are your only two safe options.
Salt in layers, not just at the end: Season the boiling water generously, taste your potatoes after ricing, then adjust again after adding cream and butter. Potatoes need more salt than you think — they’re a blank canvas and will absorb seasoning eagerly at each stage.
Keep them warm with a foil tent: If dinner isn’t ready the moment the potatoes are, transfer them to a bowl, press a piece of plastic wrap directly against the surface (not over the bowl — against the potatoes), then cover loosely with foil. This traps the steam and keeps them warm and creamy for up to 30 minutes without drying out.
Delicious Variations
Garlic Mashed Potatoes
Roast a whole head of garlic — slice the top off, drizzle with olive oil, wrap in foil, bake at 400°F for 40 minutes. Squeeze the soft, caramelized cloves directly into your riced potatoes before adding butter. Roasted garlic is sweeter and mellower than raw, so it blends into the background as a deep, savory note rather than an aggressive punch. This is the variation that gets the most requests at the dinner table.
Loaded Mashed Potatoes
Think everything you’d put on a loaded baked potato, but stirred right in. Fold in 1/2 cup shredded sharp cheddar, 4 strips of crispy crumbled bacon, 2 tablespoons of sour cream, and a handful of sliced green onions. Serve with extra cheddar and bacon on top. This version is a meal on its own and holds particularly well in a slow cooker on warm for parties and potlucks.
Cream Cheese Mashed Potatoes
Swap the sour cream for 4 ounces of softened cream cheese and reduce the heavy cream to 1/2 cup. The cream cheese melts into the hot potatoes and adds a rich, tangy creaminess that’s thicker and more substantial than the standard version. This variation holds its shape better as a side dish and reheats beautifully the next day without getting watery.
Herb and Brown Butter Mashed Potatoes
Instead of plain melted butter, brown your butter first — cook it in a light-colored pan over medium heat until the milk solids turn golden and it smells nutty, about 4 minutes. Fold the brown butter into the riced potatoes along with 2 tablespoons of fresh thyme leaves. The nutty, almost caramel-like flavor of brown butter elevates this from simple side dish to something genuinely elegant.
Dairy-Free Mashed Potatoes
Replace the butter with high-quality vegan butter (Miyoko’s Creamery is excellent here) and sub the heavy cream with full-fat canned coconut milk — the flavor is milder than you’d expect and the fat content keeps the texture creamy. Skip the sour cream or use a coconut-based alternative. Season generously with salt and a little garlic powder to make up for the lost richness from dairy.
Storage Instructions
Refrigerator
Transfer leftover mashed potatoes to an airtight container and press a piece of plastic wrap directly against the surface before sealing the lid. This prevents a dry skin from forming on top. They’ll keep in the refrigerator for up to 4 days. To reheat, add a splash of warm cream or milk and stir gently over low heat on the stovetop, or microwave in 60-second intervals, stirring between each, until hot all the way through.
Freezer
Mashed potatoes freeze surprisingly well when made with butter and cream — the fat helps stabilize the texture. Portion them into freezer-safe bags or containers, flatten them out for faster thawing, and freeze for up to 2 months. Thaw overnight in the refrigerator, then reheat slowly on the stovetop with a splash of cream and a pat of butter, stirring gently to bring them back to life. Avoid microwaving straight from frozen — it creates hot spots and uneven texture.
Make-Ahead
You can make mashed potatoes up to 2 days ahead and store them in the fridge. The key is reheating them right: place them in a heavy-bottomed pot over the lowest heat setting, add 2 to 3 tablespoons of warm cream, and stir slowly until heated through. They may need a touch more butter and salt after reheating since the flavors mellow in the fridge. For holiday meals, this make-ahead method is a lifesaver — one less thing to rush on the big day.
For food safety guidelines, visit FDA Safe Food Handling Guidelines.
Frequently Asked Questions
Why are my mashed potatoes gluey?
Gluey mashed potatoes are almost always caused by over-mixing. When you work the potatoes too aggressively — especially in a food processor or stand mixer — you break the starch granules and release a sticky, paste-like compound called amylose. The fix is to use a ricer or gentle hand masher, fold in your butter and cream with a spatula rather than stirring vigorously, and stop the moment everything is combined. There’s no way to un-gluey mashed potatoes once it happens, so a gentle hand is everything.
What are the best potatoes for mashed potatoes?
Yukon Gold potatoes are the best all-around choice for mashed potatoes. They have a naturally buttery flavor, a creamy texture, and a medium starch content that produces a smooth mash without getting gluey. Russet potatoes are higher in starch and can work if you’re very gentle, but they dry out more easily and require more cream to compensate. Red potatoes are too waxy and don’t break down as well, leaving a chunkier, denser result.
Should I peel potatoes before boiling for mashed potatoes?
You don’t have to peel them — it’s a matter of preference. Peeled potatoes give you a smoother, more refined mash that’s easier to push through a ricer cleanly. Leaving the skins on adds a slightly rustic texture, some extra fiber, and a subtle earthy flavor. If you go skin-on, make sure to scrub the potatoes thoroughly before cutting and use a hand masher rather than a ricer, since the skins won’t pass through the ricer holes easily.
Can I make mashed potatoes ahead of time?
Yes — and it’s actually one of the best make-ahead side dishes you can prepare. Make them up to 2 days ahead, transfer to an airtight container with plastic wrap pressed against the surface, and refrigerate. Reheat gently on the stovetop over low heat with a splash of warm cream and a pat of fresh butter, stirring slowly until hot. They come back together beautifully and taste nearly as good as fresh. This is especially helpful for Thanksgiving and holiday meals when oven and stovetop space is at a premium.
How do I keep mashed potatoes warm for a party?
The easiest way is a slow cooker on the ‘warm’ setting. Transfer the finished mashed potatoes to the slow cooker, drizzle a little extra butter on top, and cover. They’ll hold for up to 2 hours without drying out. Stir once or twice and add a splash of warm cream if they start to thicken. Another option is the double boiler method — set the pot of mashed potatoes over a larger pot of barely simmering water and cover with foil. Either way, don’t let them sit too long or the texture begins to break down.
Why do you start potatoes in cold water instead of boiling water?
Starting potatoes in cold water and bringing them up to temperature together ensures even cooking all the way through. If you drop raw potato chunks into already-boiling water, the outside cooks and begins to soften before the center has had a chance to heat up at all. The result is potato chunks where the exterior is falling apart and overcooked while the inside is still firm and underdone — which means uneven, lumpy mash no matter how hard you try.
More Recipes You Will Love
👉 Perfect Caramel Apples Recipe
👉 Best Pumpkin Shaped Cheese Ball Recipe
👉 Spooky Skeleton Charcuterie Board Recipe
These mashed potatoes are the kind of side dish that steals the show — people will ask what you did differently and you can tell them: warm cream, gentle hands, and a ricer. Make them once this way and you’ll never go back. Drop a comment below and let me know which variation you tried first. And if someone at your table demands the recipe, share this post — they deserve to know.