
- Prep: 30 Minutes
- Cook: 3 Hours 30 Minutes
- Total: 33 Minutes
- Servings: 12 servings
A Quick Note Before You Start
Dry-brine your turkey 24–72 hours ahead — this is the single biggest thing you can do for juicy, flavorful meat. Don’t skip it. The salt draws moisture in and seasons the bird all the way to the bone.
This turkey recipe delivers the juiciest, most golden roast turkey you’ve ever pulled from the oven — with crispy skin, herb butter under the breast, and a dry brine that transforms the whole bird from the inside out.
We combine three pro techniques — dry brining, herb butter, and high-heat finishing — to get maximum flavor and texture without babysitting the oven all day. This is the method that finally makes turkey the best thing on the table.
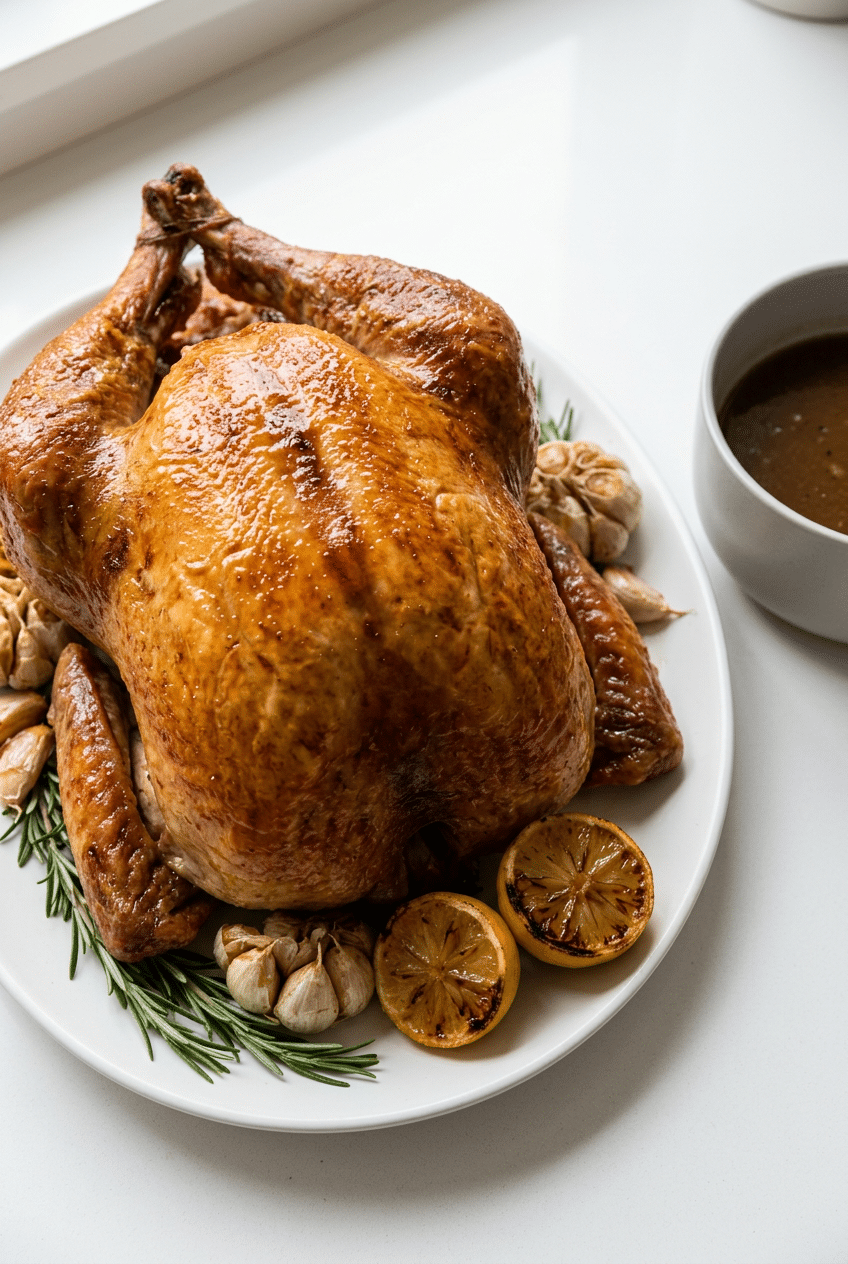
Ingredients for the Best Ever Turkey Recipe
For the Dry Brine
- 1 whole turkey (12–15 lbs) — thawed completely, giblets removed
- 3 tablespoons kosher salt — Diamond Crystal is ideal; coarser salt distributes more evenly than table salt
- 1 tablespoon black pepper — freshly cracked
- 1 teaspoon garlic powder
- 1 teaspoon smoked paprika — adds gorgeous color to the skin
For the Herb Butter
- 1 stick (8 tbsp) unsalted butter — softened to room temperature
- 4 cloves garlic — minced fine
- 1 tablespoon fresh rosemary — finely chopped
- 1 tablespoon fresh thyme — leaves only
- 1 tablespoon fresh sage — finely chopped
- Zest of 1 lemon
- 1/2 teaspoon kosher salt
For the Roasting Pan
- 1 large onion — quartered
- 1 head of garlic — halved crosswise
- 2 lemons — halved
- 4 sprigs fresh rosemary
- 4 sprigs fresh thyme
- 2 cups low-sodium chicken or turkey broth — pour into the bottom of the pan to prevent drippings from burning and to build your gravy base
- 2 tablespoons olive oil — for brushing the skin before roasting
Optional Add-Ins
- 1 tablespoon white miso paste — mixed into the butter for deep umami savoriness
- 1 teaspoon crushed red pepper flakes — adds subtle heat to the dry brine
- 1/2 cup dry white wine — added to the pan alongside the broth
- Apple and celery inside the cavity — adds moisture and light sweetness
How to Make the Best Ever Turkey Recipe Step by Step
Step 1: Dry Brine the Turkey
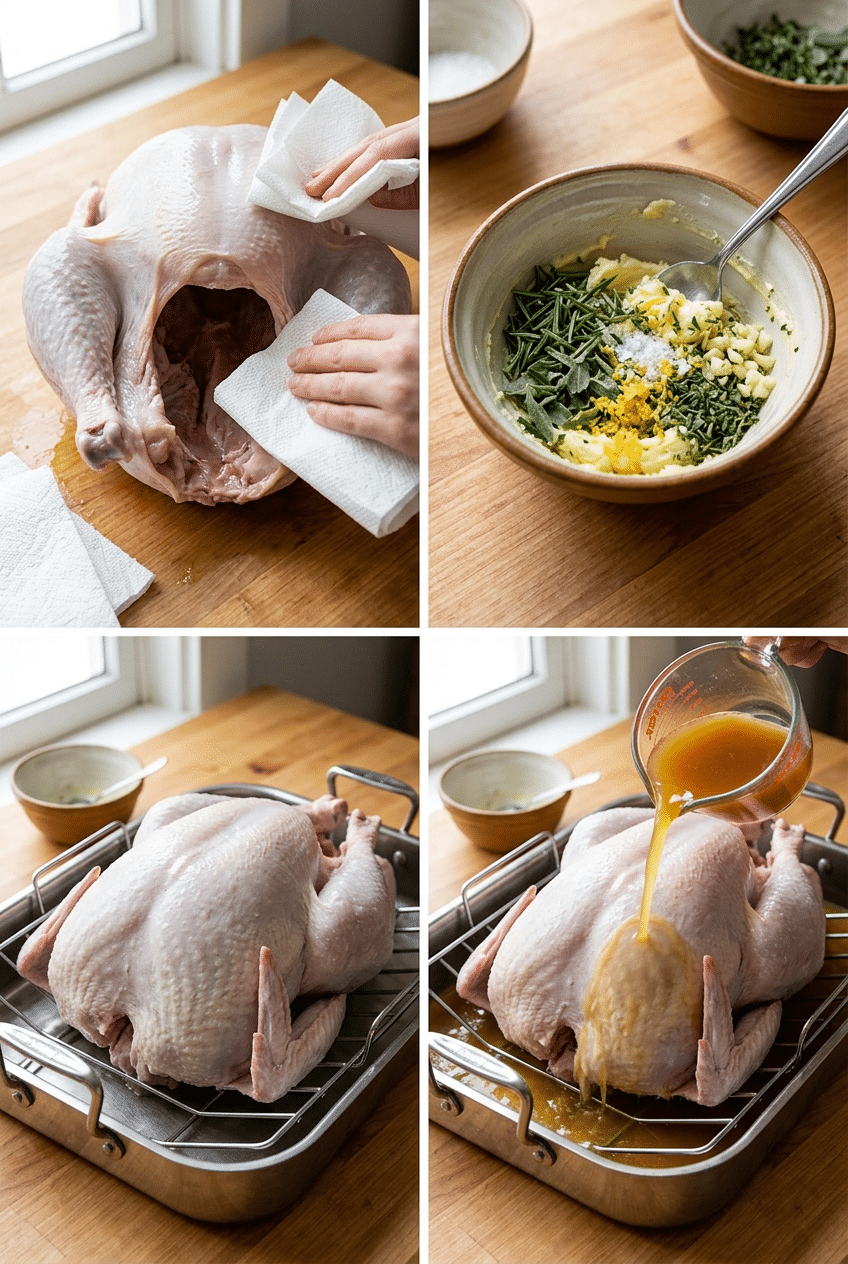
Pat the turkey completely dry with paper towels — every inch of it, including inside the cavity. Moisture is the enemy of crispy skin, so don’t rush this step. Mix together the kosher salt, black pepper, garlic powder, and smoked paprika in a small bowl.
Rub the dry brine all over the turkey: under the skin of the breast (use your fingers to gently loosen the skin), over the back, down the legs, and inside the cavity. Place the bird on a wire rack set over a baking sheet, uncovered, in the refrigerator for a minimum of 24 hours — 48 to 72 hours is even better. The salt first draws out surface moisture, then pulls it back in, carrying the seasoning deep into the meat. This is the technique that separates a good turkey from a great one.
Step 2: Make the Herb Butter
Combine the softened butter, minced garlic, rosemary, thyme, sage, lemon zest, and salt in a bowl. Mash everything together with a fork until fully combined into a smooth, fragrant paste. You can do this up to three days ahead and store it covered in the fridge — just bring it back to room temperature before using.
The herb butter serves two purposes: the fat carries fat-soluble flavor compounds (from the herbs and garlic) directly into the breast meat, and the butter on the surface of the skin promotes even, deep browning through the Maillard reaction. This is why a butter-rubbed turkey looks so much more beautiful than a plain one.
👉 McCormick Rubbed Sage — McCormick rubbed sage is more intensely flavored than ground — a little goes a long way in the herb butter.
Step 3: Prep the Turkey for the Oven
Pull the turkey from the fridge about 60 to 90 minutes before you plan to roast it. Letting it come closer to room temperature helps it cook more evenly — a cold bird from the fridge takes much longer and the breast can dry out before the thighs finish. Preheat your oven to 425°F with the rack in the lower third.
Push two-thirds of the herb butter under the breast skin, spreading it out as evenly as you can with your fingers. Rub the remaining butter all over the outside of the bird. Stuff the cavity loosely with the quartered onion, halved garlic head, lemon halves, and herb sprigs — these aromatics perfume the meat from the inside and create an incredible smell while it roasts. Brush the whole turkey with olive oil, then place it breast-side up on a roasting rack set inside your roasting pan.
👉 Roasting Rack — Stainless Steel V-Rack — A V-rack lifts the turkey off the pan so hot air circulates underneath and the skin crisps on all sides.
Step 4: Start the Roast
Pour the chicken or turkey broth into the bottom of the roasting pan. Slide the turkey into the preheated 425°F oven and roast at this high temperature for exactly 30 minutes. This initial blast of heat does two things: it jumpstarts skin crisping by rapidly evaporating surface moisture, and it gives the outside a golden head start before you drop the temperature.
After 30 minutes, reduce the oven temperature to 325°F without opening the door. From this point, the turkey will need roughly 13–15 minutes per pound to reach the safe internal temperature. A 14-pound bird will take approximately 2.5 to 3 more hours at 325°F. Resist the urge to baste — every time you open the oven you lose heat and extend the cook time, and basting doesn’t actually crisp the skin.
👉 Turkey Baster with Cleaning Brush — Skip basting during the roast, but use this for spooning drippings over your carved platter right before serving.
Step 5: Monitor the Internal Temperature
Start checking the turkey’s temperature about 45 minutes before you expect it to be done. Insert an instant-read thermometer into the thickest part of the thigh, away from the bone — you’re looking for 165°F. The breast will usually read a few degrees higher; aim for the thigh to hit 165°F and the breast to land between 160°F and 165°F. If the skin is getting too dark before the turkey is done, tent it loosely with aluminum foil.
The thermometer is non-negotiable here. Pop-up timers that come with store-bought turkeys are notoriously unreliable — they’re calibrated to a temperature higher than necessary, which means overcooked, dry meat. A good instant-read thermometer is the single most important tool in your Thanksgiving arsenal.
👉 ThermoPro TP19H Digital Instant Read Meat Thermometer — This $16 thermometer reads in 2 seconds and is the only way to guarantee a juicy, safe turkey every time.
Step 6: Rest the Turkey Before Carving
Once the turkey hits temperature, transfer it to a large cutting board and tent it loosely with foil. Let it rest for at least 30 minutes — 45 minutes is even better for a large bird. During this time the internal temperature will continue to rise (carryover cooking) and the juices redistribute back into the meat fibers instead of flooding out the moment you carve.
While the turkey rests, this is the perfect moment to make gravy from the pan drippings. Skim the fat from the top, heat the drippings on the stovetop, whisk in a tablespoon of flour, and simmer until thickened. The drippings from a well-seasoned dry-brined turkey make the most deeply savory gravy you’ve ever tasted — don’t pour them out.
Step 7: Carve and Serve
Start by removing the legs and thighs first, then slice the breast meat against the grain in smooth, even cuts. Arrange everything on a warm platter and spoon some of the pan gravy over the top so it glistens beautifully. Garnish with fresh rosemary sprigs and the roasted lemon halves from the pan — they look stunning and guests can squeeze a little extra brightness over the meat.
Carving at the table looks impressive but is harder than it sounds — we recommend carving in the kitchen on a stable board, then presenting the sliced meat beautifully arranged on a large platter. It’s actually faster, cleaner, and easier to serve a crowd that way.
👉 Large Oval Serving Platter — White Ceramic — A wide oval platter is exactly what you need to present a whole carved turkey beautifully at the table.
Nutrition Information
- Per serving (approx. 6 oz turkey): 320 cal
- 14g fat
- 0g carbs
- 46g protein
Pro Tips
Dry brine longer if you can: 48–72 hours in the fridge is the sweet spot. The salt fully penetrates the meat by hour 48, and the skin dries out completely — meaning it crisps fast in the oven. A 24-hour brine is good, but a 72-hour brine is genuinely transformative.
Don’t stuff the turkey: Stuffing inside the cavity slows down the cook time significantly and can keep the center of the stuffing in the food-danger zone while the turkey overcooks trying to get there. Cook your stuffing separately in a dish for food safety and better texture.
Spatchcock for speed: If you’re pressed for time or want the crispiest skin possible, remove the backbone and flatten the turkey before roasting. A 14-lb spatchcocked turkey roasts at 450°F in about 80 minutes. The skin is shatteringly crispy and the breast and thigh finish at the same time.
Let the broth do the work: Adding 2 cups of broth to the roasting pan prevents the drippings from scorching, keeps the oven environment slightly humid during the first phase of cooking, and guarantees you have enough liquid for incredible pan gravy. Swap half for white wine if you want a more complex dripping base.
Room temperature matters more than people think: Taking the turkey out of the fridge 90 minutes before roasting reduces the temperature differential between the breast and the thigh — which is the #1 reason turkeys cook unevenly. Cold breast, warm thigh means one of them has to be wrong.
Delicious Variations
Citrus and Herb Turkey
Add the zest of one orange and one grapefruit to the dry brine, and stuff the cavity with whole citrus halves. Swap the thyme in the herb butter for fresh tarragon. The result is a brighter, more aromatic bird with subtle sweetness in every bite — especially good if you want something a little different from the classic Thanksgiving flavor profile.
Butter and Miso Turkey
Whisk one tablespoon of white miso paste into the herb butter before spreading it under the skin. Miso is packed with glutamates — the compounds responsible for deep, savory umami flavor. It makes the turkey taste more intensely like itself, and the skin develops an even deeper mahogany color. This is our personal favorite variation for the most complex-tasting bird.
Spatchcock Turkey (Fastest Method)
Use kitchen shears to remove the backbone, then press the bird flat. Dry brine the same way, but roast at 450°F on a sheet pan for 75–90 minutes. Every part of the skin faces the heat directly, so it’s uniformly golden and crispy. The cook time drops by more than half, and the breast and thighs finish cooking at the same time — a huge advantage over traditional roasting.
Smoked Turkey
Follow the dry brine exactly, then smoke the turkey at 250°F over apple or cherry wood chips for 30–40 minutes per pound, until the thigh reaches 165°F. The smoke ring and mahogany bark on a dry-brined bird are absolutely stunning. Finish with 15 minutes at 400°F if you want crispier skin. This method is worth planning a whole weekend around.
Storage Instructions
Refrigerator
Store leftover turkey meat in an airtight container in the refrigerator for up to 4 days. Keep the meat separate from the gravy so the turkey doesn’t get soggy. To reheat, place slices in a baking dish, add a splash of broth, cover tightly with foil, and warm at 325°F for about 15–20 minutes. The broth creates steam that keeps the meat moist and prevents it from drying out the way microwave reheating does.
Freezer
Leftover turkey freezes beautifully for up to 3 months. Slice the meat, let it cool completely, then freeze in zip-lock freezer bags with as much air pressed out as possible. Label with the date. Thaw overnight in the refrigerator and reheat gently in the oven with a little broth. Frozen turkey is perfect for soups, pot pies, turkey sandwiches, and fried rice throughout the winter.
Make-Ahead
The dry brine can be applied up to 72 hours in advance — actually preferred. The herb butter can be made up to 3 days ahead and stored in the fridge, or up to 2 months ahead in the freezer. On Thanksgiving morning, all you need to do is let the bird come to temperature and get it in the oven. You can also make the pan gravy up to 2 days ahead and reheat it while the turkey rests — it reheats perfectly.
For food safety guidelines, visit USDA Safe Minimum Internal Temperatures for Poultry.
Frequently Asked Questions
What is the best turkey recipe for a beginner?
This dry brine and herb butter method is perfect for beginners because the hard work happens the day before. You apply the brine, put the turkey in the fridge, and walk away. On cooking day, it’s mostly hands-off oven time. The only truly critical skill is using an instant-read thermometer — which takes two seconds to learn. If you follow the temperature guide (165°F in the thigh), you will have a perfect turkey regardless of experience level.
How long do I cook a turkey per pound?
At 325°F after the initial 30-minute blast at 425°F, plan for roughly 13–15 minutes per pound for an unstuffed turkey. A 12-pound turkey takes about 2.5 to 3 hours total. A 15-pound turkey takes about 3 to 3.5 hours. These are estimates — always verify doneness with a thermometer in the thickest part of the thigh, away from the bone. Every oven is slightly different, which is why the thermometer beats the timer every time.
Should I cover my turkey while roasting?
No — and this is important. Covering the turkey traps steam, which makes the skin soggy instead of crispy. Roast uncovered the entire time. The only exception is if the skin is browning too fast before the turkey reaches temperature — in that case, tent it loosely with foil just over the breast to slow down browning there. But a properly dried, dry-brined turkey skin almost never needs tenting during the main roast.
Do I need to baste my turkey?
No — and we’d actually recommend against it. Basting requires you to open the oven frequently, which drops the temperature and extends your cook time significantly. The fats in the herb butter and olive oil on the skin self-baste as they render. Studies have shown basting adds negligible moisture to the meat because skin doesn’t absorb liquid. Save yourself the hassle, keep the oven closed, and trust the process.
What temperature should a turkey be when done?
The USDA safe minimum internal temperature for turkey is 165°F, measured in the thickest part of the thigh, away from the bone. The breast will usually be slightly higher — between 160°F and 170°F is fine for the breast. If your thigh reads 165°F and the breast reads 160°F, pull the turkey. Carryover heat during the 30-to-45-minute rest will bring the breast to a safe temperature while keeping the meat juicy.
How far in advance can I dry brine a turkey?
You can dry brine your turkey anywhere from 24 to 72 hours in advance. Twenty-four hours gives good flavor penetration. Forty-eight hours is noticeably better. Seventy-two hours (three days) is the sweet spot for maximum seasoning depth and the driest, crispiest skin possible. Don’t go much beyond 72 hours — the salt can start to affect the texture of the meat negatively if left too long. Three days is the maximum.
More Recipes You Will Love
👉 Spooky Skeleton Charcuterie Board Recipe
👉 Best Pumpkin Shaped Cheese Ball Recipe
👉 Perfect Caramel Apples Recipe
This turkey recipe is everything a holiday bird should be — golden, juicy, deeply seasoned, and genuinely impressive without being complicated. The dry brine does most of the heavy lifting before you even turn on the oven. Try it this Thanksgiving, and I promise you’ll never go back to plain roasted turkey. Drop a comment below and let me know how it turned out — and share this with whoever is hosting this year!