
- Prep: 20 Minutes
- Cook: 18 Minutes
- Total: 38 Minutes
- Servings: 8 skulls
A Quick Note Before You Start
You need a silicone skull mold for this recipe — a regular muffin tin won’t give you the iconic look. Pull your dough out 30 minutes before you start so it’s easier to press and stretch without snapping back.
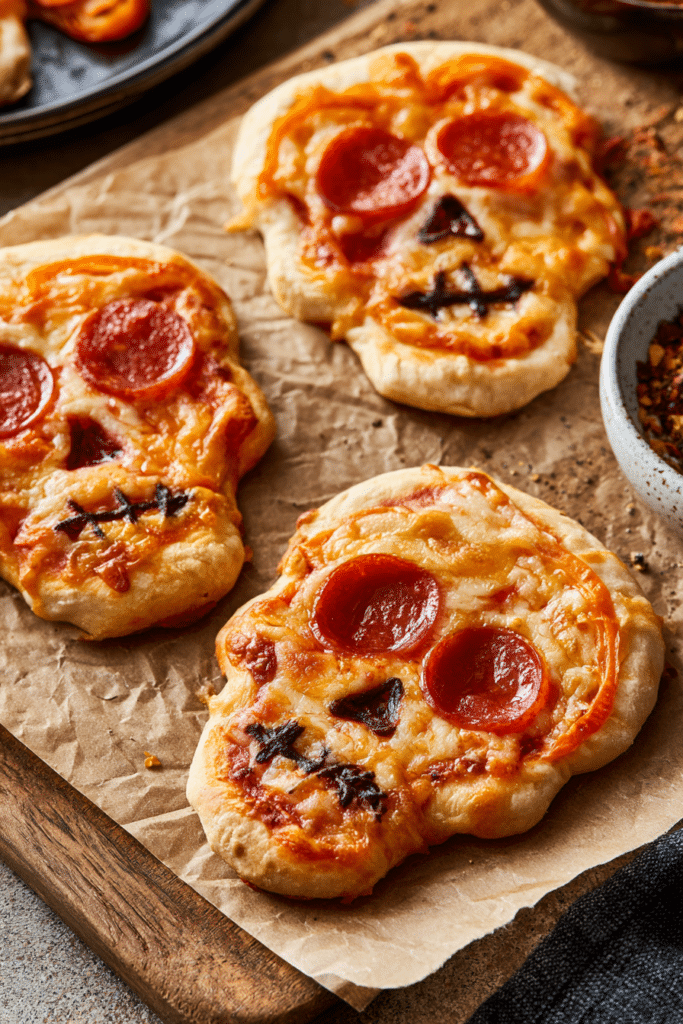
Pizza skulls are pillowy, stuffed pizza dough bites baked in a skull-shaped mold — crispy on the outside, gooey with sauce and melted mozzarella inside. They went viral for a reason.
This recipe works with store-bought dough or homemade, takes under 40 minutes start to finish, and looks so impressive that kids and adults both lose their minds when you set them on the table.
Ingredients for Pizza Skulls
For the Dough
- 1 lb store-bought pizza dough — grab the fresh ball from the refrigerated section, not the canned kind; it stretches better and bakes up chewier
- 2 tbsp olive oil — for greasing the mold and brushing the tops
- 1 tsp garlic powder — mixed into the oil for brushing; this gives the outside that pizzeria smell and flavor
- 1/2 tsp Italian seasoning — just a pinch on top makes the skulls look and taste bakery-fresh
For the Filling
- 1/2 cup Rao’s Homemade Marinara Sauce — thick, rich, and not watery, so it won’t make the dough soggy from the inside; it’s the single best jarred sauce for stuffed dough recipes
- 1 cup shredded low-moisture mozzarella — low-moisture is critical; fresh mozzarella releases too much water and turns the inside wet
- 24 mini pepperoni slices — about 3 per skull; mini pepperoni fit cleanly into the cavity without bunching up
- 1/4 tsp crushed red pepper flakes — optional, but a tiny pinch inside each skull adds a background heat that makes adults reach for seconds
For Finishing
- 2 tbsp unsalted butter, melted — brushed on right out of the oven for a shiny, rich finish
- 1 tbsp fresh grated Parmesan — a quick dusting while hot; it melts slightly and clings to the ridges of the skull
- Extra marinara sauce for dipping — warm it in a small pot while the skulls bake
Optional Add-Ins
- 1/4 cup cooked crumbled Italian sausage per batch
- 2 tbsp diced green bell pepper
- 8 small cubes of fresh mozzarella (in addition to shredded)
- 1 tsp everything bagel seasoning for topping
- 2 tbsp sliced black olives
- 1/4 tsp smoked paprika mixed into the garlic oil
How to Make Pizza Skulls Step by Step
Step 1: Prep Your Dough
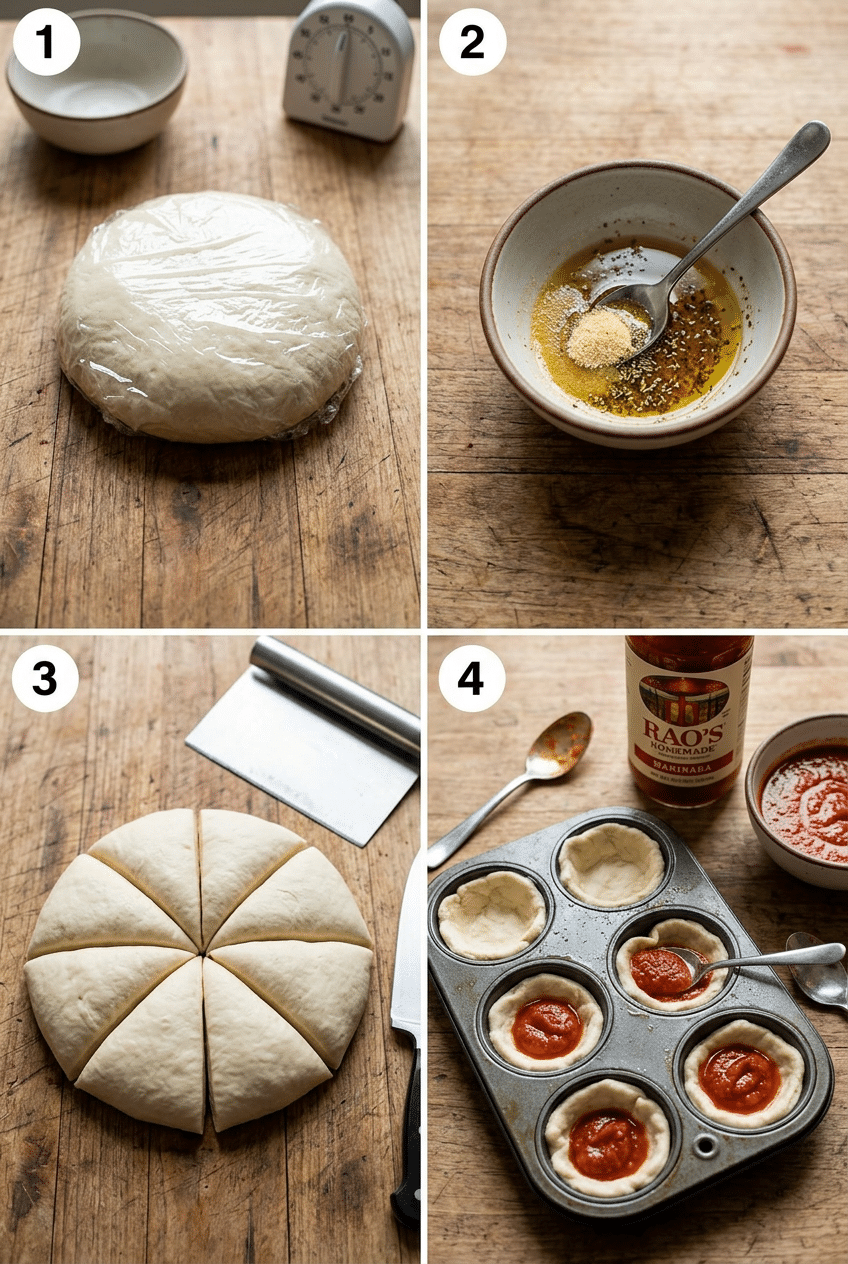
Take your pizza dough out of the fridge at least 30 minutes before you start. Cold dough is tight and elastic — it fights you when you try to stretch it, then springs back and tears. Room temperature dough is relaxed, pliable, and easy to press into the mold cavities without any resistance.
Once it’s rested, lightly flour a clean surface and use your hands to flatten the dough into a rough rectangle. Don’t use a rolling pin — rolling compresses the air bubbles out of the dough and makes the skulls denser. Just press and stretch with your palms until the dough is about half an inch thick.
Step 2: Grease the Skull Mold
Mix your olive oil with the garlic powder in a small bowl. Use a pastry brush or your fingers to coat every crevice of your silicone skull mold generously — including all the little ridges of the eye sockets, nose cavity, and cheekbones. Those details are what make the skulls look incredible, and they’re also where dough loves to stick.
Even with a silicone mold, don’t skip the greasing step. The garlic oil does double duty here — it prevents sticking AND it bakes directly into the outside of the skull, giving you that golden, aromatic crust that makes these smell as good as they look.
👉 Webake Silicone Skull Mold (6-cavity) — This is the mold — without it you just have stuffed pizza balls. The deep cavities give you sharp skull detail every time.
Step 3: Cut and Line the Mold
Cut your dough into 8 equal pieces using a bench scraper or sharp knife. Take one piece and flatten it into a rough circle about 4 inches wide using your fingers. Press it gently into one skull cavity, letting the edges overhang the sides — you’re going to fold those edges over the filling to seal the skull shut.
Don’t rush this step or try to make it perfect. The dough is forgiving and the mold does the shaping work for you. Just make sure the bottom and sides of each cavity are evenly lined with no thin spots — thin spots are where your filling leaks out during baking.
Step 4: Fill Each Skull
Add about one tablespoon of Rao’s marinara into each dough-lined cavity first — don’t overfill it, because you need room for the cheese and toppings and still be able to seal the dough. Then add a generous pinch of shredded mozzarella, 3 mini pepperoni, and a tiny pinch of red pepper flakes if you’re using them.
The layering order matters here. Sauce goes in first so it’s closest to the dough base, which means it steams and cooks the inside of the dough from within. Cheese goes on top of the sauce and acts as a seal between the sauce and the dough lid — this dramatically reduces leaking. Think of the cheese layer as glue.
👉 Rao’s Homemade Marinara Sauce (24 oz) — Thick and rich with no added sugar — it won’t make your filling watery, which is exactly what stuffed dough needs.
Step 5: Seal and Top the Skulls
Take the overhanging dough edges and fold them over the filling toward the center, pinching them firmly together. Then take a second small piece of dough — about a tablespoon’s worth — flatten it into a small circle, and press it over the top to create a clean, smooth lid. Pinch all the seams tightly shut and press down gently so the top sits flush with the mold edge.
Brush the exposed dough top with your garlic olive oil mixture and sprinkle on a pinch of Italian seasoning. This top surface is what faces DOWN in the mold — meaning when you flip the skulls out after baking, this becomes the flat bottom. The skull face side is currently pressed against the mold, and that’s where all the beautiful detail will appear.
Step 6: Bake the Pizza Skulls
Preheat your oven to 400°F. Place the filled skull mold on a rimmed baking sheet — this catches any filling that bubbles over and also helps the silicone mold hold its shape in the oven. Bake for 16 to 18 minutes until the exposed dough on top is golden brown and you can smell the garlic and cheese through the oven door.
The internal temperature of the filling should hit at least 165°F if you’re using meat fillings like sausage. For the classic pepperoni and cheese version, 18 minutes at 400°F is exactly right. The skulls will feel firm to the touch and you’ll see golden color peeking up over the edges of the mold cavities.
Step 7: Unmold and Finish
Let the mold cool for exactly 5 minutes before unmolding — not 10, not right away. Five minutes allows the dough to firm up and pull slightly away from the silicone walls, which means the skull detail releases cleanly. Too soon and the hot dough is still soft and can tear. Too long and condensation builds up and makes them stick.
Flip the mold over onto a parchment-lined baking sheet and gently press each cavity from the back to pop the skulls out. The skulls should release with satisfying detail — those eye sockets, the nose cavity, the cheekbones all crisp and golden. Immediately brush with melted butter and dust with Parmesan while they’re still hot. Serve with warm marinara for dipping.
👉 Small Ceramic Dipping Bowls Set — Individual ramekins for marinara make the skull platter look exactly like the TikTok photos that went viral.
Nutrition Information
- Per serving (1 skull): 248 cal
- 10g fat
- 29g carbs
- 10g protein
Pro Tips
Don’t overfill the cavities: One tablespoon of sauce and a small handful of cheese is enough. It sounds like too little until you realize the filling expands and bubbles when hot — overfilled skulls push the lid off the seam and leak all over your mold.
Pinch the seam twice: After you fold the dough edges over the filling and add the dough lid, press the seam with your fingers, then go around again with a fork to crimp it shut. One pass isn’t enough — the dough relaxes in the oven and a weak seal opens up.
Use low-moisture mozzarella only: This is the single most important ingredient tip in the whole recipe. Fresh mozzarella, even when drained, releases so much steam inside the skull that it makes the interior dough gummy. Low-moisture shredded mozzarella melts clean and stretches beautifully when you crack one open.
Rest before unmolding at exactly 5 minutes: Set a timer. The 5-minute rest is when the dough firms up just enough to hold its shape but the silicone walls haven’t formed a steam-suction seal yet. After 10 minutes, the skulls start sticking in spots and you lose the detail on the eye sockets.
Bake on a rimmed sheet pan: Place the silicone mold on a metal baking sheet before it goes in the oven. Silicone molds are floppy — without rigid support underneath, you’ll wobble them on the way to the oven and the filling shifts inside. The sheet pan also catches any bubbled-over cheese before it hits the oven floor.
Delicious Variations
Breakfast Pizza Skulls
Swap the marinara for a thin layer of cream cheese, then fill with scrambled egg, crumbled cooked bacon, and shredded cheddar. Bake the same way at 400°F for 18 minutes. These are genuinely unhinged in the best way for a weekend brunch — especially on Halloween morning. Kids will sprint to the table.
BBQ Chicken Pizza Skulls
Replace the marinara with your favorite smoky BBQ sauce — just one tablespoon per skull. Fill with shredded rotisserie chicken, smoked gouda, and a few diced red onion pieces. The BBQ sauce caramelizes slightly inside the hot dough cavity and creates this incredible sweet-smoky filling that adults go crazy for.
Four Cheese Vegetarian Skulls
Skip the pepperoni entirely and go full cheese. Mix together mozzarella, ricotta, Parmesan, and provolone into a thick cheese blend, then add one tablespoon of marinara and one tablespoon of the cheese blend per skull. These are richer and creamier than the classic version — the ricotta gives the filling an almost cheesecake-like texture.
Spicy Sausage and Jalapeño Skulls
Brown Italian hot sausage and crumble it fine, then combine it with pickled jalapeño slices and pepper jack cheese for the filling. Use the same marinara base. This is the adult version of pizza skulls — bring them to a game day party and they’ll disappear before you can set the tray down. Serve with ranch alongside the marinara.
Gluten-Free Pizza Skulls
Substitute a gluten-free pizza dough — many grocery stores carry Udi’s or Bob’s Red Mill GF pizza dough mix in the health food section. The technique is identical but GF dough is typically stickier and less elastic, so flour your hands generously and work quickly. The baking time drops to about 15 minutes since GF dough browns faster.
Storage Instructions
Refrigerator
Store cooled pizza skulls in an airtight container in the refrigerator for up to 3 days. To reheat, place them on a wire rack set on a baking sheet and warm in a 375°F oven for 8 to 10 minutes. The wire rack lets hot air circulate under the skull so the bottom crisps back up instead of turning steamy and soft. Avoid the microwave — it makes the dough rubbery and the skull detail softens completely.
Freezer
Pizza skulls freeze beautifully and are one of those recipes worth doubling specifically to freeze a batch. Let them cool completely, then wrap each skull individually in plastic wrap and place them in a zip-top freezer bag. They keep well for up to 2 months. To reheat from frozen, skip thawing — place them directly on a baking sheet in a 375°F oven for 15 to 18 minutes until hot through the center and crispy on the outside.
Make-Ahead
You can assemble the filled, sealed skulls in the mold up to 24 hours ahead and refrigerate them unbaked. Cover the mold tightly with plastic wrap and store in the fridge overnight. When you’re ready to bake, pull the mold out 20 minutes before baking to take the chill off the dough, then bake as directed at 400°F. This is the best approach for Halloween parties — do all the fiddly work the day before and just pop them in the oven when guests arrive.
For food safety guidelines, visit FDA Safe Food Handling Guidelines.
Frequently Asked Questions
What skull mold do I need to make pizza skulls?
You need a silicone skull mold — the flexibility is what lets you pop the skulls out cleanly without destroying the face detail. Look for a mold with cavities that are at least 3 inches deep so you have room for dough on the bottom, filling in the middle, and a dough lid on top. The most popular sizes are 4-cavity and 6-cavity molds, both of which work perfectly for this recipe. Rigid plastic or metal skull molds don’t work — you can’t flex them to release the skulls.
Can I use canned pizza dough for pizza skulls?
You can use canned refrigerated pizza dough in a pinch, but the texture will be slightly different — it tends to be a bit more bready and less chewy than fresh ball dough. Pillsbury refrigerated pizza dough is the most reliable canned option. If you go this route, skip the 30-minute rest since canned dough is already at a workable temperature. Fresh pizza dough from the grocery store deli section is still the best choice for flavor and texture.
Why are my pizza skulls leaking filling during baking?
Leaking almost always comes from one of two problems: overfilling or a weak seam seal. Keep the sauce to one tablespoon per skull — it seems like very little but it expands when heated. For the seam, fold the dough edges over the filling and then press around the entire perimeter twice with your fingertip, then crimp with a fork for good measure. Also make sure your mozzarella is low-moisture shredded, not fresh — fresh mozzarella releases steam that blows the seal open from the inside.
Can I make pizza skulls without a mold for Halloween?
If you don’t have a skull mold, you can make stuffed pizza balls instead — just seal the filling inside balls of dough, place them seam-side down on a greased baking sheet, and bake the same way. They taste identical but won’t have the skull shape. For Halloween specifically, you can use a sharp knife to lightly score eye sockets and a nose into the top of each dough ball before baking for a rough skull look. But honestly, skull molds are cheap enough that it’s worth just buying one.
How do I make pizza skulls crispier on the outside?
Three things make the biggest difference. First, don’t skip greasing the mold with olive oil — bare dough against silicone steams instead of crisps. Second, after unmolding, place the skulls skull-face-up on a wire rack and pop them back in the oven at 425°F for just 3 to 4 minutes. That blast of heat at the end crisps the face side, which never touched direct heat while it was pressed into the mold. Third, brush generously with melted butter the second they come out — butter finishes browning on contact with the hot dough.
Are pizza skulls good for kids’ birthday parties?
Pizza skulls are one of the best party foods you can make for kids. They’re hand-held, self-contained with no dripping, customizable for picky eaters, and visually exciting enough that kids talk about them. Set up a filling bar with different cheeses, meats, and sauces and let each kid fill their own skull — it turns the whole thing into an activity. Make the dough balls ahead of time and have the molds ready on the table. You can bake in batches and keep warm in a 200°F oven.
More Recipes You Will Love
👉 Perfect Sheet Pan Sausage & Veggies Recipe
👉 Perfect Taco Meat Recipe (Better Than Takeout)
👉 Perfect Turkey Meatball Pasta Recipe
Pizza skulls are genuinely one of those recipes that earns its hype. They’re fun to make, impossible to stop eating, and they look so dramatic on a serving board that people assume you spent hours on them — when really the mold does all the work. Make a batch this weekend and drop a comment below telling me what filling combo you tried. And if your kids lost it when they saw them, I want to hear that too.