
- Prep: 20 Minutes
- Cook: 20 Minutes
- Total: 40 Minutes
- Servings: 12 rolls
A Quick Note Before You Start
These dinner rolls need about 90 minutes of rise time total, so plan ahead. The good news? Most of that is completely hands-off. Use whole milk and real butter — this is not the place to substitute.
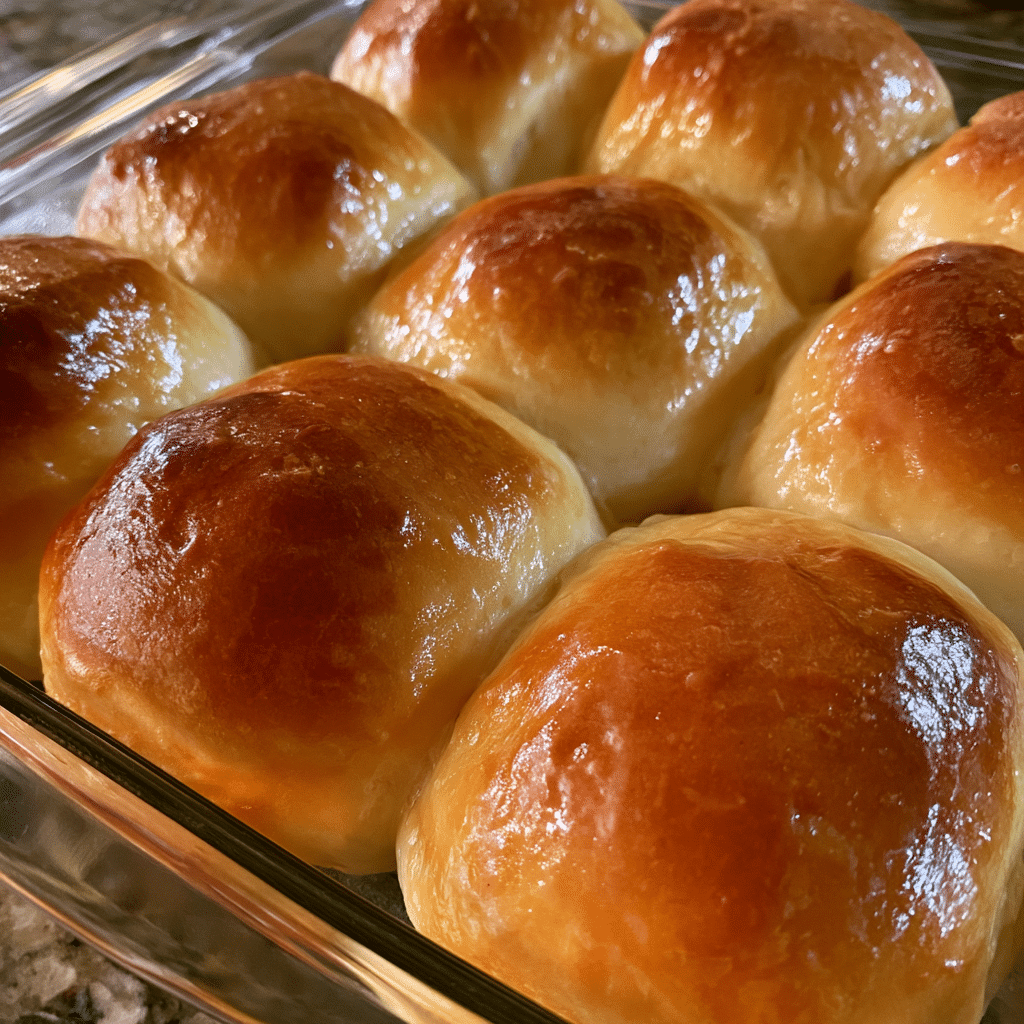
Dinner rolls are the one thing that can make an entire meal feel special. Soft, pillowy, golden on top with a buttery shine — these homemade dinner rolls beat anything from a bag, and they’re far easier to make than most people think.
This recipe uses a simple enriched dough technique — milk, butter, and egg give you that cloud-like texture. We’ll walk through every step, including how to tell if your yeast is alive and when the dough is actually ready to shape.
Ingredients for Perfect Dinner Rolls
For the Dough
- 1 cup (240ml) whole milk — warmed to 110°F; the fat content makes rolls tender
- 2¼ tsp (1 packet) active dry yeast — Fleischmann’s Active Dry Yeast is the most reliable brand for consistent rise
- 3 tbsp granulated sugar — divided; feeds the yeast and adds a gentle sweetness
- 3 cups (360g) all-purpose flour — plus extra for dusting
- 1 tsp fine salt
- 1 large egg — room temperature; adds richness and helps the rolls brown beautifully
- 4 tbsp (57g) unsalted butter — softened; works into the dough for a tender, pillowy crumb
For the Butter Finish
- 3 tbsp unsalted butter — melted; brushed on immediately after baking for that glossy, irresistible top
- Flaky sea salt — optional but highly recommended; a light sprinkle on top takes these over the edge
Optional Add-Ins
- 1 tbsp honey (swap for sugar for a richer flavor)
- 1 tsp garlic powder (mix into dough for garlic rolls)
- 2 tbsp fresh rosemary, finely chopped (fold in at the shaping stage)
- ½ cup shredded cheddar (fold in for cheesy pull-apart rolls)
- 1 tsp dried Italian seasoning
How to Make Dinner Rolls Step by Step
Step 1: Activate the Yeast
Warm your milk to exactly 110°F — use a kitchen thermometer if you have one, or test it on your wrist the way you’d test a baby bottle. It should feel warm but not hot. Add 1 tablespoon of the sugar, then sprinkle the yeast over the top and give it a gentle stir. Let it sit undisturbed for 5 to 10 minutes.
You’re looking for the mixture to turn foamy and fragrant — that foam is proof the yeast is alive and active. If nothing happens after 10 minutes, your yeast is dead and your milk was either too hot (it killed the yeast) or too cold (it didn’t wake it up). Start over with fresh yeast — there’s no fixing this step.
👉 Fleischmann’s Active Dry Yeast (3-packet strip) — The most consistent yeast for home baking — each packet is pre-measured at exactly 2¼ tsp.
Step 2: Mix and Knead the Dough
In a large bowl, whisk together the flour, salt, and remaining 2 tablespoons of sugar. Make a well in the center and pour in the foamy yeast mixture, then add the egg. Stir everything together with a wooden spoon or spatula until a shaggy dough forms — it’ll look rough and messy, and that’s exactly right.
Turn the dough out onto a lightly floured surface and knead for 8 to 10 minutes by hand, adding the softened butter one tablespoon at a time as you go. The butter makes this sticky and a little frustrating at first — push through it. You’ll know the dough is ready when it’s smooth, slightly tacky but not sticky, and springs back when you poke it with a finger.
Step 3: First Rise (Bulk Fermentation)
Shape the kneaded dough into a ball and place it in a lightly greased bowl, turning it once to coat all sides. Cover the bowl tightly with plastic wrap or a clean kitchen towel and set it somewhere warm — on top of the refrigerator, near a warm oven, or inside your oven with just the light on. Let it rise for 60 minutes or until doubled in size.
This first rise is where all the flavor develops. The yeast is eating the sugars and releasing carbon dioxide, which creates those tiny air pockets that make rolls fluffy instead of dense. Don’t rush it by cranking up the heat — a slow, steady rise at 75–80°F gives you far better flavor than a fast rise in a hot spot.
Step 4: Shape the Rolls
Punch the risen dough down firmly to release the gas, then turn it out onto a lightly floured surface. Divide it into 12 equal pieces — a bench scraper makes this incredibly easy and precise. Take each piece and cup your hand over it against the counter, then roll it in tight circles with light pressure until you get a smooth, taut ball with a clean seam on the bottom.
Arrange the shaped rolls in a greased 9×13-inch baking dish, spacing them so they’re just barely touching. That contact is intentional — as they rise and bake, they’ll press into each other, which is what gives you those signature soft sides you can pull apart at the table. Place them seam-side down so the smooth tops face up.
👉 OXO Good Grips Bench Scraper — Makes dividing dough into 12 equal pieces fast, clean, and precise — you’ll use it every time you bake.
Step 5: Second Rise and Preheat
Cover the shaped rolls loosely with plastic wrap or a clean kitchen towel and let them rise again for 30 to 45 minutes, until they’re puffed and the rolls are touching each other. While they rise, preheat your oven to 375°F — the oven needs to be fully hot before the rolls go in, so start it about 15 minutes before you think they’ll be ready.
The second rise (called the proof) is what gives dinner rolls their final light texture. Don’t skip it or cut it short. Under-proofed rolls bake up dense and bready instead of soft and pillowy. When they’re ready, the dough should look noticeably larger and feel light and airy when you gently press the side of the dish.
Step 6: Bake Until Golden
Slide the baking dish into the center of your fully preheated oven and bake for 18 to 22 minutes. You’re looking for a deep golden-brown top — not pale yellow, not dark brown. The internal temperature of a fully baked dinner roll should hit 190°F if you want to be precise about it.
The moment they come out of the oven, brush the tops generously with melted butter. Don’t wait, don’t let them cool first — you want that butter going on while the rolls are steaming hot so it soaks into the crust slightly rather than just sitting on top. Sprinkle with flaky sea salt if you’re using it, and serve immediately.
👉 Maldon Sea Salt Flakes — A pinch of Maldon on warm buttered rolls is a game-changer — the flakes add crunch and bursts of flavor.
Nutrition Information
- Per serving (1 roll): 195 cal
- 6g fat
- 30g carbs
- 5g protein
- 1g fiber
- 220mg sodium
Pro Tips
Use room temperature ingredients: Cold eggs or cold butter will slow down your yeast and make the dough stiff and hard to knead. Pull your egg and butter out of the fridge 30 minutes before you start — it takes almost no planning and makes a significant difference in how the dough comes together.
Don’t add too much flour: The number one mistake people make with dinner roll dough is adding extra flour when it gets sticky during kneading. Slightly sticky dough = soft rolls. If you flour it up until it stops sticking, you’ll get dense, bread-like rolls instead of pillowy ones. Trust the process.
The warm oven proofing trick: If your kitchen is cold, preheat the oven to its lowest setting (usually 170°F) for exactly 2 minutes, then turn it OFF and put the covered dough inside with the door cracked. This creates a perfectly warm, draft-free environment that makes yeast very happy.
Brush butter twice for extra shine: Brush once the moment they come out of the oven, wait 5 minutes, then brush again. The second coat gives you that bakery-style glossy, golden top that makes everyone reach for a roll before dinner is even served.
Equal sizing matters: Uneven rolls bake unevenly — smaller ones overbake while large ones stay doughy. Use a kitchen scale to weigh each piece to about 55–60 grams each. It takes 2 extra minutes and gives you rolls that are done at exactly the same time.
Delicious Variations
Garlic Herb Dinner Rolls
Mix 1 teaspoon garlic powder and 1 tablespoon each of finely chopped fresh parsley and rosemary directly into the dry ingredients before adding the wet ingredients. For the butter finish, melt the butter with two minced garlic cloves and a pinch of dried parsley. These are phenomenal alongside pasta or a roast chicken and disappear faster than any other variation.
Honey Butter Dinner Rolls
Swap the granulated sugar in the dough for 3 tablespoons of good honey — it adds a faint floral sweetness that’s irresistible. For the finish, mix your melted butter with an equal amount of honey and a pinch of salt, then brush generously. These are especially good at Thanksgiving and holiday dinners where you want something a little sweeter alongside savory dishes.
Cheesy Pull-Apart Rolls
After the first rise, roll the dough into a rectangle and sprinkle with 1 cup of shredded sharp cheddar or gruyère. Fold the dough over itself twice like a letter, then divide and shape into balls as usual. The cheese gets folded into layers inside each roll and melts into pockets as they bake. Serve these with soups and stews — they’re outrageously good dunked into a bowl of chili.
Whole Wheat Dinner Rolls
Replace up to half of the all-purpose flour with whole wheat flour for a heartier, nuttier roll with more fiber. Go beyond 50% whole wheat and the rolls lose their softness — the extra bran cuts gluten strands and makes them dense. Add a tablespoon of vital wheat gluten to counteract this effect if you want to go higher than 50% whole wheat while keeping them light.
Make-Ahead Overnight Rolls
After shaping the rolls and placing them in the baking dish, cover tightly with plastic wrap and refrigerate overnight instead of doing the second rise at room temperature. In the morning, pull them out 45 to 60 minutes before you want to bake, let them come to room temperature and finish rising, then bake as directed. This is the move for holiday mornings when you want fresh rolls without the full same-day process.
Storage Instructions
Refrigerator
Leftover dinner rolls keep in an airtight container or zip-lock bag at room temperature for up to 3 days — not the fridge, which actually dries bread out faster than room temperature storage does. If your kitchen runs warm, wrap them individually and store in a cool spot. To refresh day-old rolls, wrap them in a slightly damp paper towel and microwave for 15–20 seconds, or warm them in a 300°F oven for 5 minutes.
Freezer
Dinner rolls freeze beautifully and this is absolutely the move for holiday prep. Let them cool completely after baking, then place them in a single layer on a baking sheet and freeze for 1 hour until solid. Transfer to a freezer-safe zip bag and store for up to 3 months. To reheat from frozen, wrap in foil and warm in a 350°F oven for 15 minutes, then remove the foil for the last 3 minutes to re-crisp the tops. Brush with fresh butter right before serving.
Make-Ahead
You have two great make-ahead options here. Option one: Make the dough through the first rise, punch it down, then refrigerate the dough (not shaped) for up to 24 hours. Shape and do the second rise the next day. Option two: Shape the rolls, place in the baking dish, cover tightly, and refrigerate overnight before the second rise — let them sit at room temperature for 45 to 60 minutes before baking. Both methods work well, and both actually improve flavor because the slow cold fermentation develops more complex taste than a same-day bake.
For food safety guidelines, visit FDA Safe Food Handling Guidelines.
Frequently Asked Questions
Why didn’t my dinner rolls rise?
The most common culprit is dead yeast. Your milk was probably too hot (above 115°F kills yeast) or too cold (below 100°F won’t activate it). Always use a thermometer and aim for exactly 110°F. The second issue is expired yeast — check the date on your packet. Fresh yeast should foam vigorously within 5 to 10 minutes of hitting warm sweetened milk. If it doesn’t foam, start over with a fresh packet rather than proceeding and wasting the rest of the ingredients.
Can I make dinner rolls without a stand mixer?
Absolutely — this recipe was written for hand kneading. It takes about 8 to 10 minutes of steady kneading on a lightly floured surface and is genuinely one of the most satisfying things to do in the kitchen. If you do have a stand mixer with a dough hook, mix on medium-low for 6 to 7 minutes instead, adding the softened butter one tablespoon at a time. Both methods produce identical results.
Can I use instant yeast instead of active dry yeast?
Yes, and it actually simplifies the process slightly. Instant yeast (also called rapid-rise or bread machine yeast) doesn’t need to be proofed in liquid first — you can mix it directly into the dry ingredients and then add the warm milk. Use the same amount (2¼ tsp). Your rise times will be about 25% shorter, so keep an eye on the dough rather than relying strictly on the clock.
How do I get dinner rolls to be softer?
Three things make the biggest difference: using whole milk instead of water or skim milk, not adding too much flour during kneading (embrace the slight stickiness), and not overbaking. Pull the rolls when the tops are golden and the internal temperature hits 190°F — even 5 extra minutes in the oven dries them out noticeably. The butter finish immediately after baking also keeps the crust soft rather than crusty.
Can I double this dinner rolls recipe?
Yes, this recipe doubles easily and reliably. Use a large baking sheet or two 9×13 dishes. The only thing to watch: when kneading a larger batch by hand, work in two separate batches rather than trying to knead 6 cups of dough at once — it’s unwieldy and you won’t develop the gluten evenly. A stand mixer handles a double batch without issue.
Why are my dinner rolls dense instead of fluffy?
Dense rolls almost always come down to one of three things: the yeast wasn’t properly activated, the dough was over-floured during kneading, or the rolls weren’t given enough time to rise. Check that your yeast foams properly, resist adding extra flour, and make sure the dough has genuinely doubled in size during the first rise — not just puffed up slightly. Give it the full hour in a warm environment.
More Recipes You Will Love
👉 Perfect Caramel Apples Recipe
👉 Best Pumpkin Shaped Cheese Ball Recipe
👉 Mummy Wrapped Brie Recipe (Halloween Party)
These dinner rolls are the kind of recipe you make once and then make forever. They look impressive, they taste like something from a bakery, and once you understand how the dough should feel, you’ll never need to look at the recipe again. Make them this weekend — then drop a comment below and tell me how they turned out. Tag us on Instagram so we can see those golden tops.