
- Prep: 5 Minutes
- Cook: 10 Minutes
- Total: 15 Minutes
- Servings: 8 servings
A Quick Note Before You Start
This gravy recipe works with chicken, turkey, or beef drippings — whatever you’re roasting. The key is building layers of flavor before you add liquid. Don’t rush the roux.
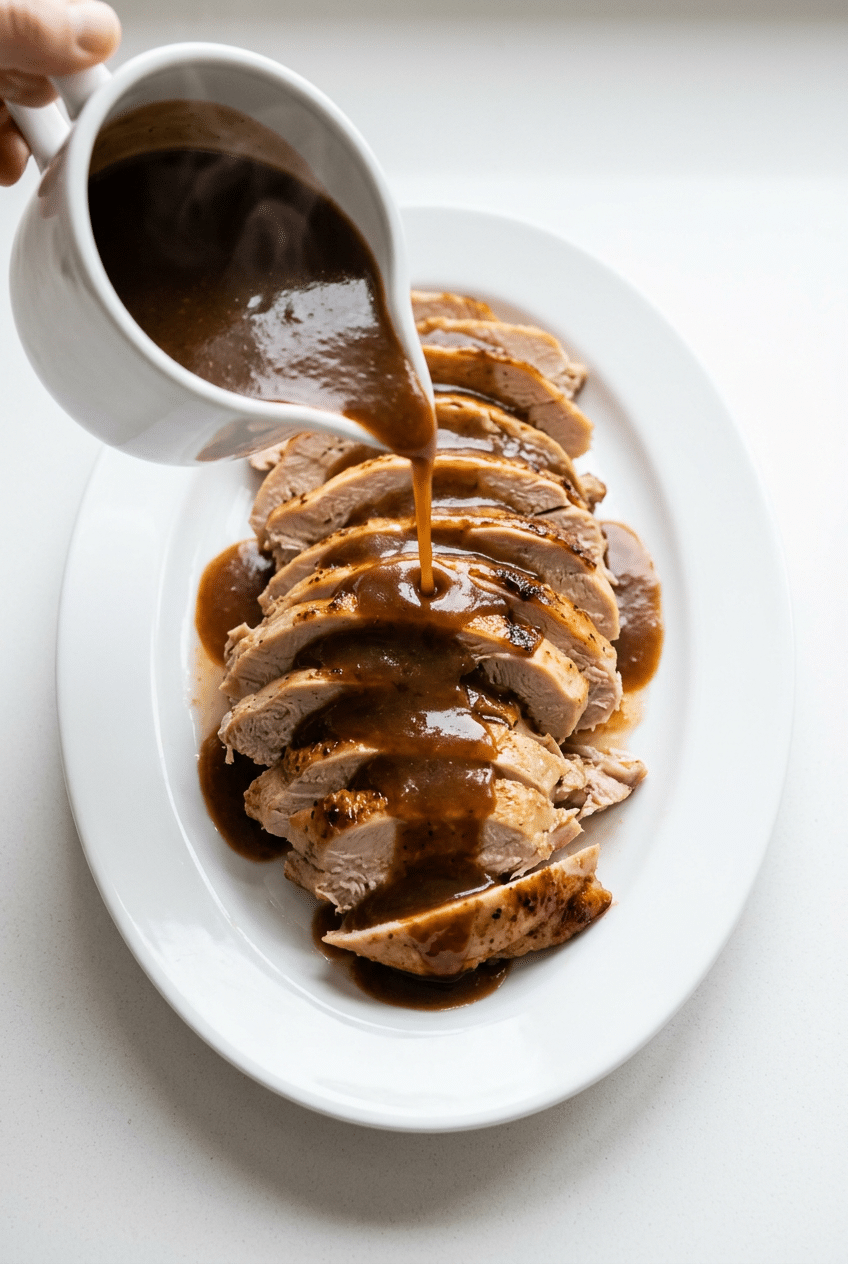
A great gravy recipe is the difference between a good holiday dinner and an unforgettable one. Rich, glossy, and deeply savory — this one comes together in just 15 minutes using your pan drippings.
We’re talking silky smooth gravy with real depth — no lumps, no bland flour taste, no guessing. Just a simple technique that works every single time, no matter what protein is on your table.
Ingredients for Homemade Gravy
For the Gravy Base
- 1/4 cup pan drippings — the fat and fond from your roasted meat, this is where all the flavor lives
- 1/4 cup all-purpose flour — thickens the gravy and forms the roux base
- 2 cups chicken, turkey, or beef broth — use whichever matches your protein for the most cohesive flavor
- Salt and black pepper to taste — season at the end so you don’t over-salt
Optional Flavor Boosters
- 1 teaspoon Worcestershire sauce — adds a deep, savory umami hit that makes everyone ask your secret
- 1/2 teaspoon garlic powder — rounds out the flavor without overpowering the drippings
- 1/4 teaspoon onion powder — subtle sweetness that background-builds the flavor
- 1 tablespoon unsalted butter — stirred in at the end for a glossy, restaurant-style finish
- Fresh thyme or rosemary sprigs — steeped in the gravy for 2 minutes, then removed
If You Have No Drippings
- 4 tablespoons unsalted butter — replaces the pan dripping fat completely
- 2 cups good-quality broth — use Swanson Natural Goodness Chicken Broth — clean ingredients, rich flavor that tastes homemade right from the carton
- 1 teaspoon Kitchen Bouquet Browning & Seasoning Sauce — adds that deep, dark color and savory depth you’d normally get from real drippings
Optional Add-Ins
- 1/4 cup heavy cream (for a richer, lighter-colored gravy)
- Splash of dry white wine or red wine (add before the broth)
- 1 teaspoon soy sauce (extra umami depth)
- Pinch of cayenne (for a subtle kick)
- 1 tablespoon apple cider vinegar (brightens and balances rich gravies)
How to Make Gravy Recipe Step by Step
Step 1: Collect Your Pan Drippings
Once your roast is done, remove it from the roasting pan and set it aside to rest. Pour the drippings into a fat separator or a large measuring cup and let them settle for about 2 minutes — the fat will rise to the top. You want about 1/4 cup of fat. If your drippings are under that amount, top them up with butter.
That liquid gold at the bottom of the separator (the dark, jelly-like stuff) is pure concentrated flavor — don’t waste a drop of it. Scrape any stuck bits from the roasting pan too, since that fond is where the deepest savory notes hide. Add a splash of broth to the roasting pan and scrape with a wooden spoon to loosen everything.
👉 Kitchen Bouquet Browning & Seasoning Sauce — Adds deep caramel color and savory depth when you’re working without drippings.
Step 2: Build the Roux
Pour your 1/4 cup of fat into a medium saucepan over medium heat. Once it’s shimmering and hot, add the 1/4 cup of flour all at once and whisk constantly. You’re looking for a paste that turns the color of peanut butter — this takes about 2 minutes of active whisking.
Cooking the flour in fat before adding liquid is what makes gravy taste like gravy instead of flour soup. This step eliminates the raw flour taste completely. Don’t rush it — if your roux looks pale and blonde, cook it another 30 to 60 seconds. The darker it gets (without burning), the richer and more complex your final gravy will taste.
Step 3: Whisk In the Broth
Add your broth in a slow, steady stream while whisking constantly — do NOT dump it all in at once. Start with just a splash and whisk until completely smooth, then add more, then whisk smooth again. Continue this process until all 2 cups are incorporated and you have a thin, lump-free liquid.
Adding liquid too fast causes the starch granules to seize up unevenly, and that’s how lumps happen. Going slow and whisking continuously keeps everything emulsified and silky. If you do get a few lumps, don’t panic — strain the gravy through a fine-mesh strainer at the end and they’ll disappear completely.
👉 Swanson Natural Goodness Chicken Broth (Pack of 6) — Clean-ingredient broth with real roasted flavor — the closest thing to homemade stock from a carton.
Step 4: Simmer Until Thick and Glossy
Raise the heat slightly to medium-high and bring the gravy to a gentle boil, then reduce to a simmer. Whisk occasionally for 5 to 7 minutes while it thickens up. You’ll know it’s ready when it coats the back of a spoon and leaves a clean line when you drag your finger through it.
The gravy will continue to thicken slightly as it cools, so pull it off the heat just before it reaches your ideal consistency. If you want it thinner, whisk in a splash more broth. If you want it thicker, keep simmering another 2 minutes. This is also the moment to add Worcestershire sauce, garlic powder, and any fresh herbs — let them steep for 2 minutes then fish the herbs out.
👉 Lea & Perrins Worcestershire Sauce — The original — deep, tangy, savory punch that makes your gravy taste impossibly complex.
Step 5: Season and Finish
Taste your gravy and season with salt and black pepper. This is the most important step — pan drippings are already salty, so hold off on seasoning until this exact moment. Add your tablespoon of cold butter right at the end, off the heat, and whisk it in until fully melted and glossy.
That final pat of butter is a classic French technique called ‘monter au beurre’ — it gives the gravy a silky, restaurant-quality sheen that you simply can’t get any other way. Pour into a warmed gravy boat and serve immediately. If you’re making it ahead, press plastic wrap directly onto the surface to prevent a skin from forming.
👉 White Ceramic Gravy Boat with Saucer — Keeps gravy warm at the table and looks stunning next to your holiday spread.
Nutrition Information
- Per serving (approx. 1/4 cup): 65 cal
- 5g fat
- 4g carbs
- 1g protein
Pro Tips
Always warm your broth first: Cold broth added to a hot roux can cause the fat to seize and create lumps. Microwave your broth for 60 seconds before adding it to the pan — the warm liquid incorporates smoothly into the roux every single time.
The fond is everything: Those dark, caramelized bits stuck to your roasting pan after cooking meat are pure concentrated flavor called ‘fond.’ Always deglaze the roasting pan with a splash of broth or wine and scrape every bit loose — that liquid goes directly into your gravy and adds a depth that no seasoning can replicate.
Rescue lumpy gravy instantly: If lumps happen, don’t throw it out. Pour the gravy through a fine-mesh strainer into a clean saucepan while it’s still warm, pressing with a spoon. It’ll come through perfectly smooth on the other side, and nobody will ever know it happened.
Control thickness like a pro: For thicker gravy, mix 1 tablespoon of cold water with 1 tablespoon of cornstarch into a slurry and whisk it into simmering gravy. For thinner gravy, simply add warm broth a tablespoon at a time while whisking. Adjust gradually — it’s much easier to thin than to thicken.
Make-ahead trick that actually works: Make your gravy up to 3 days ahead and refrigerate it. When you reheat, it will look thick and gloppy — that’s normal. Add a splash of warm broth and whisk over medium heat until it loosens back to the perfect pourable consistency.
Delicious Variations
Turkey Gravy
Follow the base recipe using turkey drippings and swap in turkey or chicken broth. Add a pinch of dried sage and a small sprig of fresh rosemary while simmering — these are the classic Thanksgiving herb flavors. Remove the rosemary before serving. This version is slightly lighter in color than beef gravy but incredibly savory and aromatic.
Beef Gravy
Use beef drippings from a roast or prime rib and substitute beef broth for the liquid. Add a teaspoon of Worcestershire sauce and a tiny splash of red wine (about 2 tablespoons) before adding the broth. The wine adds a richness and acidity that cuts through the heaviness. This is the gravy for mashed potatoes and roast beef nights — deep, dark, and incredibly satisfying.
Vegetarian Mushroom Gravy
Skip the drippings entirely and start with 4 tablespoons of butter. Sauté 8 ounces of finely chopped cremini mushrooms in the butter until they release all their liquid and turn deep golden brown — about 8 minutes. Then add your flour directly to the mushrooms and butter and build your roux from there. Use vegetable broth as your liquid. The mushrooms provide a deep, earthy umami that rivals any meat-based gravy. Season generously with thyme and black pepper.
Sausage Gravy (Southern Style)
Brown half a pound of breakfast sausage in a skillet, breaking it into crumbles. Don’t drain the fat — that’s your roux fat. Add 1/4 cup flour directly to the sausage and fat and stir for 2 minutes. Pour in 2 cups of whole milk (not broth) in a slow stream, whisking constantly. Simmer until thick and season heavily with black pepper. Serve over split buttermilk biscuits for a classic Southern breakfast.
Giblet Gravy
While your turkey roasts, simmer the neck and giblets (heart, liver, gizzard) in 3 cups of water or chicken broth with half an onion, a celery stalk, and a bay leaf for 1 to 2 hours. This giblet stock becomes your gravy liquid. Finely chop the cooked giblet meat and stir it back into the finished gravy for an old-fashioned, chunky, deeply traditional Thanksgiving gravy that your grandparents would recognize.
Storage Instructions
Refrigerator
Pour cooled gravy into an airtight container and refrigerate for up to 4 days. Press a piece of plastic wrap directly onto the surface of the gravy before sealing the container — this prevents a thick skin from forming on top. When you’re ready to serve, reheat in a small saucepan over medium-low heat, whisking in splashes of warm broth until it loosens back to a pourable consistency. It reheats beautifully and tastes just as good as the day you made it.
Freezer
Gravy freezes surprisingly well for up to 3 months. Let it cool completely, then pour into zip-top freezer bags laid flat, or use silicone ice cube trays for individual portions — pop the frozen cubes into a bag once solid. Thaw overnight in the fridge or place the sealed bag in a bowl of cold water for a faster thaw. Reheat gently on the stovetop with a whisk and a splash of broth to bring it back to life.
Make-Ahead
This is genuinely one of the best make-ahead components of any holiday meal. You can make the complete gravy up to 3 days before your dinner and simply reheat it on the stove while everything else finishes. If you’re making it far in advance without drippings, use high-quality broth and Kitchen Bouquet for color. On the day of, deglaze your roasting pan with a splash of broth, scrape up all those flavorful bits, and stir that liquid directly into your reheating gravy for a fresh hit of real roasted flavor.
For food safety guidelines, visit FDA Safe Food Handling Guidelines.
Frequently Asked Questions
How do I fix lumpy gravy?
The fastest fix is a fine-mesh strainer — pour the gravy through it into a clean saucepan while it’s still warm and whisk any thick bits through with the back of a spoon. Alternatively, use an immersion blender directly in the pan for 20 to 30 seconds. Both methods work perfectly and your gravy will come out smooth. The best prevention is adding your broth slowly and whisking constantly — lumps almost never form when you go slow.
Can I make gravy without pan drippings?
Absolutely — and it’s easier than you think. Replace the drippings fat with 4 tablespoons of unsalted butter, use a high-quality broth like Swanson Natural Goodness, and add a teaspoon of Kitchen Bouquet Browning Sauce for the deep color and savory flavor you’d normally get from real drippings. Add Worcestershire sauce and a pinch of garlic powder to build complexity. Honestly, most guests can’t tell the difference when it’s made well.
Why does my gravy taste like flour?
This is almost always because the roux wasn’t cooked long enough. You need to cook the fat and flour together, whisking constantly, for a full 2 minutes over medium heat before adding any liquid. The mixture should turn from pale yellow to a light golden-peanut-butter color. That color change tells you the raw starch taste has cooked out. If your gravy already tastes floury after adding the broth, keep simmering — another 3 to 4 minutes of cooking usually fixes it completely.
How do I make gravy thicker?
The easiest method is a cornstarch slurry — mix 1 tablespoon of cornstarch with 1 tablespoon of cold water until smooth, then whisk it into your simmering gravy. It thickens within 60 seconds and won’t add any flavor. You can also simply keep simmering to reduce the gravy down naturally. Start with small amounts of slurry and add more if needed — it’s much easier to thicken gravy than to thin it back out once you’ve gone too far.
What’s the best broth to use for gravy?
Always match your broth to your protein — chicken broth for poultry, beef broth for red meat, vegetable broth for meatless versions. Within those categories, quality matters more than people realize. Swanson Natural Goodness Chicken Broth is our go-to from the store because it has a cleaner, richer flavor than most carton broths. Homemade stock is always the gold standard if you have it, but a good commercial broth is absolutely second place and makes excellent gravy.
How much gravy do I need per person?
Plan for about 1/4 cup of gravy per person for a standard serving alongside a holiday meal. For a table of gravy lovers — and there always are some — go closer to 1/3 cup per person. This recipe makes about 2 cups total, which serves 6 to 8 people comfortably. If you’re cooking for a crowd over 10, simply double the recipe using the same technique. A 4-cup batch reheats just as well as a 2-cup batch.
Can I make gravy the day before Thanksgiving?
Yes — and honestly, we recommend it. Making gravy ahead takes the pressure off the most chaotic part of holiday cooking. Make the full gravy up to 3 days ahead using broth and store it in the fridge. On the day of the meal, deglaze your roasting pan with broth after the turkey rests, scrape up all those flavorful drippings, and stir that liquid into your reheating gravy. You get the convenience of make-ahead prep with all the flavor of fresh drippings.
More Recipes You Will Love
👉 Perfect Caramel Apples Recipe
👉 Best Pumpkin Shaped Cheese Ball Recipe
👉 Mummy Wrapped Brie Recipe (Halloween Party)
This gravy recipe is proof that the simplest techniques produce the most impressive results. A good roux, a slow pour, a little patience — and you’ll have a gravy so good people will be spooning it over everything on their plate. Make it this weekend and tell us in the comments: drippings or no drippings? And if you nailed it, share a photo — we love seeing your dinner tables.