
- Prep: 20 Minutes
- Cook: 55 Minutes
- Total: 75 Minutes
- Servings: 8 servings
A Quick Note Before You Start
Pull your eggs and evaporated milk out of the fridge 30 minutes before you start — room temperature dairy blends smoother and helps your custard set evenly. This is the single biggest upgrade most home bakers skip.
Pumpkin pie is the one dessert that makes your whole house smell like Thanksgiving. Done right, it’s a silky, deeply spiced custard in a buttery shell — not the gummy, pale slice you get from a grocery store box.
This recipe combines the best techniques from classic American baking: a blind-baked crust that stays crisp, a warm-spice custard that sets perfectly, and a filling that doesn’t crack. No fancy equipment needed.
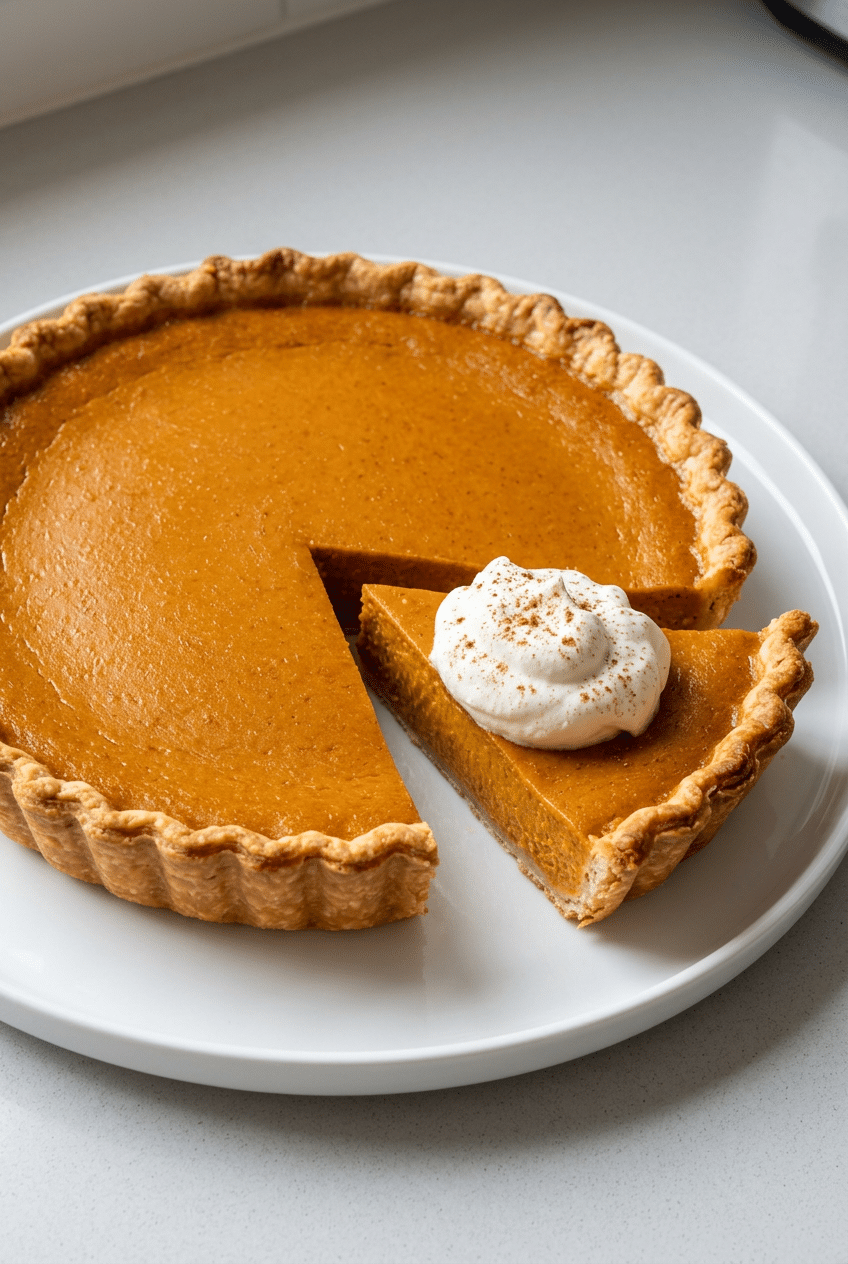
Ingredients for Classic Pumpkin Pie
For the Pie Crust
- 1 1/4 cups (155g) all-purpose flour — the base of a flaky, sturdy crust
- 1/2 tsp fine salt — balances and sharpens all the flavors
- 1 tbsp granulated sugar — just enough for a hint of sweetness and better browning
- 1/2 cup (115g) unsalted butter, cold and cubed — cold butter creates steam pockets that make the crust flaky
- 3-4 tbsp ice water — add just enough to bring the dough together without overworking it
For the Pumpkin Custard Filling
- 1 can (15 oz) Libby’s 100% Pure Pumpkin — the gold standard for consistent flavor and the right moisture level; avoid pumpkin pie filling which is pre-sweetened
- 3/4 cup (150g) packed light brown sugar — deeper molasses notes than white sugar; it rounds out the spices beautifully
- 2 tsp McCormick Pumpkin Pie Spice — a perfectly balanced pre-blended spice mix that takes all the guesswork out
- 1/2 tsp ground cinnamon — we add extra cinnamon on top of the blend because it’s the dominant warm note here
- 1/2 tsp fine salt — non-negotiable; it makes the pumpkin taste MORE like pumpkin
- 3 large eggs, room temperature — the structure of your custard; room temp eggs incorporate without shocking the filling
- 1 can (12 oz) evaporated milk, room temperature — richer than regular milk, lighter than cream; the classic choice for the perfect custard consistency
- 1 tsp pure vanilla extract — adds warmth and rounds out the spice
For Serving
- 1 cup heavy whipping cream — for freshly whipped cream on top
- 2 tbsp powdered sugar — sweetens the whipped cream without grittiness
- Ground cinnamon or nutmeg — for dusting on the whipped cream
Optional Add-Ins
- 1 tbsp molasses (stir into filling for deeper, richer color and flavor)
- 1/4 tsp black pepper (sounds odd, but it wakes up every other spice in the filling)
- 1 tbsp bourbon or dark rum (add with the vanilla for a grown-up holiday version)
- Pinch of ground cloves (for extra warmth in the spice profile)
How to Make Pumpkin Pie Step by Step
Step 1: Make the Pie Dough
In a large bowl, whisk together the flour, salt, and sugar. Add the cold, cubed butter and use your fingertips to work it into the flour until the mixture looks like coarse, pea-sized crumbles — some bigger, uneven chunks are totally fine and actually desirable. Speed matters here: the warmth of your hands is the enemy of a flaky crust.
Drizzle in the ice water one tablespoon at a time, stirring gently with a fork after each addition. Stop adding water the moment the dough comes together and holds when you pinch it. Over-watered dough becomes tough. Shape it into a flat disc, wrap it tightly in plastic wrap, and refrigerate for at least 1 hour — this lets the gluten relax so your crust rolls out without shrinking.
Step 2: Blind Bake the Crust
Preheat your oven to 375°F (190°C). On a lightly floured surface, roll the chilled dough out to a 12-inch circle, about 1/8-inch thick. Drape it gently over your 9-inch pie dish — a ceramic or glass dish gives you the most even browning on the bottom crust. Press it into the edges without stretching the dough, and crimp or flute the rim however you like. Trim any overhang to about half an inch.
Line the crust with a sheet of parchment paper and fill it completely with pie weights or dried beans — this keeps the crust from puffing up into a dome during blind baking. Bake for 15 minutes, then carefully lift out the parchment and weights and bake another 5 minutes until the bottom looks dry and pale gold. This step is what separates a soggy-bottomed pie from a crisp, professional one.
👉 Ceramic Pie Weights for Blind Baking — Reusable ceramic beads distribute heat evenly so your crust bakes flat — dried beans work but warp over time.
Step 3: Mix the Pumpkin Filling
While the crust blind bakes, make your filling. In a large bowl, whisk together the pumpkin puree, brown sugar, pumpkin pie spice, extra cinnamon, and salt until everything is fully combined and smooth. Then add the eggs one at a time, whisking well after each. Finally, pour in the evaporated milk and vanilla extract and whisk until the filling is completely smooth and pourable — it should look like a deep orange, silky batter.
Do not use a blender or food processor here. Blending introduces air bubbles that cause the surface of your pie to crack as it bakes. A simple whisk and a gentle hand give you that perfectly smooth, glossy top. If you want to check for lumps, pour the filling through a fine mesh sieve directly into a measuring pitcher — this also makes pouring into the crust much cleaner and easier.
👉 Libby’s 100% Pure Pumpkin (6-pack) — The most consistent pumpkin puree on the market — same moisture, same color, same flavor every single time.
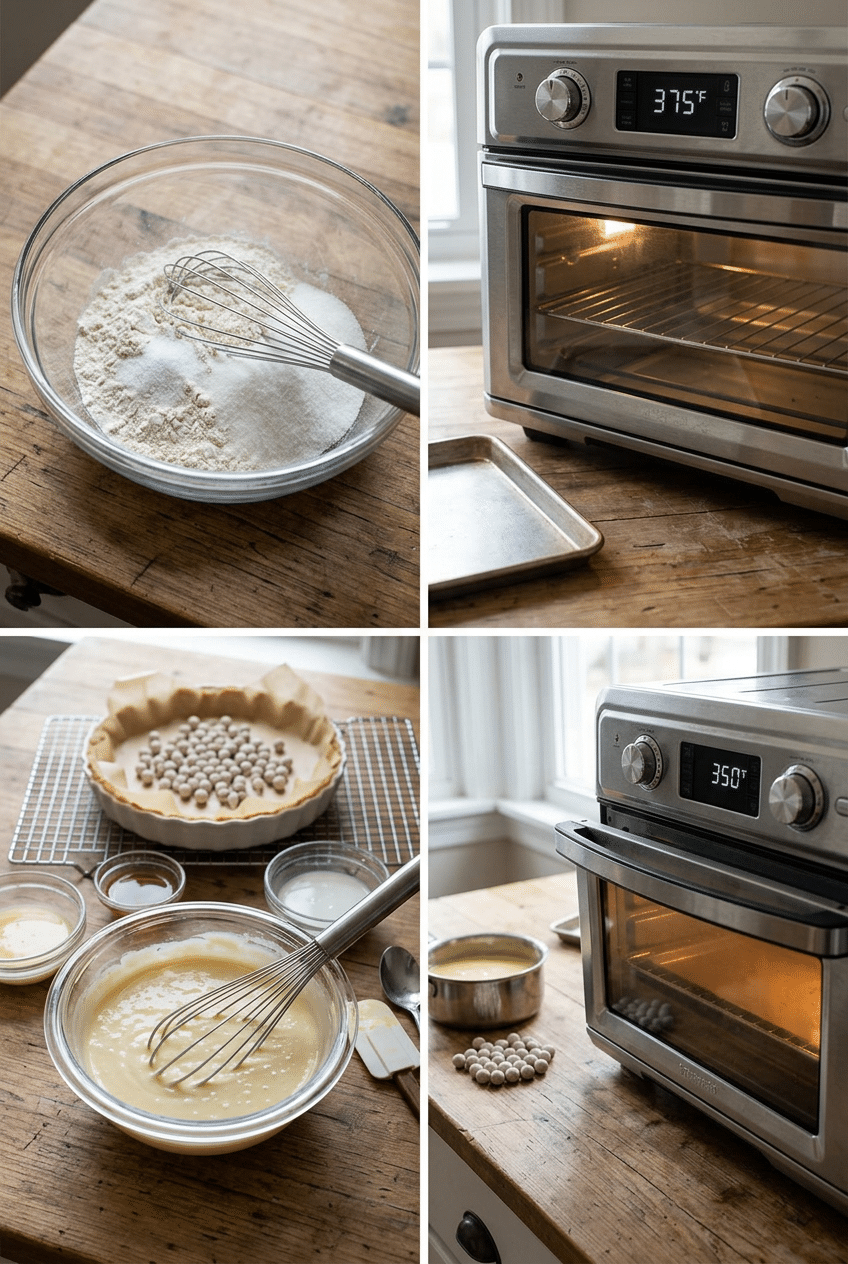
Step 4: Fill and Bake the Pie
Lower your oven temperature to 350°F (175°C). Set the blind-baked crust on a baking sheet — this makes it easier to get in and out of the oven and catches any drips. Pour the pumpkin filling into the warm crust, filling it almost to the rim. The filling will be very liquid at this point; that’s correct. If the crust edges look like they might over-brown, tent them loosely with small strips of aluminum foil or use a pie crust shield ring.
Bake at 350°F for 50-55 minutes. The pie is done when the edges are set and puffed slightly but the very center — about a 2-inch circle — still has a gentle wobble when you nudge the pan. Think of it like Jell-O: it should jiggle as one unit, not slosh. It will continue to firm up as it cools, and pulling it out too early is far better than overbaking into a cracked, rubbery mess.
👉 OXO Good Grips Pie Crust Shield — Stops the crust edges from burning during the long bake — reusable, adjustable, and fits any 9-inch pie.
Step 5: Cool and Serve the Pie
Transfer the pie to a wire rack and let it cool completely at room temperature — this takes about 2 full hours and you cannot rush it. Cutting into a warm pumpkin pie will give you a soupy, collapsing slice. The custard needs time to fully set. Once it’s at room temperature, refrigerate it uncovered for at least 1 more hour before slicing for the cleanest, most defined slices.
When you’re ready to serve, whip the heavy cream with the powdered sugar to soft, billowy peaks and pile it generously on each slice. Dust with a tiny pinch of ground cinnamon or freshly grated nutmeg. A 9-inch pie cuts cleanly into 8 slices — run a sharp knife under hot water and wipe it clean between cuts for bakery-level presentation.
Nutrition Information
- Per serving (1 slice
- 1/8 of pie
- without whipped cream): 320 cal
- 14g fat
- 43g carbs
- 7g protein
- 2g fiber
- 24g sugar
- 310mg sodium
Pro Tips
Don’t skip the room temperature dairy: Cold eggs and cold evaporated milk make the filling harder to emulsify and can cause the custard to bake unevenly — pull them from the fridge 30-60 minutes before you start and you’ll get a noticeably smoother, more consistent custard every single time.
The jiggle test is your best friend: The number one mistake people make is overbaking. At 55 minutes, open the oven and give the pan a gentle nudge. The outer 2-3 inches should be fully set while the center 2 inches still have a slow, Jell-O-like wobble. If the whole surface sloshes, give it 5 more minutes. If it’s completely rigid, you’ve gone too far — but it’ll still taste good.
Bake it on a sheet pan: Setting your pie dish on a rimmed baking sheet serves two purposes. First, it protects your oven floor from any drips. Second, it makes sliding the full, liquid-topped pie in and out of the oven dramatically safer — no more white-knuckling a sloshing pie dish with oven mitts.
Warm your spices in the pumpkin: For even deeper flavor, add the spices directly to the pumpkin puree and stir over medium heat on the stovetop for 2-3 minutes before mixing in the other ingredients. Heat blooms spices, releasing their essential oils — this is the move that makes your filling taste layered and complex rather than flat.
The water bath option: If you struggle with cracked custards, place your pie dish inside a larger roasting pan and add an inch of hot water around it. The steam keeps the oven humid, slows the bake, and nearly guarantees a crack-free surface — the same technique used for cheesecake.
Delicious Variations
Brown Butter Pumpkin Pie
Melt 2 tablespoons of butter in a light-colored pan over medium heat, swirling constantly, until it turns golden and smells nutty — about 4-5 minutes. Let it cool slightly, then whisk it directly into your filling along with the eggs. The toasty, caramel notes of brown butter add a whole new dimension to the spiced custard. It sounds like a small change but the flavor difference is remarkable.
Maple Pumpkin Pie
Replace half the brown sugar (so about 6 tablespoons) with pure dark maple syrup. The maple adds an earthy, woodsy sweetness that plays off the pumpkin spice in a way that regular sugar simply can’t match. Use Grade A Dark maple syrup for the most pronounced flavor. Your filling will be slightly thinner, so expect it to need an extra 5 minutes in the oven.
Gingersnap Crust Pumpkin Pie
Skip the traditional pastry crust entirely. Crush 1 and a half cups of gingersnap cookies into fine crumbs, mix with 5 tablespoons of melted butter and a tablespoon of sugar, and press the mixture firmly into your pie dish. Chill for 15 minutes before adding the filling. The spicy, snap-crackle crunch of the gingersnap base against the silky pumpkin custard is an absolute crowd-stopper.
Dairy-Free Pumpkin Pie
Swap the evaporated milk with full-fat canned coconut milk — not light coconut milk, which is too thin and will give you a wobbly, under-set pie. The coconut milk adds a very subtle tropical note that actually pairs beautifully with the warm spices. For a fully dairy-free version, use a store-bought vegan pie crust or make the pastry with cold coconut oil instead of butter.
Storage Instructions
Refrigerator
Pumpkin pie is a custard, which means it’s perishable and must be refrigerated — don’t leave it on the counter overnight no matter what your grandmother tells you. Once completely cooled, cover it loosely with plastic wrap or foil and refrigerate for up to 4 days. The crust will soften slightly by day 2, but the filling actually develops more flavor as it rests. Let individual slices sit at room temperature for 20-30 minutes before serving for the best texture.
Freezer
Pumpkin pie freezes beautifully and is one of the easiest pies to make ahead for the holidays. Cool the baked pie completely, then wrap it tightly in two layers of plastic wrap followed by a layer of aluminum foil. Freeze for up to 1 month. To thaw, transfer it to the refrigerator overnight — never thaw at room temperature or the custard gets watery. The texture holds up remarkably well; most guests won’t know it was frozen.
Make-Ahead
This pie is genuinely better made 1-2 days in advance. The flavors deepen and meld as the pie rests in the fridge, and the custard firms up to the perfect sliceable consistency. Make the dough up to 3 days ahead and refrigerate it as a disc. You can also make and blind-bake the crust shell up to 2 days ahead — let it cool completely and store it at room temperature covered loosely with a kitchen towel. Mix and bake the filling the day before serving.
For food safety guidelines, visit FDA Safe Food Handling Guidelines.
Frequently Asked Questions
Why did my pumpkin pie crack on top?
Cracking almost always means the pie was overbaked or cooled too quickly. The eggs in the custard tighten and pull apart when they get too hot. Two fixes: first, pull the pie out while the center still has a slight wobble — it will continue setting as it cools. Second, let it cool gradually at room temperature rather than going straight to the refrigerator. A cracked pie tastes identical to a perfect one; just cover the cracks with whipped cream and nobody will ever know.
Can I use fresh pumpkin instead of canned?
You can, but it requires extra work and the results are often inconsistent. Fresh pumpkin puree is wetter and less concentrated than canned, so you’ll need to roast and drain it thoroughly before using — line a strainer with cheesecloth, add the puree, and let it drain for at least an hour. Most professional bakers, including many Michelin-starred pastry chefs, actually prefer Libby’s canned pumpkin for its consistency. Save the fresh pumpkin for soup.
How do I know when pumpkin pie is done baking?
The jiggle test is the most reliable method. At the 50-minute mark, open the oven and give the pan a gentle nudge or tap. The edges should look fully set and slightly puffed, while the center 2-inch circle should jiggle slowly like Jell-O — moving as one cohesive unit, not sloshing like liquid. A toothpick inserted near the center should come out with just a tiny bit of custardy residue. The internal temperature should read 175°F on an instant-read thermometer if you want to be precise.
Can I make pumpkin pie without a pie dish?
Yes — a 9-inch springform pan works well and actually makes unmolding and slicing dramatically easier. You can also use a 9×9 square baking dish for a slab-style pumpkin custard bar, which skips the crust drama entirely. Press a graham cracker or gingersnap crust into the bottom, pour in the filling, and bake at the same temperature. You’ll get about 12 smaller bars that are perfect for a potluck or cookie-swap situation.
What is the difference between pumpkin pie filling and pumpkin puree?
This is one of the most important label checks you’ll do at the grocery store. Pumpkin puree (like Libby’s 100% Pure Pumpkin) contains only cooked, pureed pumpkin — nothing else. Pumpkin pie filling is pre-seasoned and pre-sweetened, meaning it already has sugar and spices added. If you use pie filling with this recipe, which also adds sugar and spices, your pie will be cloyingly sweet and over-spiced. Always grab the plain puree and control the seasoning yourself.
Why is evaporated milk used instead of regular milk or cream?
Evaporated milk is whole milk with about 60% of the water removed, which makes it richer and more concentrated than fresh milk without being as heavy as cream. It gives pumpkin pie its signature tender, creamy texture — not too dense, not too loose. Heavy cream makes the filling overly rich and can cause it to stay slightly wobbly in the center. Regular milk doesn’t have enough fat for a properly set custard. Evaporated milk hits the sweet spot that 70+ years of Thanksgiving pies have proven works.
More Recipes You Will Love
👉 Best Pumpkin Shaped Cheese Ball Recipe
👉 Perfect Caramel Apples Recipe
👉 Best Halloween Sugar Cookies (Decorated)
👉 Spooky Skeleton Charcuterie Board Recipe
This pumpkin pie is the kind of recipe you’ll make every November for the rest of your life. Silky, spiced, perfectly set — and honestly not that hard once you know the techniques. Make it a day ahead so your oven is free on the big day. Then slice it, pile on the whipped cream, and watch it disappear. Drop a comment below and tell me how it turned out — I read every single one.