
- Prep: 15 Minutes
- Cook: 20 Minutes
- Total: 35 Minutes
- Servings: 8 apples
A Quick Note Before You Start
Use cold, dry apples straight from the fridge — any moisture on the skin is caramel’s worst enemy. Wax-coated apples from the grocery store will cause the caramel to slide right off, so scrub them with hot water first or grab apples from a farmers market.
Caramel apples are one of those fall treats that look complicated but are completely doable at home — and the homemade version destroys anything you’d buy at a store. Real caramel, made from scratch, is thicker, richer, and actually stays put.
This recipe uses a cooked sugar caramel that sets firm enough to bite through cleanly without sliding off the apple. We’ll cover the exact temperature you need, the best apple varieties, and how to nail toppings that actually stick.
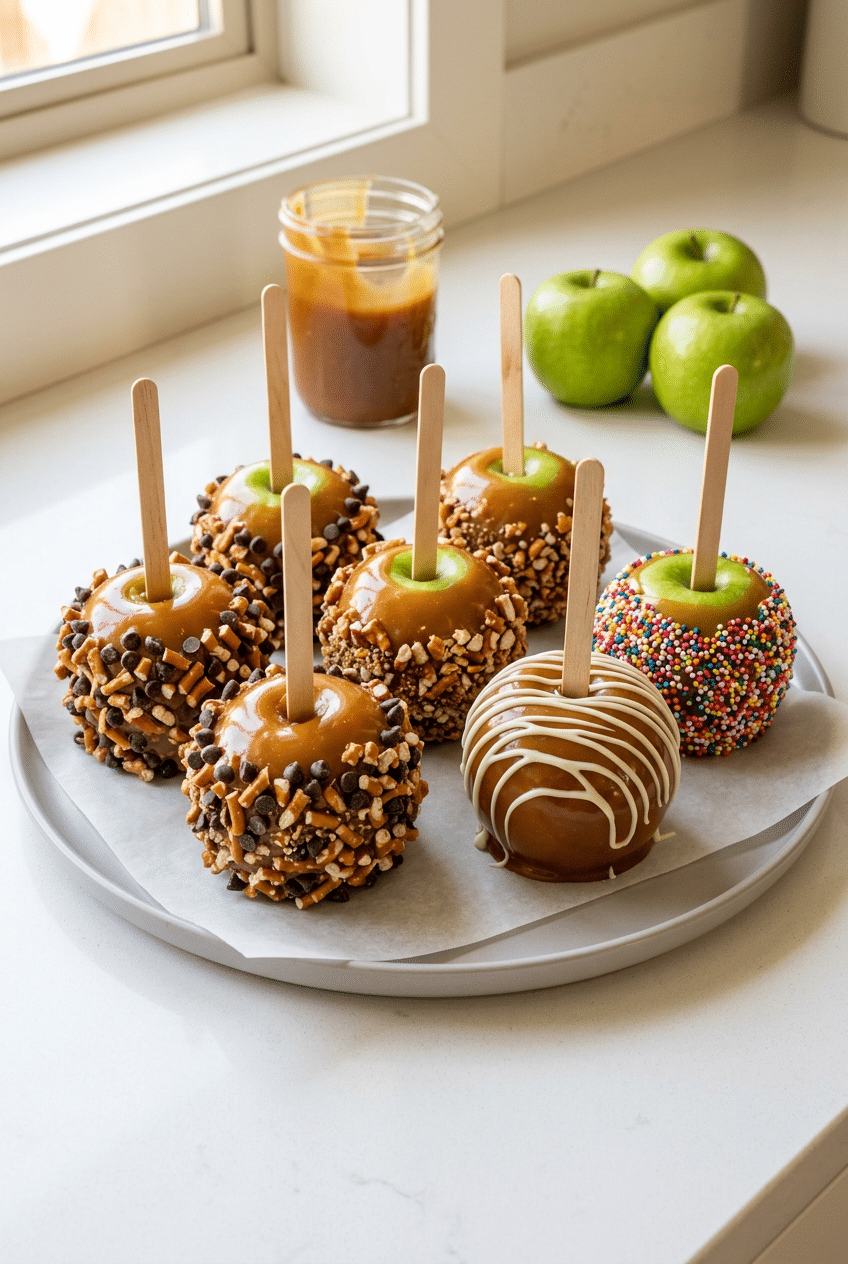
Ingredients for Caramel Apples
For the Caramel
- 2 cups (400g) granulated white sugar — the base of your caramel
- 1/2 cup (1 stick / 113g) unsalted butter, cut into cubes — adds richness and helps prevent crystallization
- 1 cup (240ml) heavy cream, at room temperature — cold cream will seize up when it hits the hot sugar
- 1/2 cup light corn syrup — keeps the caramel smooth and glossy without crystallizing; Karo Light Corn Syrup is the classic go-to and works perfectly here
- 1/4 cup water
- 1 tsp pure vanilla extract
- 1/2 tsp fine sea salt — balances the sweetness dramatically
For the Apples
- 8 medium Granny Smith apples — the tartness cuts through the sweet caramel; firm flesh holds up to dipping
- 8 wooden craft sticks or lollipop sticks — push them in at least 1.5 inches so the apple doesn’t slide off mid-bite
Optional Toppings
- Crushed salted pretzels
- Mini chocolate chips
- Crushed graham crackers
- Chopped peanuts or pecans
- Rainbow sprinkles
- Melted white or dark chocolate for drizzling
- Flaky sea salt — Maldon Sea Salt Flakes sprinkled over the caramel add a beautiful finish and incredible flavor contrast
Optional Add-Ins
- 1/4 tsp cinnamon stirred into the caramel for a spiced version
- 1 tbsp bourbon stirred in at the end (off heat) for an adult version
- Crushed Oreos for rolling
- Toffee bits
- Shredded coconut
How to Make Caramel Apples Step by Step
Step 1: Prep Your Apples First
Start here, not with the caramel — once the caramel is ready, you have maybe 10 minutes to work before it thickens too much. Wash your apples in very hot water and scrub them firmly with a clean towel to remove any wax coating from the skin. Dry them completely, then refrigerate them for at least 30 minutes. Cold apples help the caramel grip and set faster once dipped.
Push a wooden craft stick firmly into the stem end of each apple, pressing at least 1.5 inches deep. Line a baking sheet with parchment paper and lightly spray it with cooking spray — this prevents the caramel from welding the apples to the pan. Set up your toppings in shallow bowls now so you’re not scrambling once the caramel is ready.
👉 Wooden Candy Apple Craft Sticks (50-pack) — Sturdy, food-safe wooden sticks that actually hold the apple without snapping.
Step 2: Cook the Caramel Base
Combine the sugar, corn syrup, and water in a heavy-bottomed saucepan over medium heat. Stir just until the sugar dissolves, then stop stirring completely. Stirring after the sugar melts causes crystallization, which turns your caramel grainy and dull. Let the mixture cook undisturbed — you can swirl the pan gently if needed, but keep that spoon out.
Clip your candy thermometer to the side of the pan. You’re watching for the mixture to reach 320°F (160°C), which is the light amber stage. This takes about 8 to 10 minutes. The color shifts from clear to pale gold to a deeper amber — trust the thermometer more than your eyes at first, because color can be deceptive depending on your pan.
👉 Taylor Precision Candy Thermometer — A candy thermometer is non-negotiable here — guessing temperature kills caramel apples every time.
Step 3: Add Cream, Butter, and Salt
Once you hit 320°F, carefully add the butter cubes. The mixture will bubble violently — that’s normal, just keep your face back and use a long-handled spoon. Stir until the butter is fully melted, then slowly pour in the heavy cream in a thin, steady stream while stirring constantly. The cream needs to be at room temperature; cold cream shocks the sugar and can seize or crystallize the caramel.
Stir in the salt and vanilla, then let the caramel continue cooking until it reaches 245°F (118°C) — this is firm-ball stage, and it’s the sweet spot for dipping caramel that’s thick enough to stay on the apple but still flexible when you bite. Remove from heat immediately at 245°F and let it cool for 3 to 5 minutes until it thickens slightly and stops bubbling aggressively.
Step 4: Dip the Apples
Tilt the saucepan to one side to create a deep pool of caramel. Hold the apple by the stick and dip it straight down, submerging it almost to the stick. Lift it out and let the excess drip off for about 10 seconds — twirl the apple slowly to help the caramel set evenly around the sides. Then immediately roll it in your topping of choice, pressing gently so the pieces adhere before the caramel skins over.
Set each finished apple upright on your prepared parchment sheet. If the caramel is pooling too much at the base, try tipping the apple slightly or resting it at an angle for the first few seconds. Work quickly — as the caramel cools, it thickens and becomes harder to dip cleanly. If it gets too thick before you’re done, reheat it gently over low heat for 60 seconds.
👉 Maldon Sea Salt Flakes — A pinch of Maldon over finished caramel apples takes them from good to unforgettable.
Step 5: Let the Caramel Set
Let the dipped apples sit at room temperature for at least 30 to 45 minutes before eating or wrapping. This gives the caramel time to fully firm up so it doesn’t sag or slide. If your kitchen is warm, pop the tray in the refrigerator for 15 minutes to speed up the process. Don’t refrigerate them for long-term storage — cold air turns the apple skin slick and causes the caramel to weep and slide off.
Once set, you can drizzle melted chocolate over the top using a fork or spoon for decoration. Melt your chocolate chips in 30-second microwave bursts, stir until smooth, then drizzle freely. The chocolate hardens quickly against the cold caramel and adds another layer of flavor and visual appeal.
👉 Individual Clear Cellophane Treat Bags — Wrap finished caramel apples in these for gifting or a party presentation that looks professional.
Nutrition Information
- Per serving (1 caramel apple
- no toppings): ~380 cal
- 14g fat
- 65g carbs
- 1g protein
Pro Tips
Remove the apple wax first: Store-bought apples are coated in food-grade wax to extend shelf life — it’s the number one reason caramel slides right off. Submerge each apple in boiling water for 10 seconds, then scrub vigorously with a clean cloth. You’ll actually see a slight film come off. This one step makes a dramatic difference in how well the caramel adheres.
Temperature is everything: Pulling caramel at 235°F gives you a soft, fudgy coating that’s too runny. Pulling at 260°F gives you something rock-hard and brittle. The 240–248°F window (firm-ball stage) is your target. If you don’t own a candy thermometer, drop a small amount of caramel into cold water — it should form a firm but pliable ball you can shape with your fingers.
Work in a dry environment: Humidity is caramel’s enemy. On a rainy or particularly humid day, your caramel will stay tacky longer and may not set up as firm as you want. Cook on a dry day when possible, or run your kitchen AC for a bit before you start. This matters more than most people realize.
Reheat the caramel if needed: If the caramel thickens too much mid-dipping (which happens if you’re making a big batch), set the saucepan back over very low heat for 60 to 90 seconds and stir gently. It will loosen back to a dippable consistency without damaging the texture.
Toppings need to go on immediately: You have about 15 to 20 seconds after dipping before the caramel skins over and toppings won’t stick. Have your bowls ready and move fast. Press toppings in gently with your palm rather than just rolling the apple — the pressure helps them embed into the soft caramel.
Delicious Variations
Chocolate-Dipped Caramel Apples
After your caramel sets for 15 minutes, dip the lower half of each apple into melted dark or milk chocolate. Let the chocolate harden completely on parchment before adding any additional drizzle or toppings. The three-layer combination of tart apple, chewy caramel, and snappy chocolate shell is next-level. Use Wilton Candy Melts for the easiest, smoothest result.
Spiced Cinnamon Caramel Apples
Stir 1/2 teaspoon of cinnamon and a tiny pinch of cayenne into the finished caramel right before you start dipping. The cinnamon deepens the warm flavor and the faint heat from the cayenne lingers in a way that’s surprising and completely addictive. Roll in crushed cinnamon graham crackers to double down on the spice theme.
Peanut Butter Drizzle Apples
Melt 1/4 cup of creamy peanut butter with 1 teaspoon of coconut oil in the microwave until fully liquid. Drizzle it over the set caramel apples, then immediately roll them in crushed salted peanuts or Reese’s Pieces. The peanut butter hardens slightly as it cools, creating a second layer of coating that pairs incredibly well with the tart Granny Smith base.
S’mores Caramel Apples
Roll freshly dipped caramel apples in a mix of crushed graham crackers and mini marshmallows, pressing firmly so everything adheres. Then drizzle with melted dark chocolate. The result tastes exactly like a campfire s’more in every bite, and the visual presentation is stunning — perfect for Halloween parties or fall events.
Candy Bar Caramel Apples
Crush your favorite candy bars — Snickers, Butterfingers, and Heath bars all work beautifully — into rough chunks and spread them in a shallow dish. Roll the freshly dipped apple through the candy pieces while the caramel is still tacky. The different textures of nougat, chocolate, and toffee create an over-the-top, indulgent apple that kids and adults both lose their minds over.
Storage Instructions
Refrigerator
Caramel apples last up to one week in the refrigerator. Wrap each apple individually in a small square of cellophane or wax paper and store them upright in a tall container so they don’t touch each other. The wax paper prevents the caramel from sticking to anything and keeps the toppings from getting compressed. Pull them out about 15 minutes before serving — cold caramel straight from the fridge is quite hard and less pleasant to bite into.
Freezer
You can freeze caramel apples, though the texture changes slightly on thaw. Wrap each apple tightly in plastic wrap, then in foil, and freeze for up to 6 weeks. Thaw in the refrigerator overnight. The caramel may become a bit softer and the apple skin slightly slippery — they’re still totally edible but won’t be quite as pristine as fresh. Freezing works best if you haven’t added toppings yet, since crushed pretzels and cookies can get soggy.
Make-Ahead
Caramel apples are an ideal make-ahead treat for parties and Halloween events. Make them up to 3 days in advance and store wrapped in the fridge. The caramel actually becomes firmer and easier to eat after a day or two of resting. If you’re making them for gifting, wrap in individual clear cellophane bags and tie with a ribbon — they hold up beautifully at room temperature for up to 24 hours for short-term display at events.
For food safety guidelines, visit FDA Food Safety Guidelines for Safe Food Handling.
Frequently Asked Questions
Why does my caramel slide off caramel apples?
The two most common reasons are wax on the apple skin and moisture. Grocery store apples are coated in food-grade wax — it’s invisible but it completely repels caramel. Scrub apples with boiling water before dipping. The second culprit is moisture: wet apples, humid kitchens, or caramel that isn’t cooked to the right temperature. Cold, dry apples dipped in properly cooked caramel will hold beautifully.
What are the best apples for caramel apples?
Granny Smith is the gold standard — their firm flesh doesn’t get mushy under the caramel, and the tartness balances the intense sweetness perfectly. Honeycrisp is a close second if you prefer a sweeter apple with the same firm texture. Avoid Red Delicious and Fuji — they’re too soft and too sweet, and the caramel coating makes them cloying.
What temperature should caramel apples be cooked to?
You’re aiming for 245°F to 248°F, which is the firm-ball stage on a candy thermometer. This produces caramel that’s thick and chewy — firm enough to stay on the apple without sliding, but soft enough that you can bite through it without pulling the entire coating off in one go. Under 240°F and the caramel runs; over 255°F and it becomes too hard and brittle.
Can I use store-bought caramel for caramel apples?
You can, but results vary. Soft caramel candies like Kraft unwrapped caramels can be melted with a couple tablespoons of heavy cream and work reasonably well for a quicker version. They won’t be as thick or as flavorful as homemade, and they tend to slide off more easily. If you use store-bought caramel, cook it to about 240°F before dipping for better adhesion.
How far in advance can I make caramel apples?
Up to 3 days ahead works great. Make them, let them set, wrap each one individually in cellophane or wax paper, and store in the fridge. Pull them out 15 minutes before serving so the caramel softens slightly. For the absolute best texture and appearance, same-day or next-day is ideal — but 3-day-ahead apples are still completely delicious and hold up well for parties.
How do I keep toppings from falling off caramel apples?
Timing is everything. Roll or press toppings onto the apple within 15 seconds of pulling it out of the caramel. After that, the surface starts to skin over and won’t hold anything. Press toppings in firmly with clean hands rather than gently rolling — the physical pressure embeds them into the soft caramel. If your toppings are still falling off after cooling, a light drizzle of melted chocolate over the top can act as a sealant.
More Recipes You Will Love
👉 Perfect Sheet Pan Sausage & Veggies Recipe
👉 Perfect Taco Meat Recipe (Better Than Takeout)
👉 Perfect Teriyaki Chicken Bowls Recipe
👉 Perfect Chicken Caesar Wraps Recipe
Caramel apples are one of those recipes where the homemade version is so much better it almost feels unfair. Once you nail the temperature and the apple prep, you’ll never buy a pre-made one again. Make a batch this weekend, roll them in every topping you can find, and share a photo in the comments — I want to see your creations. Tag a friend who needs this recipe in their fall lineup.