
- Prep: 10 Minutes
- Cook: 15 Minutes
- Total: 25 Minutes
- Servings: 4 servings
Table of Contents
A Quick Note Before You Start
These strips come together fast — but the SECRET is letting the pan fully preheat before the tortilla touches it. A cold pan equals a pale, limp quesadilla. Hot pan equals that crackling golden crust that makes people reach for seconds.
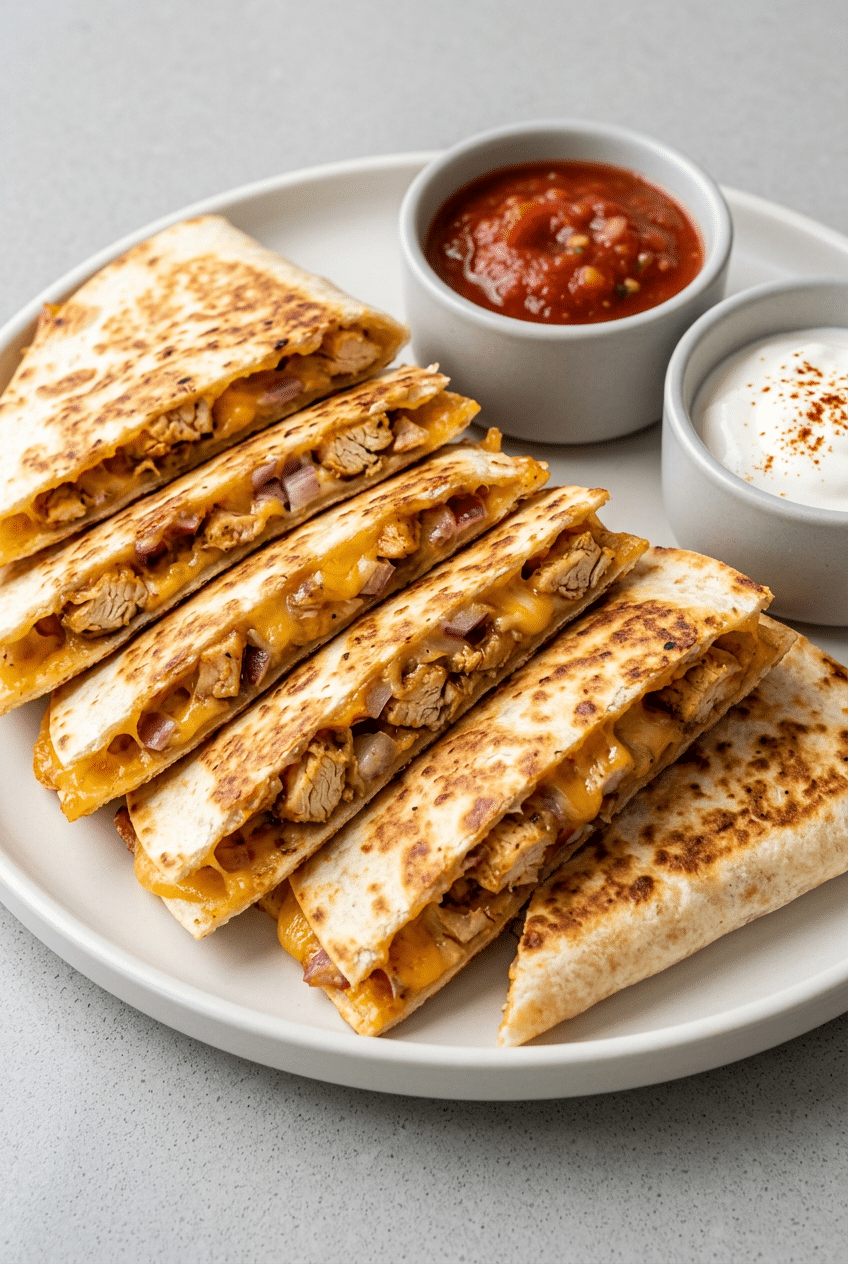
Chicken quesadilla strips are everything you love about a classic quesadilla, sliced into dippable, shareable strips that work as a weeknight dinner, game day snack, or lunchbox hero.
We’re talking seasoned shredded chicken, two melty cheeses, and a crispy tortilla shell — sliced into strips so every single bite has the perfect crust-to-filling ratio.
Ingredients for Chicken Quesadilla Strips
For the Chicken Filling
- 2 cups cooked shredded chicken — rotisserie works great here
- 1 tsp chili powder
- 1 tsp garlic powder
- 1/2 tsp cumin
- 1/2 tsp smoked paprika
- 1/4 tsp onion powder
- 1/2 tsp kosher salt
- 1/4 tsp black pepper
- 1 tbsp fresh lime juice
- 2 tbsp chipotle peppers in adobo sauce, minced — adds smoky heat that takes the filling from basic to crave-worthy
For the Quesadillas
- 4 large (10-inch) flour tortillas
- 1 cup shredded Monterey Jack cheese
- 1 cup shredded sharp cheddar cheese
- 1/2 cup finely diced white onion
- 1/2 cup finely diced green bell pepper
- 1 tbsp butter — split across batches for browning
- 1 tbsp neutral oil (avocado or vegetable)
For Serving
- Sour cream
- Fresh salsa or pico de gallo
- Guacamole
- Fresh lime wedges
- Chopped fresh cilantro
Optional Add-Ins
- 1/4 cup diced pickled jalapeños
- 1/4 cup corn kernels (canned or frozen, thawed)
- 1/4 cup black beans, drained and rinsed
- 2 tbsp diced roasted red peppers
- 1/4 tsp cayenne for extra heat
How to Make Chicken Quesadilla Strips Step by Step
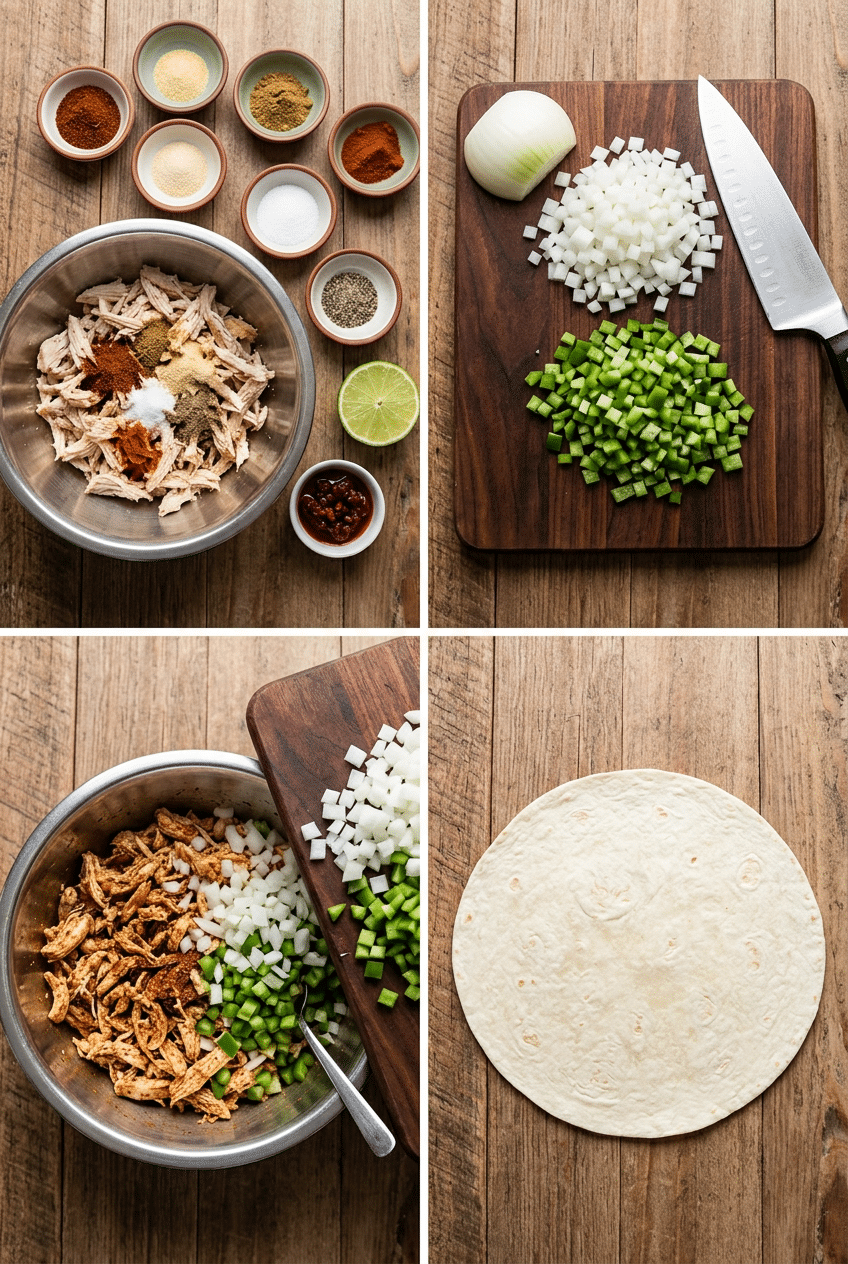
Step 1: Season and Prep the Chicken
Grab your shredded chicken and toss it in a bowl with the chili powder, garlic powder, cumin, smoked paprika, onion powder, salt, pepper, lime juice, and minced chipotle in adobo. Use your hands or two forks to work the seasoning all the way through the meat — you want every strand coated, not just the outside layer.
If you’re starting from raw chicken, poach two boneless breasts in salted water for 15 minutes until cooked through, then shred them while still warm. Warm chicken shreds in clean long strands instead of crumbling into dry chunks, which makes a huge difference in the final texture of your strips.
👉 San Marcos Chipotle Peppers in Adobo Sauce — This specific brand has the perfect smoky-to-spicy balance — one can lasts weeks in the fridge.
Step 2: Dice Your Vegetables Small
Dice your white onion and green bell pepper into a very fine, uniform dice — we’re talking roughly 1/4-inch pieces. Big chunks of raw vegetable inside a quesadilla don’t cook through fully in the short pan time, leaving you with a crunchy, slightly raw bite in the middle of all that melty cheese.
A fine dice means the vegetables soften just enough from the residual heat of the pan and the hot filling without needing any pre-cooking. If you want them even softer, sauté them in a dry pan over medium heat for 3 minutes before combining with the chicken.
Step 3: Combine the Filling
Add the diced onion and bell pepper directly to the seasoned chicken bowl and mix everything together. In a separate bowl, toss the Monterey Jack and cheddar together so they’re fully combined — you’ll be using this mixed cheese blend for every quesadilla, and pre-mixing ensures you get both cheeses in every single bite rather than pockets of one or the other.
The two-cheese combo is intentional. Monterey Jack melts smooth and creamy while cheddar brings sharpness and pull. Using just one cheese gives you either gooey-but-bland or flavorful-but-stringy — the combination nails both.
Step 4: Build the Quesadilla
Lay a flour tortilla flat on your work surface. Spread about 1/4 cup of the cheese blend across the entire bottom half of the tortilla, leaving a 1/2-inch border at the edge. Then layer roughly 1/2 cup of the chicken filling on top of the cheese, spread it evenly, and top with another 1/4 cup of cheese. Fold the bare top half of the tortilla over the filling to create a half-moon shape.
Cheese on both the bottom AND top of the filling is the trick that actually holds everything together when you slice the strips. The bottom cheese melts into the tortilla and the top cheese acts as glue between the filling and the upper tortilla — your strips stay intact instead of spilling their guts onto the cutting board.
Step 5: Get the Pan Screaming Hot
Place a large skillet or cast iron pan over medium-high heat and let it heat up for a full 2 minutes before adding anything. When you flick a drop of water onto the surface and it immediately evaporates with a sizzle, you’re ready. Add half the butter and half the oil together, swirl to coat, and let the butter foam and subside — that’s your cue to add the quesadilla.
The butter-and-oil combo is intentional. Butter alone burns at high heat before the tortilla gets properly golden. Oil alone gives you a greasy, pale result without that rich flavor. Together, the oil raises the smoke point while the butter delivers color and taste. This is the exact combination that gives restaurant quesadillas their signature golden crust.
👉 Lodge 10.25-Inch Cast Iron Skillet — Cast iron holds heat perfectly and gives quesadilla strips the crispiest, most even crust possible.
Step 6: Cook Until Golden and Crispy
Slide the folded quesadilla into the hot pan and press it down gently with a spatula. Cook for 2 to 3 minutes without moving it — resist the urge to peek or lift. You’ll see the edges of the tortilla start to turn golden and the cheese will begin melting visibly near the fold. When the underside is deep golden brown, carefully flip it and cook another 2 minutes on the second side.
Don’t move the quesadilla around once it’s in the pan. Contact time with the hot surface is what creates that crispy crust — every time you lift or shift it, you’re interrupting the browning process. Cook your remaining quesadillas in the same pan, wiping it clean between batches if any burnt bits accumulate, adding fresh butter and oil each time.
Step 7: Rest, Then Slice Into Strips
Transfer the cooked quesadilla to a cutting board and let it rest for 60 to 90 seconds before cutting. This rest is non-negotiable — the cheese is molten the second it comes off the pan, and if you cut immediately, it all pours out and you lose the structural integrity of every strip. Give it just enough time to set up so the filling stays put.
Once rested, use a sharp chef’s knife or a pizza wheel to slice the half-moon into strips about 1 to 1.5 inches wide, cutting straight down in firm decisive strokes rather than sawing. Sawing tears the tortilla and drags the filling out. Clean slices keep the layers intact. Arrange them cut-side-up on a serving board so everyone can see those gorgeous melted cheese layers.
👉 OXO Good Grips Pizza Wheel — Slices quesadilla strips cleanly in one roll without dragging the filling out.
Nutrition Information
- Per serving (1 quesadilla
- sliced into strips): 480 cal
- 22g fat
- 38g carbs
- 34g protein
- 3g fiber
- 890mg sodium
Pro Tips
Don’t overfill: The biggest mistake people make is packing the quesadilla so full it won’t seal or flip cleanly. A thin, even layer of filling — maybe 1/2 cup chicken and 1/2 cup total cheese per quesadilla — gives you clean sliceable strips. More filling sounds better but just creates a soggy, collapsing mess.
Shred your own cheese: Pre-shredded cheese is coated in cellulose powder to prevent clumping, which also prevents proper melting. Block cheese you shred yourself melts completely smooth and creates that Instagram-worthy cheese pull. Takes two extra minutes and makes a noticeable difference in texture.
The resting trick: After cooking, sliding the quesadilla off the pan onto a wire cooling rack instead of a flat plate keeps the bottom crispy. A flat plate traps steam underneath and softens the crust while it rests. The wire rack lets air circulate and keeps that crunch intact until it hits the table.
Use medium-high, not high: Cranking the heat to high gets the outside golden before the cheese has time to melt, leaving you with a crunchy exterior and cold, unmelted cheese inside. Medium-high hits the sweet spot — golden crust achieved right around the same time the cheese is fully melted and bubbly.
Press it down: A gentle press with a flat spatula in the first minute of cooking helps the cheese make full contact with both tortilla layers, acting as a better seal and helping the whole quesadilla hold together when you slice it into strips.
Delicious Variations
BBQ Chicken Quesadilla Strips
Swap the chipotle-spice seasoning for two tablespoons of your favorite smoky BBQ sauce tossed directly into the shredded chicken. Add a handful of thinly sliced red onion to the filling. The sweet and tangy sauce caramelizes slightly against the hot pan, and the red onion adds a sharp contrast. Serve with ranch dressing instead of sour cream for dipping.
Buffalo Chicken Quesadilla Strips
Toss the shredded chicken in three tablespoons of Frank’s RedHot Buffalo sauce and one tablespoon of melted butter. Use pepper jack cheese instead of cheddar for extra heat. These strips are incredible served with blue cheese dressing and celery sticks on the side — basically a buffalo wing in crispy tortilla form. Perfect for game day.
Spinach and Chicken Quesadilla Strips
Wilt two large handfuls of fresh baby spinach in the pan for 90 seconds before building the filling. Squeeze out excess moisture thoroughly before adding to the chicken — wet spinach creates steam that makes the tortilla soggy. Add a tablespoon of cream cheese to the filling for a rich, creamy texture that balances the mild earthiness of the greens.
Sheet Pan Quesadilla Strips
Assemble all four quesadillas on two large baking sheets, brush the tops with melted butter, and bake at 425°F for 10 to 12 minutes, flipping halfway through. You lose a tiny bit of that skillet crispiness but you gain the ability to cook all four at the same time — which is a lifesaver when feeding a crowd of eight or more.
Storage Instructions
Refrigerator
Store leftover chicken quesadilla strips in an airtight container or wrapped tightly in aluminum foil for up to 3 days in the refrigerator. The key to reheating them without making them soggy is a dry skillet over medium heat for 2 to 3 minutes per side — this re-crisps the tortilla beautifully. Avoid the microwave if you care about texture; it turns the tortilla rubbery and steams the cheese into a strange texture.
Freezer
Cooked quesadilla strips freeze surprisingly well for up to 2 months. Let them cool completely, arrange them in a single layer on a baking sheet, freeze for one hour until solid, then transfer to a zip-lock freezer bag. This flash-freeze step prevents them from sticking together. Reheat directly from frozen in a 375°F oven for 12 to 15 minutes, flipping once at the halfway mark, until heated through and crispy again.
Make-Ahead
You can prep the seasoned chicken filling and the mixed cheese blend up to two days ahead and store them in separate containers in the fridge. When you’re ready to eat, the actual cook time is under 15 minutes since all the prep work is done. You can also assemble the uncooked folded quesadillas, stack them with parchment paper between each one, wrap the stack in plastic wrap, and refrigerate for up to 24 hours before cooking.
For food safety guidelines, visit FDA Food Safety Guidelines for Poultry.
Frequently Asked Questions
What chicken works best for chicken quesadilla strips?
Rotisserie chicken is the fastest and most flavorful option because it’s already seasoned and the meat is incredibly tender. If you’re cooking from scratch, boneless skinless chicken thighs actually shred better than breasts and stay juicier under the high heat of the pan. Breasts work fine but can dry out if overcooked before shredding. Whatever you use, shred it while it’s still warm — cold chicken shreds into dry, crumbly chunks that don’t hold together as well inside the quesadilla.
How do I keep chicken quesadilla strips crispy?
Three things keep quesadilla strips crispy: a fully preheated pan, a butter-and-oil combination for cooking fat, and resting them on a wire rack instead of a flat plate after cooking. The wire rack is the one most people skip. Resting on a flat surface traps steam under the tortilla and softens everything you worked to crisp up. If you’re making multiple batches for a crowd, keep finished strips on a baking sheet in a 200°F oven on a wire rack to hold them warm and crispy for up to 30 minutes.
Can I make chicken quesadilla strips in an air fryer?
Absolutely, and the results are fantastic. Assemble your quesadilla the same way, brush both sides lightly with oil or melted butter, and air fry at 375°F for 8 to 10 minutes, flipping at the 5-minute mark. The circulating hot air crisps up both sides evenly without needing to flip with as much precision as a stovetop. Let the quesadilla rest for 60 seconds before slicing, then cut into strips using a pizza wheel.
Why do my quesadilla strips fall apart when I cut them?
Usually two reasons: too much filling, or cutting before the cheese has set. Overfilling makes it impossible for the cheese to act as glue between the tortilla layers — the pressure of cutting pushes everything out the sides. Cutting too early means the cheese is still liquid and spills rather than holds. Use a modest amount of filling, wait 90 seconds after removing from the pan, and make clean downward strokes with a sharp knife or pizza wheel rather than sawing back and forth.
What dipping sauces go best with chicken quesadilla strips?
The classic trio is salsa, sour cream, and guacamole — and there’s a reason every Mexican restaurant serves exactly those three. For something different, chipotle ranch (ranch dressing plus a minced chipotle pepper) adds a smoky kick. Honey mustard works surprisingly well with the BBQ chicken variation. For the buffalo version, blue cheese dressing is non-negotiable. A simple avocado crema made from blended avocado, lime juice, and sour cream is also outstanding and comes together in two minutes.
Can I use corn tortillas instead of flour for quesadilla strips?
You can, but it requires a different approach. Corn tortillas are smaller and more fragile, so use two of them open-faced rather than folding one — lay one flat, add filling, and press a second tortilla on top. They also crisp up faster so keep your heat at medium rather than medium-high. The flavor is earthier and slightly more authentic, and corn tortillas are naturally gluten-free if that matters for your household. The strips will be smaller since corn tortillas are typically 6 inches versus 10 for flour.
More Recipes You Will Love
👉 Perfect BBQ Baby Back Ribs Recipe (Fall-Off-Bone)
👉 All-American Burger Recipe (Juicy & Classic)
👉 Perfect Corn on the Cob Recipe (5 Easy Ways)
These chicken quesadilla strips have become a weeknight staple in our kitchen for good reason — fast, crowd-pleasing, and endlessly customizable. Make them once and you’ll stop ordering quesadillas out entirely. Try the recipe this week, then drop a comment below and tell us which dipping sauce you went with. If you snapped a photo, tag us — we love seeing your versions!