
- Prep: 15 Minutes
- Cook: 30 Minutes
- Total: 45 Minutes
- Servings: 6 servings
A Quick Note Before You Start
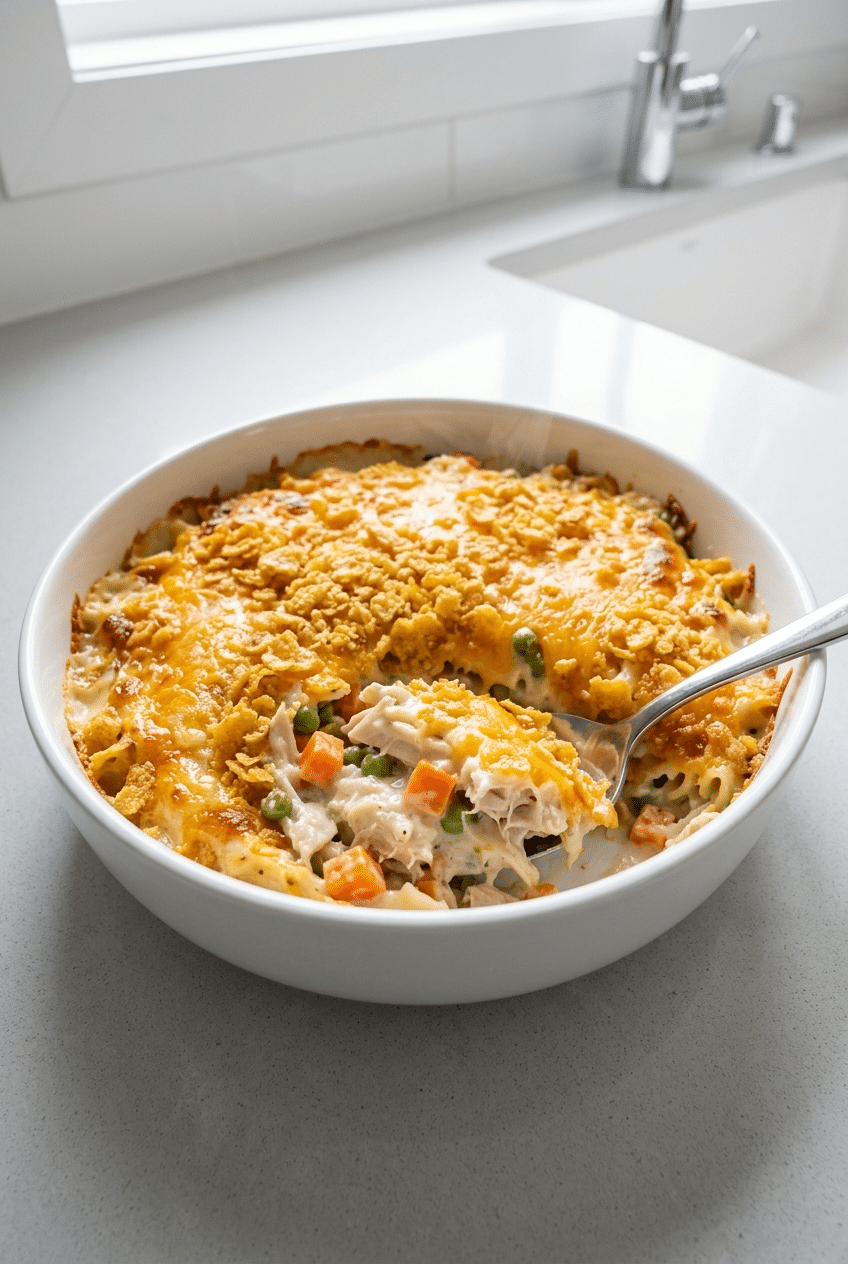
This rotisserie chicken casserole transforms store-bought convenience into homemade comfort. The secret is layering flavors with cream of chicken soup and letting the cheese get golden and bubbly.
Rotisserie chicken casserole is the ultimate weeknight dinner hack that tastes like you spent hours in the kitchen. Using store-bought rotisserie chicken cuts prep time in half while delivering restaurant-quality flavor.
This recipe combines tender chicken with fluffy rice, crisp vegetables, and a creamy sauce that bubbles to golden perfection. One casserole dish feeds six people with minimal cleanup required.
Ingredients for Perfect Rotisserie Chicken Casserole
For the Main Casserole
- 3 cups cooked rotisserie chicken — shredded, skin removed
- 2½ cups cooked white rice — long-grain works best
- 1 (10.75 oz) can cream of chicken soup — condensed, undiluted
- 1 cup sour cream — full-fat for richness
- ¾ cup mayonnaise — real mayo, not miracle whip
- 1 cup shredded sharp cheddar cheese — divided
- ¾ cup thinly sliced celery — adds crucial crunch
- ½ cup slivered almonds — for texture contrast
- 1 cup frozen peas and carrots — thawed
- 1 medium yellow onion — finely diced
- 2 cloves garlic — minced
- 1 teaspoon garlic powder — enhances flavor
- ½ teaspoon black pepper — freshly ground
- 1 teaspoon salt — or to taste
For the Crispy Topping
- 2 cups cornflakes cereal — lightly crushed
- 4 tablespoons butter — melted
- ½ cup shredded cheddar cheese — for extra golden top
Optional Add-Ins
- 1 cup frozen broccoli florets
- ½ cup sliced mushrooms
- 1 tablespoon fresh thyme leaves
How to Make Perfect Rotisserie Chicken Casserole Step by Step
Step 1: Prep Your Ingredients
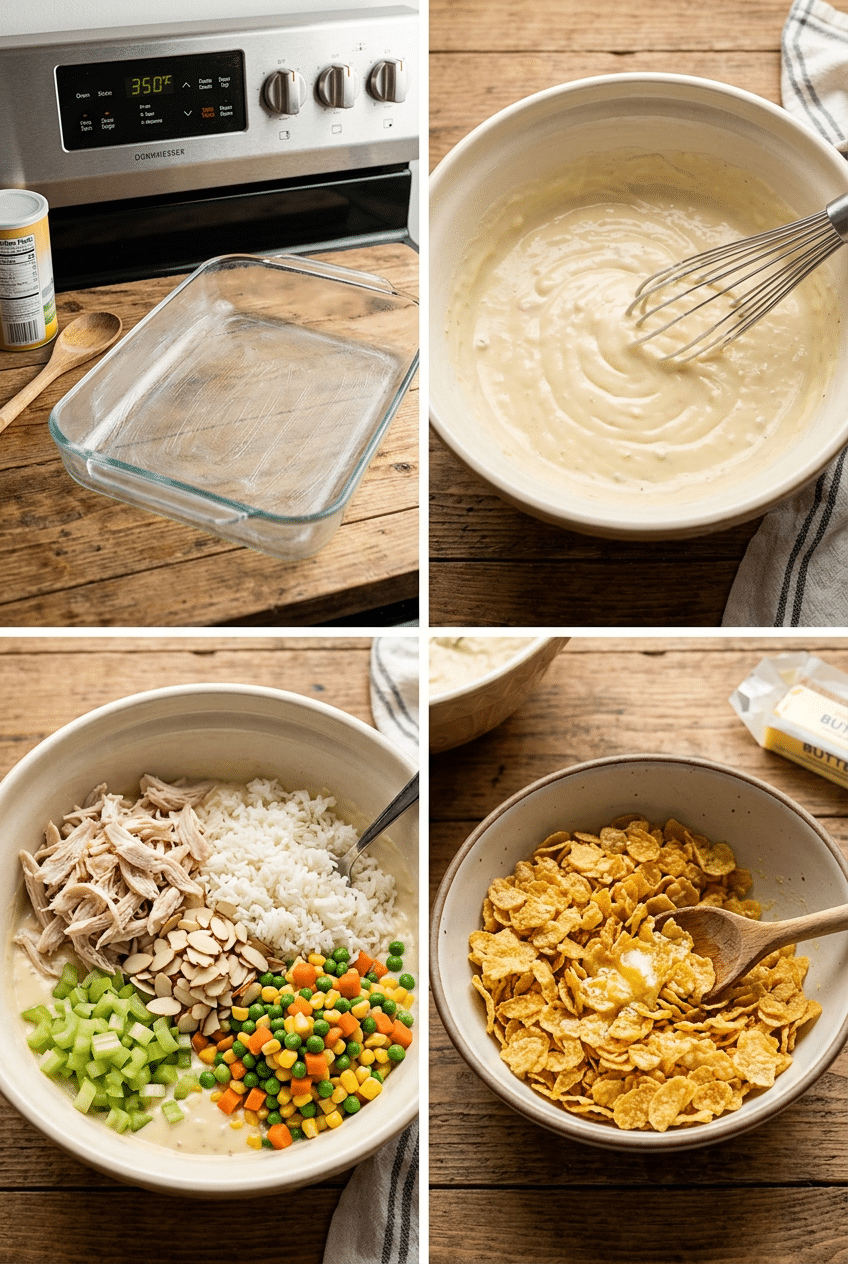
Preheat your oven to 350°F and spray a 9×13-inch baking dish with cooking spray. Remove all meat from the rotisserie chicken, discarding skin and bones, then shred into bite-sized pieces. You should have about 3 cups of meat total.
Cook your rice according to package directions if you haven’t already, then let it cool slightly. Thaw your frozen vegetables by leaving them at room temperature for 30 minutes, or run them under cool water and drain thoroughly.
Having everything prepped before you start mixing saves time and prevents the casserole from becoming watery. Properly thawed vegetables are crucial because excess moisture will make your casserole soggy instead of creamy.
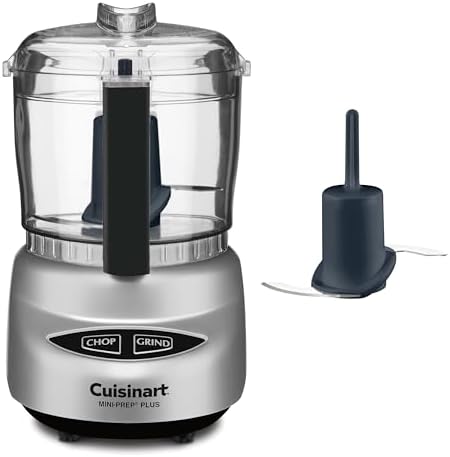
- SUPERIOR FUNCTION: The Cuisinart Mini-Prep Plus Food Processor offers an efficient 250-watt motor and patented reversibl…
- CONVENIENT CONTROL: The 24-ounce food chopper with durable, lightweight plastic body features a push-button control pane…
- EASY CLEANUP: A dishwasher-safe bowl and lid provide for easy cleanup, while the motor base can be wiped clean with a da…
Step 2: Create the Creamy Base
In a large mixing bowl, combine the cream of chicken soup, sour cream, and mayonnaise until completely smooth. Whisk vigorously to eliminate any lumps. Add the garlic powder, salt, and black pepper, then stir in half of the shredded cheddar cheese.
The combination of sour cream and mayonnaise creates incredible richness without being heavy. The acid in the sour cream brightens the flavors while the mayonnaise adds silky texture that coats every ingredient.
Mixing the wet ingredients first ensures even distribution throughout the casserole. This prevents pockets of bland rice or overly salty spots that can happen when seasonings aren’t properly incorporated.
Step 3: Combine Main Ingredients
Add the shredded chicken, cooked rice, celery, slivered almonds, and thawed vegetables to the creamy base. Fold everything together gently but thoroughly, making sure every grain of rice is coated with the sauce.
The celery provides essential crunch that contrasts beautifully with the tender chicken and fluffy rice. Slivered almonds add nutty richness and textural interest that elevates this from basic casserole to restaurant-quality comfort food.
Don’t overmix at this stage, as you want to keep the rice grains intact rather than mashing them. Gentle folding maintains the casserole’s appealing texture and prevents it from becoming gluey.
Step 4: Prepare the Golden Topping
In a separate bowl, combine the lightly crushed cornflakes with melted butter, tossing until every piece is coated. The cornflakes should be broken into smaller pieces but not completely pulverized—you want some texture remaining.
This is where the right mixing bowl makes all the difference. A standard mixing bowl requires constant scraping and leaves butter clinging to the sides. The OXO Good Grips 3-Piece Mixing Bowl Set has non-slip bottoms and wide rims that make tossing ingredients effortless.
Without proper mixing tools, you’ll spend extra time trying to coat cereal evenly, and some pieces will be soggy while others stay dry. The right bowl eliminates this frustration and ensures every bite has that perfect buttery crunch.

- 3GRATER ATTACHMENTS: This bowl set comes with 3 different grater attachments (slicing/grating/shredding) just shred or s…
- NON SLIP SILICONE BOTTOMS: Most metal mixing bowls is that they will slide on the counter the more vigorously you store …
- AIRTIGHT BPA FREE LIDS & 5 SIZES BOWLS: The range of sizes from 5QT down to 1.5QT, makes this set incredibly versatile a…
Step 5: Assemble and Bake
Spread the chicken mixture evenly in your prepared baking dish, then sprinkle the remaining ½ cup of shredded cheese over the top. Distribute the buttered cornflakes evenly over the cheese layer, creating a golden carpet of crunch.
Bake for 25-30 minutes, until the casserole is bubbling around the edges and the topping is golden brown. The internal temperature should reach 165°F for food safety. Let it rest for 5 minutes before serving to allow the flavors to settle.
The resting time is crucial for the perfect slice. Cutting immediately results in a soupy mess, while waiting allows the starches to firm up and the cheese to set properly.
👉 Pyrex Easy Grab 9×13 Glass Baking Dish — Perfect even heating every time

- PREMIUM LARGE BAKING PAN SET: Our baking dishes are made of borosilicate glass, can be used in microwave, oven, freezer …
- TIGHT FITTING LIDS: 8-piece baking dishes set includes 4 baking dishes and 4 gray plastic tight fitting lids, which are …
- ELEGANT DESIGN: The clear glass baking pan makes a nice, attractive presentation for enjoyable baking time, a charming d…
Nutrition Information
- Per serving: 485 cal
- 28g fat
- 32g carbs
- 28g protein
Pro Tips
Let casserole rest 10 minutes: This prevents a soupy mess when serving and allows flavors to meld perfectly together.
Use day-old rice: Freshly cooked rice contains too much moisture and can make your casserole watery rather than creamy.
Remove chicken skin completely: Even small pieces will make your casserole greasy and unappetizing to most people.
Toast almonds first: Toasting slivered almonds in a dry pan for 2-3 minutes adds incredible nutty depth to every bite.
Double the recipe easily: This freezes beautifully, so make two casseroles and freeze one for busy weeknights ahead.
Delicious Variations
Mexican-Style Chicken Casserole
Replace cream of chicken soup with cream of mushroom, add 1 can diced green chiles, 1 packet taco seasoning, and top with Mexican cheese blend. Serve with fresh cilantro, sour cream, and salsa for an authentic south-of-the-border twist.
Broccoli Cheddar Version
Add 2 cups fresh broccoli florets and use only sharp cheddar cheese throughout. The broccoli adds vibrant color and extra nutrition while the sharp cheddar provides tangy flavor that pairs perfectly with the mild chicken and rice base.
Italian Herb Casserole
Replace cornflakes with panko breadcrumbs mixed with Parmesan cheese, add 1 tablespoon Italian seasoning, and include sun-dried tomatoes. This Mediterranean-inspired version feels sophisticated enough for company dinners yet remains comfortingly familiar.
Storage Instructions
Refrigerator
Store leftover casserole covered in the refrigerator for up to 4 days. The flavors actually improve overnight as the ingredients meld together. Reheat individual portions in the microwave for 1-2 minutes, stirring halfway through to ensure even heating. For larger portions, cover with foil and reheat in a 350°F oven for 15-20 minutes until heated through.
Freezer
This casserole freezes beautifully for up to 3 months. Cool completely before wrapping tightly in plastic wrap, then aluminum foil. Label with the date and contents. Thaw overnight in the refrigerator before reheating. You may need to add a splash of chicken broth when reheating if the mixture seems dry, as freezing can separate some of the dairy ingredients.
Make-Ahead
Assemble the entire casserole up to 2 days ahead, but don’t add the cornflake topping until ready to bake. Cover tightly and refrigerate. Add the buttered cornflakes just before baking, and increase cooking time by 5-10 minutes since you’re starting with a cold casserole. This is perfect for potluck dinners or busy weeknight meal prep.
For food safety guidelines, visit USDA Food Safety Guidelines.
Frequently Asked Questions
Can I use leftover rotisserie chicken that’s been frozen?
Yes, but thaw it completely in the refrigerator first and drain any excess moisture. Frozen and thawed rotisserie chicken may be slightly less tender than fresh, but it works perfectly in casseroles where it’s mixed with creamy sauces. Pat the thawed chicken dry with paper towels before shredding to prevent watery casserole.
What’s the best way to reheat rotisserie chicken casserole?
For best results, reheat covered in a 350°F oven for 15-20 minutes until hot throughout. Microwave reheating works for individual portions but can make the cornflake topping soggy. If the casserole seems dry after reheating, stir in a tablespoon of chicken broth or milk to restore creaminess.
Can I make this rotisserie chicken casserole ahead of time?
Absolutely! Assemble everything except the cornflake topping up to 48 hours ahead. Cover and refrigerate, then add the buttered cornflakes just before baking. Cold casseroles need an extra 5-10 minutes in the oven. This make-ahead feature makes it perfect for entertaining or meal prep.
How do I prevent my chicken casserole from being watery?
Use day-old rice rather than freshly cooked, thoroughly drain frozen vegetables, and don’t skip the resting time after baking. Remove all chicken skin and pat the meat dry before shredding. These simple steps ensure a creamy, not soggy, casserole every time.
More Recipes You Will Love
👉 Perfect Mediterranean Lemon Chicken Soup Recipe
This rotisserie chicken casserole proves that convenience foods can create extraordinary dinners when used thoughtfully. The combination of textures—creamy base, tender chicken, crunchy almonds, and golden cornflake topping—makes every bite interesting. Try this recipe this week and let me know in the comments how your family loves it. Share photos on social media and tag us so we can see your beautiful creations!