
- Prep: 15 Minutes
- Cook: 20 Minutes
- Total: 35 Minutes
- Servings: 6 servings
A Quick Note Before You Start
The secret to perfect churros is getting your oil temperature exactly right at 375°F. Too hot burns the outside before cooking through, too cool makes them greasy and soggy.
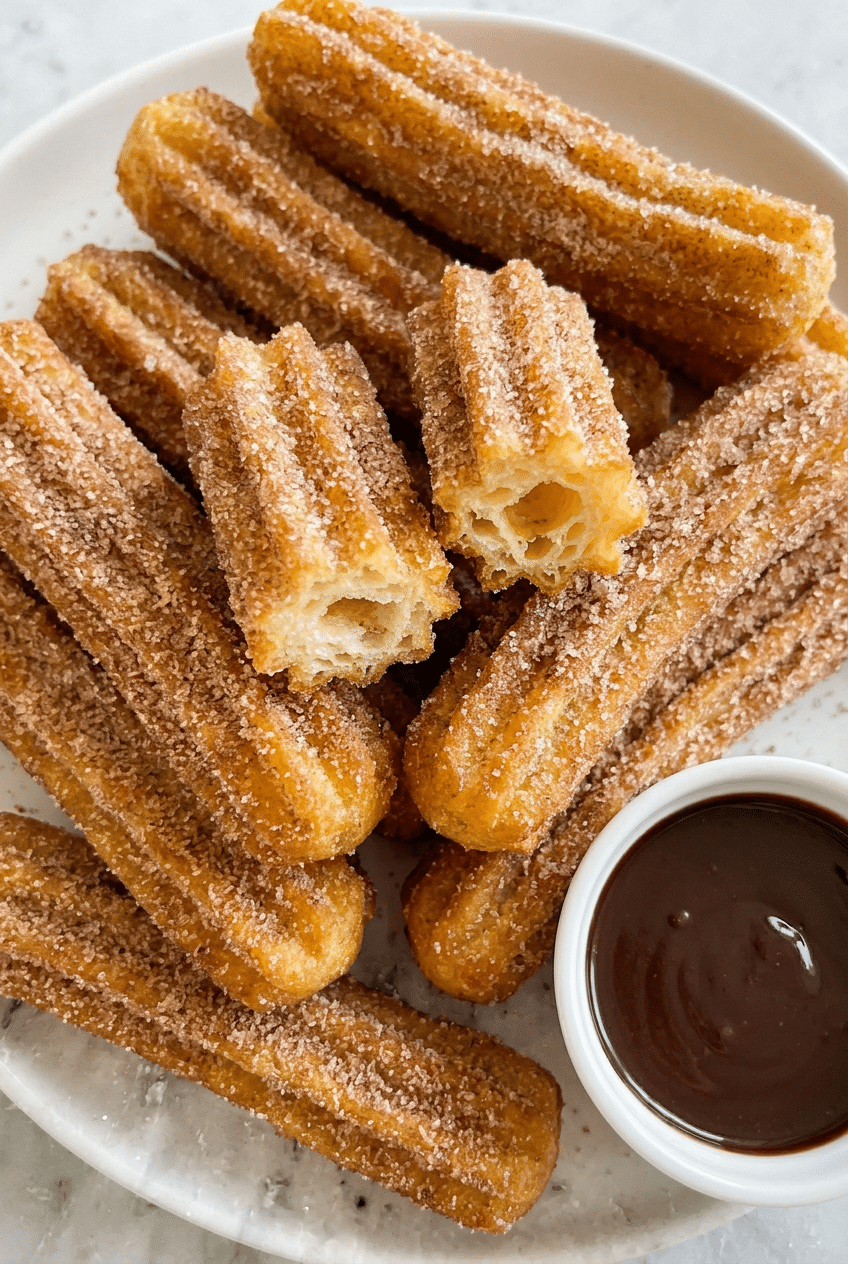
This authentic churros recipe creates those crispy golden ridges and pillowy soft centers that make Spanish street food so irresistible and addictive.
We’ll master the choux pastry technique that puffs perfectly in hot oil, plus the exact piping method for those signature star-shaped ridges.
Ingredients for Perfect Homemade Churros
For the Churro Dough
- 1 cup water — creates steam for puffing
- 2½ tablespoons granulated sugar — adds sweetness and browning
- ½ teaspoon salt — enhances flavor and strengthens structure
- 2 tablespoons vegetable oil — keeps dough tender
- 1 cup all-purpose flour — provides structure and chewiness
- 2 large eggs — creates richness and binding
- ½ teaspoon vanilla extract — adds depth and aroma
For Frying and Coating
- 6 cups vegetable oil — for deep frying at 375°F
- ½ cup granulated sugar — for coating
- 1 tablespoon ground cinnamon — for that classic Spanish flavor
Optional Add-Ins
- 1 cup thick chocolate sauce for dipping
- 1 teaspoon orange zest in dough
- ¼ cup dulce de leche filling
How to Make Perfect Churros Recipe Step by Step
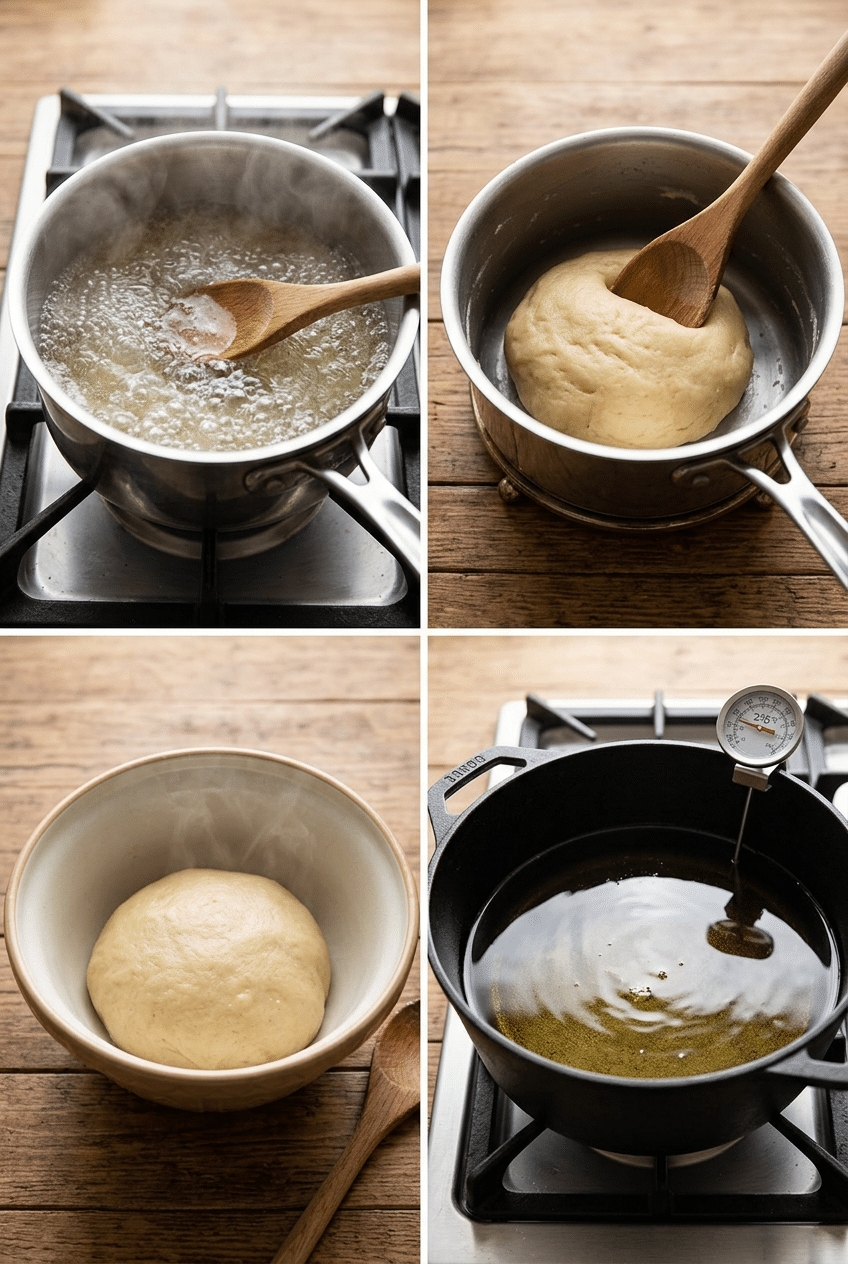
Step 1: Make the Choux Dough
Combine water, sugar, salt, and oil in a medium saucepan over medium-high heat, stirring until the mixture reaches a rolling boil. The sugar needs to dissolve completely before boiling to prevent crystallization. Watch for vigorous bubbling that won’t stop when you stir – that’s your cue that it’s hot enough.
This boiling step is crucial because it creates the steam that will puff your churros from the inside. The oil adds tenderness while the salt amplifies all the other flavors.
A heavy-bottomed saucepan like the Cuisinart MultiClad Pro distributes heat evenly and prevents hot spots that could scorch your mixture. Thin pans create temperature fluctuations that lead to lumpy dough.
👉 Heavy-bottomed saucepan — Even heat distribution prevents scorching during the critical dough-making stage.

- Stainless steel and 5 layers bottom: Kirecoo 8-Quart Stainless Steel Stockpot with Lid is an essential kitchen cookware,…
- Riveted handles and Glass lid: Kirecoo soup pot comes equipped with riveted stainless steel side handles, proving sturdy…
- Versatility with Large Size: Kirecoo 8 qt cooking pot features classic sliver appearance and large size, while is ideal …
Step 2: Add Flour and Cook
Remove the pan from heat and immediately dump in all the flour at once, stirring vigorously with a wooden spoon until a smooth ball forms. The mixture will look shaggy at first, but keep stirring – it comes together quickly. Return to low heat and cook for 1-2 minutes, stirring constantly, until the dough pulls away from the pan sides cleanly.
This cooking step removes excess moisture and develops the gluten just enough for structure. You’ll know it’s ready when you can run your spoon across the bottom of the pan and it stays clear for a few seconds.
A sturdy wooden spoon like the OXO Good Grips handles the thick, hot dough without melting like plastic spoons do. The rounded edge won’t scratch your pan while giving you the leverage needed to stir vigorously.
Step 3: Cool and Add Eggs
Transfer dough to a large bowl and let cool for 5 minutes – this prevents the eggs from scrambling when you add them. Beat in eggs one at a time, mixing thoroughly after each addition until completely smooth. The dough will look broken and lumpy after the first egg, but keep beating and it will come together beautifully.
Room temperature eggs incorporate more easily than cold ones, so take them out while your dough cooks. The vanilla goes in with the second egg for even distribution.
A stand mixer like the KitchenAid Artisan makes this step effortless, especially when the dough seems stubborn. The paddle attachment works better than the whisk for thick doughs, and you can scrape the bowl without stopping the mixer.
Step 4: Heat Oil to Perfect Temperature
Pour oil into a heavy pot until it’s 2-3 inches deep and heat to exactly 375°F over medium-high heat. Use a candy thermometer clipped to the side of the pot to monitor temperature constantly. The oil temperature will drop when you add churros, so having it at 375°F ensures it stays in the ideal 350-365°F range during frying.
Consistent temperature is everything – too hot and they burn outside while staying raw inside, too cool and they absorb oil and turn greasy. Test with a small piece of dough first – it should sizzle immediately and float to the surface.
A clip-on thermometer like the Taylor Precision Digital eliminates guesswork and gives you instant readings. Unlike probe thermometers, it stays in the oil so you can monitor temperature changes without disturbing your frying rhythm.
👉 Candy thermometer — Precise temperature control is the difference between perfect churros and greasy disasters.
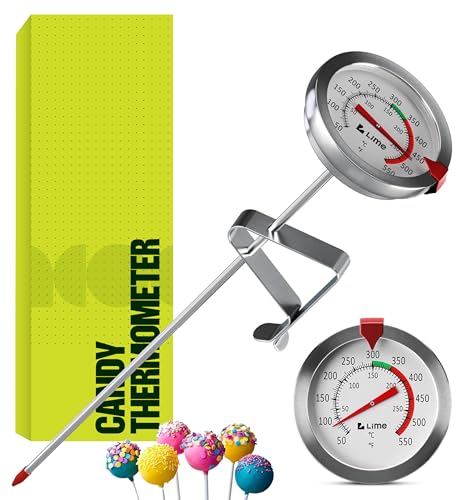
- ACCURATE FAST READINGS (No More Burned Candy) — Our candy deep fry thermometer provides instant and accurate temperatu…
- STAINLESS STEEL CONSTRUCTION (No More Rust) — The oil thermometer for frying is made with high-quality stainless steel…
- TEMPERATURE RANGE: 50°F – 548°F (10°C – 287°C).
Step 5: Pipe and Fry Churros
Transfer dough to a piping bag fitted with a large star tip and pipe 6-inch lengths directly into the hot oil, using kitchen shears to cut them cleanly. Work in small batches of 3-4 churros to maintain oil temperature. They’ll sink briefly then float and start bubbling – that’s exactly what you want to see.
Fry for 2-3 minutes on the first side until deep golden brown, then flip and fry another 1-2 minutes. The star tip creates those signature ridges that hold cinnamon sugar and provide extra surface area for crispiness.
The Ateco 846 star tip creates perfect professional ridges, while cheap plastic tips can melt or clog with the thick dough. A 16-inch piping bag gives you room to work without the dough pushing back out the top.
👉 Large star piping tip — Creates those signature ridges that make churros crispy and help cinnamon sugar stick.

- Riccle Piping Bags and Tips Set, 11.8 Inch 100 Anti Burst Piping Bags, 124 Pcs Cake Decorating Kit with 16 Piping Tips, …
- Riccle Frosting Piping Kit includes 100 x piping bags disposable, 1 x silicone pastry bag, 16 x stainless steel frosting…
- Premium Cake Decorating Supplies for Lasting Elegance: Our durable and reusable piping bags piping bags, along with our …
Step 6: Coat with Cinnamon Sugar
Mix cinnamon and sugar in a shallow dish while churros are still hot from the oil. Roll each churro immediately in the mixture, turning to coat all sides evenly. The residual heat and slight oil coating help the cinnamon sugar stick perfectly.
Work quickly here – churros are best eaten warm, and the coating adheres better to hot churros than cooled ones. Serve immediately for the ultimate contrast between crispy exterior and fluffy interior.
Nutrition Information
- Per serving: 285 cal
- 18g fat
- 28g carbs
- 4g protein
Pro Tips
Double-strain your oil: Pass cooled frying oil through a fine-mesh strainer lined with coffee filters to remove all debris, then store in a sealed container. Properly filtered oil can be reused 2-3 times for frying.
Pipe directly over oil: Don’t pre-pipe churros onto a tray – they’ll stick and lose their shape. Pipe straight into the hot oil for perfectly formed churros every time.
Test dough consistency: Properly mixed choux pastry should be smooth, glossy, and hold its shape when piped. If it’s too thick, beat in an extra egg yolk; too thin means you overcooked the flour mixture.
Make chocolate sauce: Heat ½ cup heavy cream with 4 oz chopped dark chocolate and 1 tablespoon sugar until smooth. This authentic Spanish-style chocolate is thick enough to coat churros without dripping everywhere.
Delicious Variations
Filled Churros
After cooling completely, use a long piping tip to fill churros with dulce de leche, chocolate ganache, or pastry cream. Insert the tip into one end and squeeze gently until filling appears at the other end.
Mini Churros
Pipe 3-inch lengths for bite-sized churros perfect for parties. Reduce frying time to 1-2 minutes per side and watch carefully – they brown much faster than full-size ones.
Baked Churros
Pipe onto parchment-lined baking sheets and bake at 425°F for 15-20 minutes until golden. They won’t be as crispy as fried, but they’re lighter and still delicious with cinnamon sugar.
Chocolate Churros
Replace 2 tablespoons flour with unsweetened cocoa powder for rich chocolate churros. Increase sugar in the dough to ¾ cup to balance the cocoa’s bitterness.
Storage Instructions
Refrigerator
Fresh churros don’t store well and become chewy within hours. If you must keep leftovers, store in an airtight container for up to 2 days and reheat in a 350°F oven for 5 minutes to restore some crispiness. The texture won’t match fresh churros, but they’re still edible for breakfast or snacking.
Freezer
Freeze unbaked piped churros on parchment-lined trays, then transfer to freezer bags for up to 2 months. Fry directly from frozen, adding 1-2 extra minutes to cooking time. You can also freeze baked churros for up to 1 month – reheat from frozen in a 350°F oven for 10-12 minutes.
Make-Ahead
Prepare the choux dough up to 4 hours ahead and keep covered at room temperature. The consistency may thicken slightly, but it will still pipe and fry perfectly. Don’t make the cinnamon sugar coating until ready to serve, as it can clump in humid conditions.
For food safety guidelines, visit USDA Food Safety Guidelines.
Frequently Asked Questions
Why are my churros not crispy enough?
Oil temperature is the most common culprit – too low (under 350°F) makes churros absorb oil and turn soggy. Also ensure you’re not overcrowding the pot, which drops temperature quickly. Finally, serve immediately while hot, as churros lose crispiness rapidly as they cool and steam trapped inside softens the exterior.
Can I make churros recipe without a piping bag?
Yes, though the shape won’t be as authentic. Transfer dough to a large zip-lock bag, cut off one corner, and pipe through that. For the ridged texture, you can roll the warm churros in cinnamon sugar mixed with a fork to create grooves, though it won’t be quite the same as star-tip ridges.
What’s the best oil for frying churros?
Vegetable oil, canola oil, or peanut oil work best because of their high smoke points and neutral flavors. Avoid olive oil (too low smoke point) or coconut oil (solidifies as it cools). You need at least 2-3 inches depth for proper frying, so plan for 6-8 cups of oil depending on your pot size.
How do I know when churros recipe dough is ready?
Perfect choux pastry is smooth, glossy, and holds its shape when piped. It should be thick enough to hold the ridges from your star tip but not so thick that it’s hard to pipe. When you lift the beaters, the dough should fall in a thick ribbon that dissolves back into the mixture within 3-4 seconds.
More Recipes You Will Love
👉 Perfect Authentic Pico de Gallo Recipe
👉 Homemade Restaurant-Style Charred Salsa
👉 Buttery Crispy Edge Pancakes
These homemade churros deliver that perfect contrast of crispy ridged exterior and fluffy interior that makes Spanish street food so addictive. The choux pastry technique might seem intimidating at first, but once you nail the consistency and oil temperature, you’ll be making café-quality churros in your own kitchen. Try this recipe tonight and let me know in the comments how your first batch turns out!