
This ninja creami vanilla ice cream recipe will transform how you make homemade frozen desserts forever! After researching extensively for my Ultimate Ninja CREAMi Review guide, I knew this machine had incredible potential for creating the perfect ninja creami vanilla ice cream recipe. My dad James had just finished photographing summer desserts for KitchenQuill when I decided to perfect this recipe. After countless batches, I discovered the secrets to achieving that professional ice cream parlor texture right at home with this ninja creami vanilla ice cream recipe. What makes this particular creation special isn’t just the velvety smoothness—it’s how incredibly simple yet customizable it truly is.
Every time I make this ninja creami vanilla ice cream recipe, I’m reminded of childhood summers at my grandmother’s house, where vanilla ice cream was the canvas for her famous hot fudge sauce. Now with this perfected method, I can recreate those memories anytime without traditional churning.
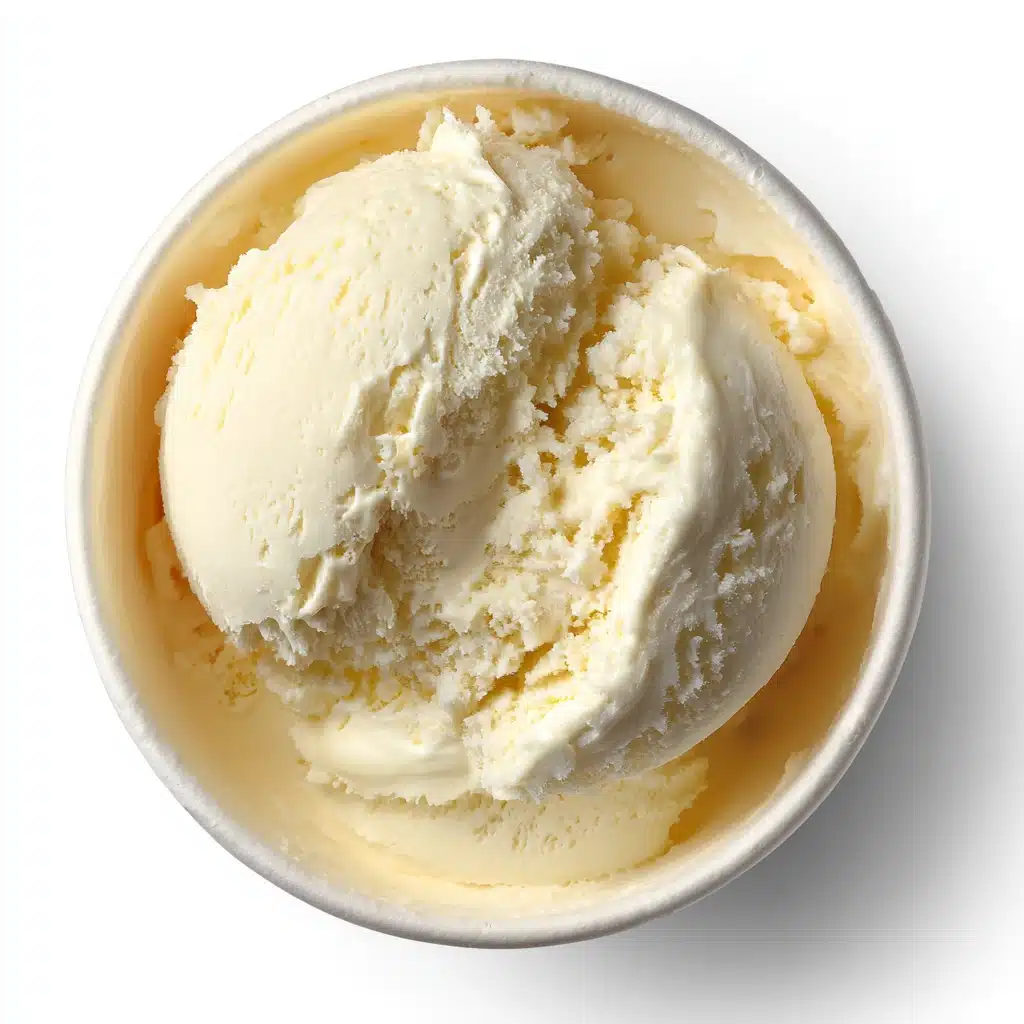
Table of Contents
New to Ninja CREAMi? Start Here!
If you haven’t purchased a Ninja CREAMi yet or are experiencing issues with your current machine, check out my comprehensive Ultimate Ninja CREAMi Review & Complete Guide first. You’ll find:
- Model comparisons and buying recommendations
- Current Amazon deals (save up to 40%)
- Troubleshooting for common problems
- Essential accessories and replacement parts
- Over 500 recipe categories
- Protein ice cream options and tips
The Ultimate Ninja Creami Vanilla Ice Cream Recipe
Ingredients
Method
- Whisk together 1 cup whole milk and 1/3 cup granulated sugar in a mixing bowl until sugar completely dissolves (about 2 minutes).
- Add 3/4 cup heavy cream and 1 tablespoon vanilla bean paste (or 2 teaspoons vanilla extract), stirring until well combined.
- Pour mixture into Ninja Creami pint container, leaving 1/2 inch space at top for expansion.
- Secure lid tightly and place container on flat surface in freezer for 24 hours (minimum 12-15 hours in 0°F freezer).
- Remove pint from freezer and let sit for 1 minute if frozen longer than 24 hours.
- Place pint in Ninja Creami machine and process on ‘Ice Cream’ setting.
- If texture seems crumbly, create a small well in center and re-spin for extra creaminess.
- For mix-ins, create tunnel in center, add desired ingredients, and use ‘Mix-in’ cycle.
- Serve immediately or refreeze with plastic wrap pressed directly on surface to prevent ice crystals.
Nutrition
Notes
Tried this recipe?
Let us know how it was!Mastering the Perfect Ninja Creami Vanilla Ice Cream Recipe Base
Understanding Your Machine’s Capabilities
The Ninja Creami revolutionizes homemade ice cream by using unique spinning blade technology that transforms frozen bases into incredibly smooth textures. Unlike traditional makers that require constant churning while freezing, this machine works perfectly with completely frozen mixtures for this ninja creami vanilla ice cream recipe, giving you ultimate control. If you’re unsure which model suits you best, check my complete model comparison chart.
Key factors for success:
- Higher fat content creates creamier results
- Proper sugar ratios prevent icy crystals
- Even freezing ensures consistent texture
- Temperature control is critical for processing
When exploring other dessert recipes, you’ll notice the machine’s versatility extends beyond ice cream to sorbets, gelatos, and protein-packed treats.
Essential Ingredients for Classic Vanilla Excellence
Creating the perfect ninja creami vanilla ice cream recipe requires just five quality ingredients working in harmony. Heavy cream provides luxurious mouthfeel, while whole milk adds lightness without sacrificing richness. The ideal ratio for this ninja creami vanilla ice cream recipe is 2:1 cream to milk for optimal texture.
Core ingredients needed:
- 1 cup whole milk
- 3/4 cup heavy cream
- 1/3 cup granulated sugar
- 1 tablespoon vanilla bean paste (or 2 teaspoons extract)
- Pinch of salt (optional)
Sugar affects more than sweetness—it controls freezing point and texture in your ninja creami vanilla ice cream recipe. I recommend regular granulated sugar for consistent results. Real vanilla extract or bean paste makes all the difference; I prefer paste for those beautiful speckles and intense flavor reminiscent of artisanal shops. For healthier alternatives, check my protein ice cream guide or explore healthy dessert options.
Ninja Creami Vanilla Ice Cream Recipe Step-by-Step Process
Mixing and Preparing Your Ice Cream Base
Start your ninja creami vanilla ice cream recipe by whisking together milk and sugar until the sugar completely dissolves—about two minutes of gentle stirring. Pour in heavy cream and add vanilla bean paste or extract, stirring until thoroughly combined. The mixture for this ninja creami vanilla ice cream recipe should look smooth and slightly thick, with no visible sugar granules.
Pro mixing tips:
- Room temperature ingredients blend more easily
- Whisk in figure-8 pattern for even distribution
- Taste and adjust vanilla before freezing
- Strain if using vanilla beans for smoother texture
Some recipes suggest heating the mixture, but cold-mixing works perfectly for this ninja creami vanilla ice cream recipe method, saving time while delivering equally delicious results.
Freezing and Processing for Optimal Texture
Pour your vanilla mixture into the Ninja Creami pint container, leaving half an inch of space for expansion. Secure the lid tightly and place on a flat freezer surface, ensuring it stays level for even freezing of your ninja creami vanilla ice cream recipe.
Freezing timeline guidelines:
- Minimum: 12-15 hours in 0°F freezer
- Recommended: 24 hours for guaranteed results
- Maximum: Can freeze up to 2 weeks
- Test: Press knife in center—should be solid throughout
When ready to spin your ninja creami vanilla ice cream recipe, remove from freezer and let sit one minute if frozen over 24 hours. Process on the ice cream setting, and if needed, create a well in the center and re-spin for extra creaminess. This technique has transformed many of my frozen dessert experiments into restaurant-quality treats.
Advanced Techniques for Ninja Creami Vanilla Perfection
Troubleshooting Common Texture Issues
Sometimes your ninja creami vanilla ice cream recipe might come out icy or crumbly on first spin, but don’t worry—this is completely fixable. If the texture appears powdery or separated after processing, use the re-spin function after making a small well and adding a tablespoon of milk or cream. For comprehensive troubleshooting from thousands of users, see my detailed CREAMi guide.
Common issues and solutions:
- Icy texture → Increase fat content or add cream cheese
- Too hard → Add tablespoon of vodka or corn syrup
- Crumbly → Ensure complete freezing and re-spin
- Separated → Check freezer temperature consistency
- Grainy → Dissolve sugar completely before freezing
The beauty of this ninja creami vanilla ice cream recipe is its forgiving nature—even “failed” batches usually recover with strategic re-spinning and minor adjustments.
Creative Mix-Ins and Flavor Variations
Transform your basic ninja creami vanilla ice cream recipe into gourmet desserts by mastering mix-ins and flavor layering. After initial processing, create a tunnel down the center and add your chosen ingredients before using the mix-in cycle.
Popular mix-in combinations:
- Classic chocolate chip cookie dough
- Caramel swirl with sea salt
- Fresh berry preserves
- Crushed Oreos or brownies
- Toasted nuts and toffee bits
- Peanut butter ribbons
For sophisticated twists on this ninja creami vanilla ice cream recipe, infuse your base with lavender, cardamom, or brown butter before freezing. Temperature-sensitive additions like chocolate should be frozen beforehand, while syrups work best at room temperature. Explore my 500+ recipe categories guide and seasonal dessert collection for endless inspiration.
Storage and Serving Suggestions for Ninja Creami Vanilla Ice Cream
Proper Storage Methods for Quality
Once you’ve perfected your ninja creami vanilla ice cream recipe, proper storage ensures you enjoy creamy scoops for weeks. After processing, smooth the top flat and press plastic wrap directly onto the surface before replacing the lid—this prevents freezer burn and ice crystals.
Storage best practices:
- Store in main freezer compartment (not door)
- Keep temperature consistent at 0°F
- Use within 2-3 weeks for best quality
- Label containers with date made
- Transfer to smaller containers after 2 weeks
If you need additional pint containers or replacement parts, see my CREAMi accessories guide. When your ninja creami vanilla ice cream recipe becomes too hard, let it sit 3-5 minutes before scooping, or use the re-spin function to restore creaminess.
Serving Ideas and Pairing Recommendations
This ninja creami vanilla ice cream recipe serves as the perfect canvas for countless dessert creations. Serve generous scoops alongside warm desserts where temperature contrast creates irresistible combinations.
Serving suggestions:
- Classic sundaes with hot fudge and cherries
- Affogatos with fresh espresso poured over
- Ice cream sandwiches with homemade cookies
- Milkshakes blended with favorite mix-ins
- Root beer or cola floats
- Banana splits with multiple toppings
- Parfaits layered with fruit and granola
For special occasions, create elegant presentations using warmed serving bowls and quality toppings. Explore more creative serving suggestions to transform simple vanilla into show-stopping desserts.
Frequently Asked Questions
Do you really have to wait 24 hours to use Ninja Creami?
While 24 hours is the manufacturer’s recommendation for your ninja creami vanilla ice cream recipe, you don’t always need to wait that long with a very cold freezer. The minimum freezing time depends on freezer temperature and ingredients—I’ve successfully processed bases after 12-15 hours at 0°F. The crucial factor is ensuring complete freezing throughout. Test by pressing a knife into the center; if you encounter resistance throughout, it’s ready.
How much vanilla paste should I use in Ninja Creami?
For a standard pint-sized ninja creami vanilla ice cream recipe, use one tablespoon of vanilla bean paste for rich, authentic flavor with beautiful vanilla specks. This amount provides perfect balance without overpowering the creamy base. Some prefer up to one and a half tablespoons for extra intensity. Vanilla paste is more concentrated than extract, so if substituting, use about two teaspoons of extract for similar depth.
Do I need to respin my Ninja Creami ice cream after refreezing?
Yes, typically you’ll need to re-spin your ninja creami vanilla ice cream recipe after refreezing, as the mixture becomes solid again and loses its creamy texture. Re-spinning takes just minutes and instantly restores smoothness. Some higher-fat formulas may remain softer, requiring only partial re-spinning. To minimize this need, add a tablespoon of vodka or corn syrup to maintain softer freezer texture.
Why don’t some people recommend the Ninja Creami?
The main criticism of the Ninja Creami is that its blades don’t fully reach container edges, potentially leaving unmixed sections in your ninja creami vanilla ice cream recipe. This can create inconsistent texture with some icy bits. However, proper technique—ensuring even freezing and using re-spin—easily overcomes these issues. For complete pros/cons analysis, see my detailed review. Despite minor challenges, thousands successfully create professional-quality results daily
Conclusion
This ninja creami vanilla ice cream recipe represents everything I love about modern home cooking—taking classic flavors and making them accessible with innovative tools. From understanding machine capabilities to mastering mix-ins and storage, you now have all knowledge needed to create ice cream rivaling premium brands with this ninja creami vanilla ice cream recipe. Remember, perfecting your technique involves experimentation to find what works for your taste and specific model. Whether making simple Tuesday night treats or elaborate sundae bars for celebrations, this ninja creami vanilla ice cream recipe provides endless delicious possibilities in your kitchen.