
- Prep: 15 Minutes
- Cook: 8 Minutes
- Total: 23 Minutes
- Servings: 4 burgers
A Quick Note Before You Start
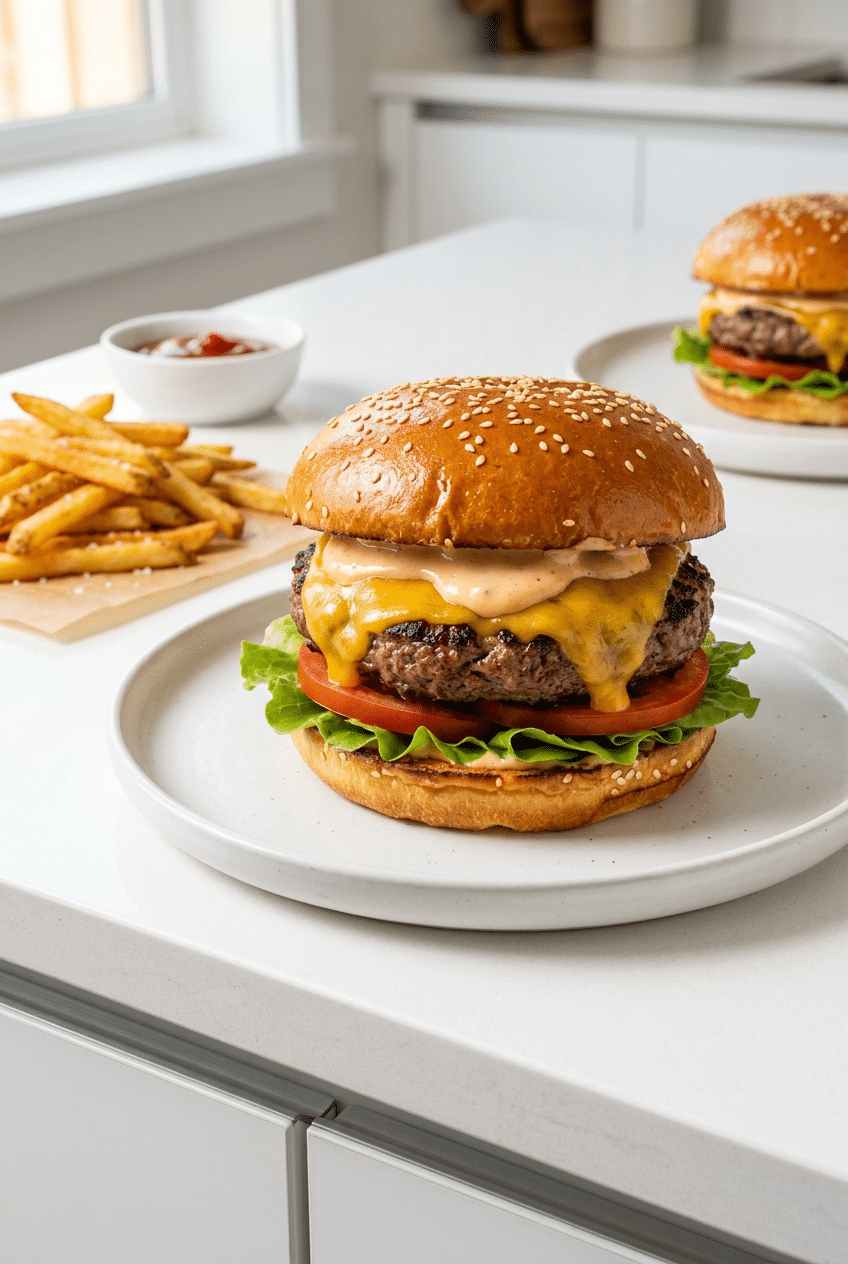
The secret to the best burgers? Don’t overwork the meat and create a slight dimple in each patty. This prevents the dreaded burger dome that makes toppings slide off.
This best burger recipe transforms simple ground beef into juicy, restaurant-quality patties that beat any takeout burger. The key lies in proper meat selection, gentle handling, and strategic seasoning techniques.
You’ll master the art of creating perfectly cooked burgers with a caramelized crust and pink center. These techniques ensure every bite delivers maximum flavor and that coveted juicy texture.
Ingredients for the Best Burger Recipe
For the Burger Patties
- 1½ pounds ground beef (80/20 blend) — perfect fat ratio for juiciness
- 1 teaspoon kosher salt — enhances natural beef flavor
- ½ teaspoon black pepper — adds subtle heat
- ½ teaspoon garlic powder — depth without overpowering
- 1 tablespoon Worcestershire sauce — umami boost
For Assembly
- 4 brioche hamburger buns — sturdy yet soft texture
- 4 slices sharp cheddar cheese — melts beautifully
- 4 butter lettuce leaves — crisp without overpowering
- 1 large tomato, sliced ¼-inch thick — adds freshness
- 4 tablespoons mayonnaise — creamy base
- 2 tablespoons ketchup — classic sweetness
- 1 tablespoon yellow mustard — tangy contrast
Optional Add-Ins
- 4 slices bacon
- ½ red onion, sliced
- 2 pickles, sliced
- 1 avocado, sliced
How to Make the Best Burger Recipe Step by Step
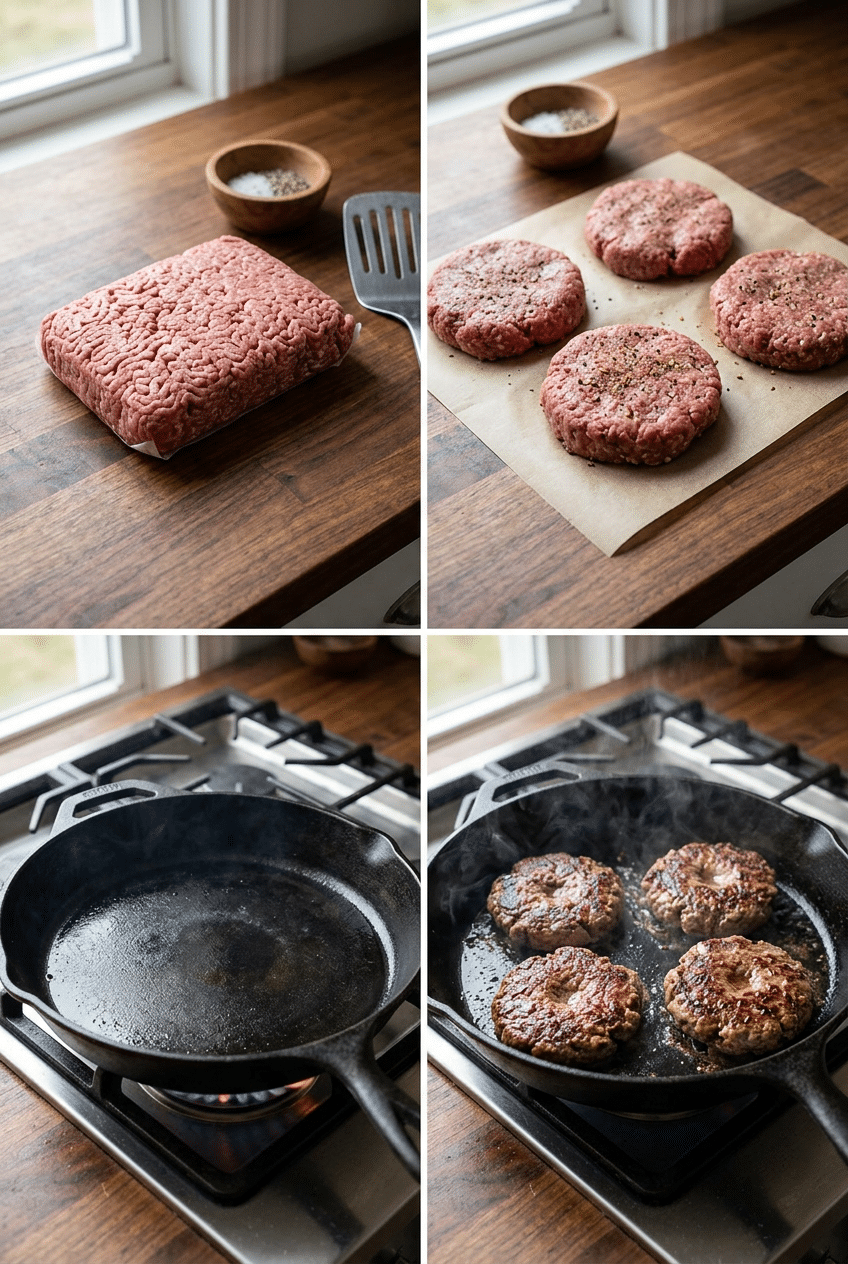
Step 1: Prepare the Meat Mixture
Remove the ground beef from the refrigerator 15 minutes before cooking to bring it closer to room temperature. This ensures even cooking throughout the patty. Cold meat tends to cook unevenly, creating tough exteriors before the center reaches proper temperature.
In a large mixing bowl, gently combine the ground beef, salt, pepper, garlic powder, and Worcestershire sauce using your hands. Mix just until the seasonings are evenly distributed — about 30 seconds of gentle folding motions. Overmixing develops the proteins too much, creating dense, tough burgers instead of tender ones.
The key here is restraint. Many home cooks make the mistake of kneading the meat like bread dough, which squeezes out moisture and creates a chewy texture. Think of it as folding ingredients together rather than mixing them aggressively.
Step 2: Form Perfect Patties
Divide the seasoned meat into 4 equal portions, about 6 ounces each. Gently roll each portion into a loose ball, then flatten into patties about ¾-inch thick and slightly larger than your buns. The patties will shrink during cooking, so making them bigger ensures they fit perfectly after cooking.
Create a shallow dimple in the center of each patty using your thumb — about ¼-inch deep and 2 inches wide. This prevents the burger from puffing up into a dome shape during cooking. Without this dimple, the edges cook faster than the center, causing the patty to curl upward.
Place the formed patties on a plate and refrigerate for 10 minutes while you prepare the cooking surface. This brief chilling helps the patties hold their shape better during the initial searing process.
Step 3: Preheat Your Cooking Surface
Heat a cast iron skillet or heavy-bottomed pan over medium-high heat for 3-4 minutes until it’s properly preheated. You can test readiness by flicking a few drops of water onto the surface — they should sizzle and evaporate immediately. Proper preheating ensures that beautiful caramelized crust that makes restaurant burgers so irresistible.
Avoid using non-stick pans for this recipe because they don’t retain heat well enough to create the proper sear. Cast iron holds heat evenly and creates superior browning through the Maillard reaction.
A well-seasoned cast iron skillet like the Lodge Cast Iron Skillet transforms burger cooking completely. Thin pans lose heat when you add cold meat, preventing proper browning. This 12-inch Lodge skillet maintains consistent temperature and develops that restaurant-quality crust that makes burgers legendary.
👉 Lodge Cast Iron Skillet — Creates the perfect searing temperature and even heat distribution that thin pans simply can’t match.
Step 4: Cook the First Side
Place the patties in the hot pan, dimple-side up, leaving space between each burger. You should hear an immediate, aggressive sizzle — this sound tells you the pan is hot enough for proper searing. Cook without moving them for 3-4 minutes, allowing the bottom to develop a golden-brown crust.
Resist the urge to press down on the patties with a spatula. This common mistake squeezes out the flavorful juices that keep your burger moist and delicious. The weight of the spatula forces out the fat and moisture that you worked hard to preserve through gentle mixing.
You’ll know they’re ready to flip when the edges start to look cooked and the bottom releases easily from the pan. If the patty sticks when you try to flip it, give it another 30 seconds — it’s not ready yet.
Step 5: Flip and Add Cheese
Flip the patties using a wide spatula, being gentle to maintain their shape. Cook the second side for 2-3 minutes for medium doneness, or until the internal temperature reaches 135°F for medium-rare or 145°F for medium. The dimple should now be facing down and will help the burger cook evenly.
Immediately after flipping, place a slice of cheese on each patty. The residual heat from the pan and the hot patty will melt the cheese perfectly. Cover the pan with a lid for 30 seconds to create a mini steam chamber that melts the cheese completely and evenly.
For food safety, ground beef should reach an internal temperature of 160°F according to USDA guidelines, though many prefer the juicier texture of medium burgers cooked to 145°F. Use your judgment based on your meat source and personal preference.
Step 6: Toast the Buns
While the cheese melts, slice the brioche buns in half and place them cut-side down in the same pan around the burgers, or use a separate pan. Toast for 1-2 minutes until golden brown and slightly crispy. This step prevents soggy buns and adds textural contrast to every bite.
The residual beef fat in the pan adds incredible flavor to the bun surfaces. This technique mimics what high-end burger restaurants do — they toast buns on the same surface where the meat cooked, picking up those concentrated flavors.
Remove the patties and buns from the pan and let the meat rest for 2 minutes. This brief resting period allows the juices to redistribute throughout the patty, ensuring every bite is maximally juicy.
Step 7: Assemble Your Burgers
Spread mayonnaise on the bottom bun, followed by a light layer of mustard and ketchup if using. The mayonnaise creates a moisture barrier that prevents the bun from getting soggy from the tomato and lettuce. This professional technique keeps your burger structurally sound from first bite to last.
Layer the lettuce leaf, tomato slice, and finally the cheese-topped patty on the dressed bottom bun. Top with the toasted upper bun and press gently to compact slightly. The order matters — vegetables on bottom provide a barrier between juices and bread, while cheese on top stays melted against the hot meat.
Serve immediately while the patties are still hot and the cheese is perfectly melted. The contrast between the warm, juicy patty and cool, crisp vegetables creates the ideal burger experience that balances temperatures and textures.
How to Make the Best Burger Recipe Step by Step
Step 1: Prepare the Meat Mixture
Remove the ground beef from the refrigerator 15 minutes before cooking to bring it closer to room temperature. This ensures even cooking throughout the patty. Cold meat tends to cook unevenly, creating tough exteriors before the center reaches proper temperature.
In a large mixing bowl, gently combine the ground beef, salt, pepper, garlic powder, and Worcestershire sauce using your hands. Mix just until the seasonings are evenly distributed — about 30 seconds of gentle folding motions. Overmixing develops the proteins too much, creating dense, tough burgers instead of tender ones.
The key here is restraint. Many home cooks make the mistake of kneading the meat like bread dough, which squeezes out moisture and creates a chewy texture. Think of it as folding ingredients together rather than mixing them aggressively.
Step 2: Form Perfect Patties
Divide the seasoned meat into 4 equal portions, about 6 ounces each. Gently roll each portion into a loose ball, then flatten into patties about ¾-inch thick and slightly larger than your buns. The patties will shrink during cooking, so making them bigger ensures they fit perfectly after cooking.
💡 Stop Making “Meatball” Burgers! Does your burger always puff up in the middle and shrink into a thick meatball while cooking? Skip the messy hand-shaping and grab a Non-Stick Adjustable Burger Press For under $15, it presses perfectly uniform patties that cook evenly every single time. It even comes with wax paper discs for easy stacking!

- BURGERS – Perfect for smash burgers with beautiful grill marks BACON – Keeps strips flat and cooks evenly STEAKS – Helps…
- FOOD-GRADE CAST IRON & SAFETY FIRST Crafted from premium cast iron with a BPA-free, heat-resistant handle, this 7.1-inch…
- FULL-COVERAGE DESIGN FOR JUICY, CRISP EDGES Oversized at 7.08 inches to fully cover 1/3 to 1/2 lb patties, this press de…
If shaping by hand, create a shallow dimple in the center of each patty using your thumb — about ¼-inch deep and 2 inches wide. This prevents the burger from puffing up into a dome shape during cooking. Place the formed patties on a plate and refrigerate for 10 minutes while you prepare the cooking surface.
Step 3: Preheat Your Cooking Surface
Heat a cast iron skillet or heavy-bottomed pan over medium-high heat for 3-4 minutes until it’s properly preheated. You can test readiness by flicking a few drops of water onto the surface — they should sizzle and evaporate immediately. Proper preheating ensures that beautiful caramelized crust that makes restaurant burgers so irresistible.
Avoid using non-stick pans for this recipe because they don’t retain heat well enough to create the proper sear. Cast iron holds heat evenly and creates superior browning through the Maillard reaction.
💡 The Secret to a Restaurant Crust A well-seasoned cast iron skillet transforms burger cooking completely. Thin pans lose heat when you add cold meat, preventing proper browning. The 12-inch Lodge Cast Iron Skillet maintains consistent temperature and develops that restaurant-quality crust that makes burgers legendary. It’s the best $30 you will ever spend on your kitchen.
Step 4: Cook the First Side
Place the patties in the hot pan, dimple-side up, leaving space between each burger. You should hear an immediate, aggressive sizzle — this sound tells you the pan is hot enough for proper searing.
💡 Kitchen Hack: Stop the Grease Mess! Cooking great burgers indoors means popping grease on your stove and counters. Do yourself a favor and grab a Stainless Steel Grease Splatter Screen. You just rest it over the pan while the meat cooks—it lets the steam escape so your meat sears perfectly, but catches 99% of the messy grease splatter.
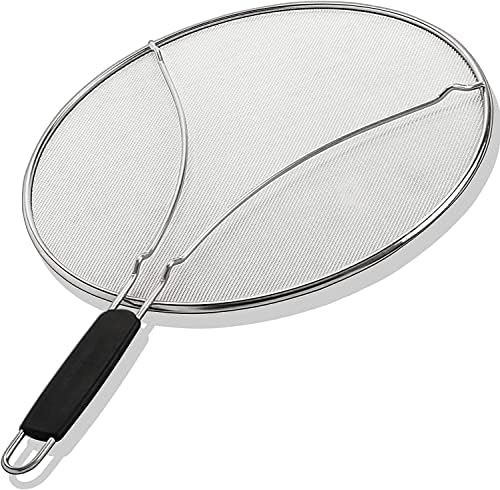
- PROTECTS FROM HOT SPITTING OIL – Our oil splatter guard shield securely joins to the handles of cookware to protect your…
- KEEPS THE STOVE, CABINETS, AND COUNTER CLEAN – Tired of cleaning stains off the wall, counter top, refrigerator, and cab…
- WORKS WITH MOST COOKWARE – Our heavy-duty, grease splatter screen for frying pan fits most pots, pans and skillets – hel…
Cook without moving them for 3-4 minutes, allowing the bottom to develop a golden-brown crust. Resist the urge to press down on the patties with a spatula. This common mistake squeezes out the flavorful juices that keep your burger moist and delicious. You’ll know they’re ready to flip when the edges start to look cooked and the bottom releases easily from the pan.
Step 5: Flip and Add Cheese
Flip the patties using a wide metal spatula, being gentle to maintain their shape. Cook the second side for 2-3 minutes. The dimple should now be facing down and will help the burger cook evenly.
💡 Never Undercook a Burger Again Guessing if a burger is done by “feeling it” is a recipe for dry meat or an upset stomach. The only way to guarantee a perfectly juicy medium-rare (135°F) or medium (145°F) burger is with an ThermoPro Instant Read Meat Thermometer. It reads the exact temperature in 2 seconds so you pull the meat off the heat at the perfect moment.

- 【Professional Precision & Lightning Speed】With full readings in 1 second and +/-0.5°F Pro-Accuracy through industrial-le…
- 【Easy to Read】Large luminous digits and 180° auto-rotating ambidextrous backlit display make this kitchen thermometer ea…
- 【Easy to Use】Motion-Wake feature makes this digital instant thermometer ready to use at any time; 90-sec Auto-Off deacti…
Immediately after flipping, place a slice of cheese on each patty. The residual heat from the pan and the hot patty will melt the cheese perfectly. Cover the pan with a lid (or a [Affiliate Link: Stainless Steel Melting Dome]) for 30 seconds to create a mini steam chamber that melts the cheese completely and evenly.
Step 6: Toast the Buns
While the cheese melts, slice the brioche buns in half and place them cut-side down in the same pan around the burgers, or use a separate pan. Toast for 1-2 minutes until golden brown and slightly crispy. This step prevents soggy buns and adds textural contrast to every bite.
The residual beef fat in the pan adds incredible flavor to the bun surfaces. This technique mimics what high-end burger restaurants do — they toast buns on the same surface where the meat cooked, picking up those concentrated flavors. Remove the patties and buns from the pan and let the meat rest for 2 minutes.
Step 7: Assemble Your Burgers
Spread mayonnaise on the bottom bun, followed by a light layer of mustard and ketchup if using. The mayonnaise creates a moisture barrier that prevents the bun from getting soggy from the tomato and lettuce. This professional technique keeps your burger structurally sound from first bite to last.
Layer the lettuce leaf, tomato slice, and finally the cheese-topped patty on the dressed bottom bun. Top with the toasted upper bun and press gently to compact slightly. Serve immediately while the patties are still hot and the cheese is perfectly melted.
Nutrition Information
- Per serving: 520 calories
- 32g fat
- 28g carbs
- 35g protein
Pro Tips
Salt timing matters: Salt the meat just before forming patties, not hours ahead. Early salting draws out moisture, creating a denser texture.
Temperature control: Use medium-high heat, not maximum heat. Too hot burns the outside before the center cooks properly.
The smash technique: For thinner patties, place a ball of meat in the hot pan and immediately press with a spatula for 10 seconds to create ultra-crispy edges.
Cheese melting hack: Add a tablespoon of water to the pan and cover immediately after adding cheese for perfect melting in 15 seconds.
Bun protection: Lightly butter the cut sides of buns before toasting for extra richness and moisture barrier.
Rest your meat: Let ground beef sit at room temperature for 15 minutes before cooking for more even heat distribution.
Delicious Variations
Turkey Burger Version
Substitute ground turkey (85/15 blend) for beef and add 1 tablespoon olive oil to the mixture. Turkey needs the extra fat to stay juicy. Cook to 165°F internal temperature for food safety.
Stuffed Cheese Burgers
Form 8 thin patties instead of 4 thick ones. Place cheese in center of 4 patties, top with remaining patties, and seal edges. Cook 4-5 minutes per side for melted cheese centers.
Bacon Cheeseburger
Cook 4 strips of bacon in the same pan before cooking burgers. Use the rendered bacon fat to cook the patties for extra flavor, then crumble bacon on top of melted cheese.
Mediterranean Style
Add 1 teaspoon dried oregano and ½ teaspoon cumin to the meat mixture. Top with feta cheese, cucumber, red onion, and tzatziki sauce instead of traditional toppings.
Storage Instructions
Refrigerator
Store cooked burger patties in the refrigerator for up to 3 days in an airtight container. Reheat gently in a skillet over low heat with a splash of water to prevent drying out. Raw formed patties can be refrigerated for up to 24 hours before cooking — place parchment between patties to prevent sticking.
Freezer
Freeze raw patties for up to 3 months by wrapping individually in plastic wrap, then storing in freezer bags. Thaw overnight in refrigerator before cooking. Cooked patties freeze for up to 2 months but lose some texture quality when reheated.
Make-Ahead
Form patties up to 24 hours ahead and refrigerate covered. This actually improves flavor as seasonings have time to penetrate the meat. You can also pre-mix special burger sauce and prep vegetables the day before for easy assembly when ready to cook.
For food safety guidelines, visit USDA Food Safety Guidelines.
Frequently Asked Questions
What’s the best ground beef blend for burgers?
The 80/20 blend (80% lean, 20% fat) creates the perfect balance of flavor and juiciness. Leaner blends like 90/10 tend to dry out, while fattier blends like 70/30 can be greasy. The 20% fat content renders during cooking, keeping the meat moist while creating that coveted beefy flavor that makes the best burger recipe truly exceptional.
How do I know when my burger is done without cutting it?
Use a meat thermometer inserted horizontally into the center of the patty. For food safety, ground beef should reach 160°F, though many prefer 145°F for medium doneness. You can also test doneness by gently pressing the center — firm but springy indicates medium, while very firm means well-done. The best burger recipe relies on temperature, not guesswork.
Why do my burgers always shrink and curl up?
Burgers curl because the edges cook faster than the center, causing proteins to contract unevenly. The dimple technique in this best burger recipe solves this problem — the shallow depression in the center compensates for natural shrinkage. Also avoid overworking the meat, which creates tight proteins that contract more during cooking.
Can I make these burgers on a grill instead of stovetop?
Absolutely! Preheat your grill to medium-high heat and oil the grates well. Cook for 4-5 minutes per side, following the same dimple technique and timing guidelines. The best burger recipe works beautifully on grills, though you’ll miss the fond (browned bits) that flavors the bun toasting step.
More Recipes You Will Love
👉 Perfect Strawberry Shortcake Recipe (Fluffy Biscuits)
This best burger recipe proves that perfect burgers start with quality ingredients and proper technique, not fancy equipment. The dimple trick alone will transform your burger game forever. Try this recipe this weekend and taste the difference that gentle handling and strategic seasoning make. Drop a comment below with your favorite burger topping combination — I love hearing how you customize these juicy beauties!