
🛑 Stop! Don’t Have a Ninja Creami Yet?
This recipe strictly requires a Ninja Creami machine. Because of how the machine shaves ice, you cannot make this in a regular blender, food processor, or traditional ice cream maker.
If you are here because you keep seeing viral Creami recipes and are on the fence about buying one, read this first: Before you spend $200+, check out our Ninja Creami Review: 6-Month Test & Model Comparison. We break down exactly which model is actually worth the money, which one is the quietest, and how to score it for up to 40% off.
Already have your Creami on the counter? Let’s get to the recipe!
- Prep: 15 Minutes
- Cook: 24 Hours (freezing)
- Total: 39 Minutes
- Servings: 4 servings
A Quick Note Before You Start
Your Ninja Creami pint must freeze for at least 24 hours before processing. The creamier your base, the smoother your final texture will be.
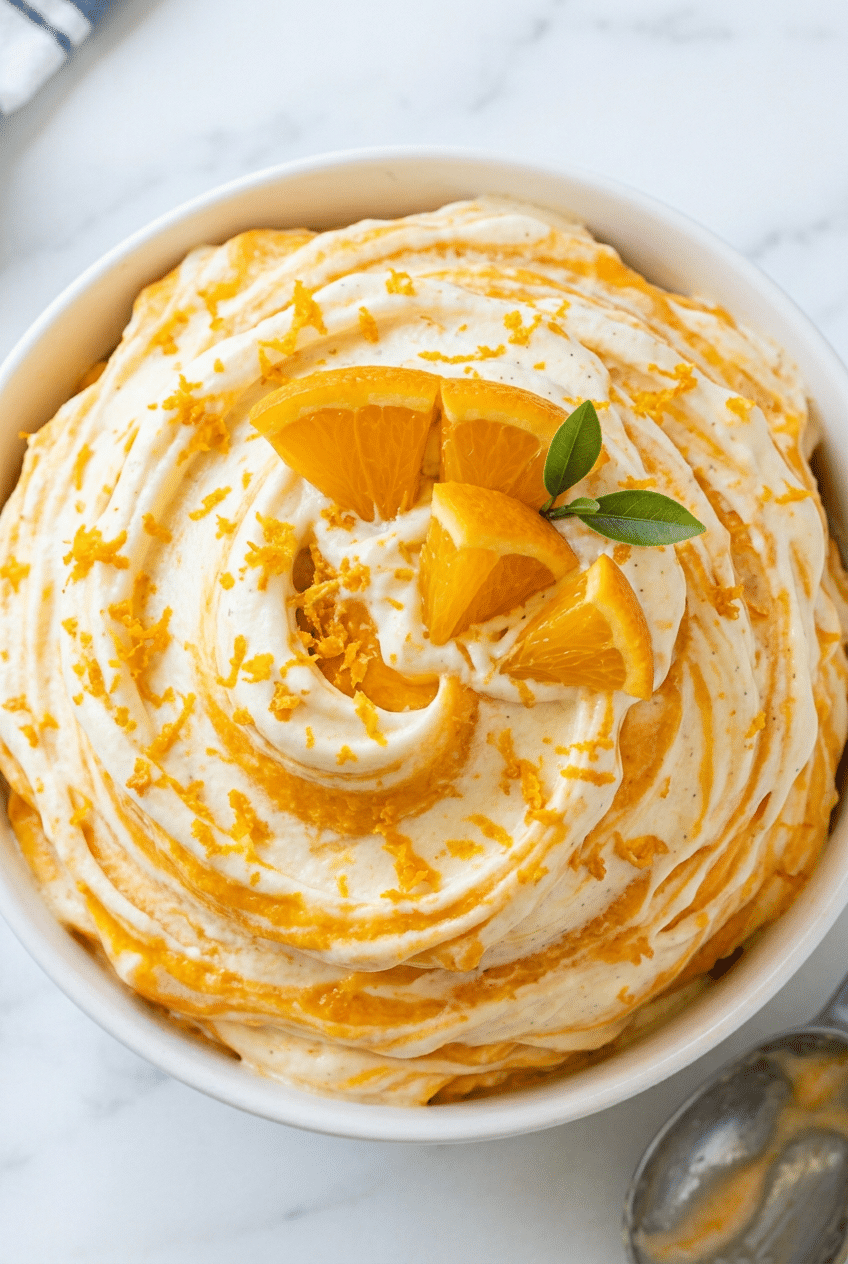
Orange Creamsicle Ice Cream Ninja Creami transforms childhood memories into restaurant-quality frozen dessert. This recipe delivers that perfect vanilla-orange swirl with incredibly smooth texture.
The secret lies in balancing cream ratios and orange intensity. Your Ninja Creami does the heavy lifting, creating professional ice cream texture without an ice cream maker.
Ingredients for Orange Creamsicle Ice Cream
For the Vanilla Base
- 1 cup heavy cream — creates rich, smooth texture
- 1/2 cup whole milk — adds creaminess without heaviness
- 1/3 cup granulated sugar — sweetens and prevents ice crystals
- 2 tablespoons corn syrup — ensures smooth scooping texture
- 1 teaspoon vanilla extract — provides classic creamsicle base flavor
- 1/4 teaspoon salt — enhances all flavors
For the Orange Swirl
- 1/2 cup fresh orange juice — bright, natural orange flavor
- 2 tablespoons orange zest — intensifies orange taste
- 3 tablespoons powdered sugar — sweetens without grittiness
- 2 tablespoons heavy cream — creates swirl consistency
- 1 drop orange food coloring — enhances visual appeal
Optional Add-Ins
- 1/4 cup mini marshmallows
- 1 tablespoon orange liqueur
- 1/4 teaspoon orange extract
How to Make Orange Creamsicle Ice Cream Ninja Creami Step by Step
Step 1: Prepare Orange Swirl
Start by making your orange swirl mixture since it needs time to develop flavors. Combine fresh orange juice, orange zest, powdered sugar, and heavy cream in a small bowl. Whisk until the powdered sugar completely dissolves and the mixture becomes smooth.
💡 Kitchen Hack: The Secret to Perfect Zest If you hate zesting citrus because you always end up grating the bitter white pith into your food, you need a Microplane Classic Zester. It effortlessly shaves only the flavorful oils off the peel. It is easily the cheapest, most-used tool in my kitchen!
The powdered sugar dissolves easier than granulated sugar, preventing any grittiness in your final ice cream. Fresh orange juice provides brighter flavor than concentrate, while the zest adds natural orange oils that intensify the taste. Add one drop of orange food coloring if you want that classic creamsicle orange hue. Mix thoroughly and set aside while you prepare the vanilla base. This resting time allows the flavors to meld beautifully.
Step 2: Create Vanilla Base
In a mixing bowl, whisk together heavy cream, whole milk, granulated sugar, corn syrup, vanilla extract, and salt. Whisk vigorously for 2-3 minutes until the sugar completely dissolves and the mixture becomes slightly frothy.
The corn syrup prevents ice crystals from forming during freezing, ensuring your ice cream scoops smoothly even after days in the freezer. This ingredient makes the difference between professional and homemade texture.
💡 Stop Whisking by Hand! Dissolving sugar by hand takes 5 minutes of vigorous whisking that leaves your arm aching. A KitchenAid 5-Speed Hand Mixer powers through in half the time. Its variable speeds ensure you don’t splash cream everywhere while achieving perfect sugar dissolution.
Step 3: Layer and Swirl
Pour half of your vanilla base into the Ninja Creami pint container. Add dollops of the orange mixture using a spoon, then pour in the remaining vanilla base. Don’t mix completely – you want distinct layers for swirling.
Use a skewer or a thin [Affiliate Link: Silicone Spatula] to create gentle swirls by drawing figure-eight patterns through the mixture. Too much mixing creates muddy color instead of beautiful ribbons. Three to four gentle swirls create the perfect marbled effect.
The layering technique ensures orange swirls throughout the entire pint rather than settling at the bottom. This method distributes flavor evenly while maintaining visual appeal.
Step 4: Freeze Overnight
Secure the lid tightly on your Ninja Creami pint and place it in the freezer. The mixture needs at least 24 hours to freeze completely solid. Don’t rush this step – partially frozen mixtures won’t process properly.
💡 The #1 Ninja Creami Mistake to Avoid Waiting 24 hours is the hardest part. If you only have the two containers that came with your machine, you’ll constantly be waiting a whole day just to make your next batch! I highly recommend grabbing a 4-Pack of Official Ninja Creami Pints. (Make sure to buy the official Ninja ones, as cheap knockoffs can strip your machine’s blade!)
Your freezer temperature should be 0°F or below for optimal results. Place the pint toward the back of the freezer where temperature stays most consistent. Avoid the door area where temperature fluctuates. Set a phone reminder for 24 hours because it’s easy to forget. The anticipation builds, but a properly frozen base ensures smooth, creamy results without ice chunks.
Step 5: Process in Creami
Remove the frozen pint from the freezer and let it sit at room temperature for 5 minutes. This slight thawing prevents the Creami blade from working too hard initially. Install the pint in your Ninja NC301 CREAMi Ice Cream Maker and select the Ice Cream function.

- 7-IN-1 ICE CREAM MAKER — A FROZEN TREAT FOR EVERY CRAVING: Choose from 7 one-touch programs — Ice Cream, Gelato, Sorbe…
- CREAMIFY TECHNOLOGY — INCREDIBLY SMOOTH, CREAMY RESULTS: Ninja’s exclusive Creamify Technology finely shaves through a …
- MAKE IT YOUR WAY — TOTAL INGREDIENT CONTROL: Create protein-packed ice cream, low-sugar sorbet, dairy-free treats, and …
The machine will process for about 2 minutes, breaking down ice crystals and incorporating air. You’ll hear the motor working hard initially, then becoming quieter as the texture smooths out. Don’t open the lid during processing.
If your first spin results in slightly chunky texture, use the Re-spin function once. This additional processing creates ultra-smooth, professional texture that rivals premium ice cream shops.
Step 6: Final Texture Check
After processing, remove the lid and check your ice cream texture. It should be smooth and scoopable with visible orange swirls throughout. If you notice any remaining chunks, run one more Re-spin cycle.
(Optional: Once it’s perfectly smooth, slide your pint into a Neoprene Creami Pint Koozie Sleeve so your hands don’t freeze while you enjoy it on the couch!)
The perfect Orange Creamsicle Ice Cream Ninja Creami has the consistency of soft-serve when freshly made. It will firm up slightly after sitting in the freezer for 30 minutes, reaching ideal scooping consistency. Taste and adjust if needed – you can add more orange zest for stronger flavor or a pinch more salt to enhance sweetness.e salt to enhance sweetness. The Ninja Creami allows easy adjustments even after processing.
Nutrition Information
- Per serving: 285 calories
- 19g fat
- 26g carbs
- 4g protein
Pro Tips
Temperature Matters: Let your frozen pint sit 5 minutes before processing. Rock-hard ice cream can strain the Creami motor unnecessarily.
Swirl Technique: Less is more when creating swirls. Three gentle figure-eights create better patterns than aggressive mixing.
Sugar Dissolution: Whisk sugar until completely dissolved. Undissolved sugar creates gritty texture that the Creami can’t fix.
Freezer Placement: Store pints in the back of your freezer where temperature stays most consistent for even freezing.
Fresh vs Store Orange: Fresh orange juice and zest provide brighter flavor than store-bought concentrates or artificial flavoring.
Delicious Variations
Blood Orange Creamsicle
Replace regular orange juice with blood orange juice for deeper color and slightly tart flavor. The natural red hues create stunning pink-orange swirls throughout the vanilla base.
Coconut Orange Creamsicle
Substitute half the heavy cream with canned coconut cream for tropical twist. Add 1/4 teaspoon coconut extract to enhance the island flavors.
Orange Chocolate Chip
Fold in 1/4 cup mini chocolate chips after the final processing. The chocolate adds texture contrast and complements the citrus beautifully.
Adult Orange Creamsicle
Add 1 tablespoon Grand Marnier or Cointreau to the orange swirl mixture. The orange liqueur intensifies citrus flavor while adding sophisticated depth.
Storage Instructions
Refrigerator
This ice cream doesn’t store well in the refrigerator as it will melt and lose its texture. If accidentally left out, refreeze for 4-6 hours then re-process in the Ninja Creami using the Re-spin function to restore smooth texture.
Freezer
Store in the Ninja Creami pint container with lid tightly sealed for up to 2 months. For best texture, consume within 2 weeks. After a week in the freezer, let sit 5 minutes at room temperature before scooping for easier serving.
Make-Ahead
This recipe is perfect for make-ahead entertaining. Prepare the base up to 3 days in advance and freeze. Process in the Creami up to 6 hours before serving. Cover processed ice cream with plastic wrap pressed directly onto surface to prevent ice crystals.
For food safety guidelines, visit FDA Ice Cream Safety Guidelines.
Frequently Asked Questions
Why is my Orange Creamsicle Ice Cream Ninja Creami coming out icy?
Icy texture usually results from insufficient fat content or improper freezing. Ensure you’re using heavy cream (not half-and-half) and that your freezer maintains 0°F. The corn syrup also prevents ice crystals, so don’t skip it. If still icy, try the Re-spin function for smoother texture.
Can I use store-bought orange juice for this recipe?
Yes, but fresh orange juice provides superior flavor and natural oils from pulp. If using store-bought, choose 100% pure orange juice without added sugars. Avoid orange drinks or cocktails as they contain artificial flavors that won’t taste as vibrant.
How long should I freeze the pint before processing?
Freeze for minimum 24 hours until completely solid throughout. The center should be rock-hard when tapped. Insufficient freezing time results in soupy texture that won’t process correctly. For best results, freeze overnight or up to 48 hours.
Why are my orange swirls disappearing during processing?
Over-swirling the base before freezing or using too thin orange mixture causes swirls to disappear. Make your orange mixture slightly thicker with extra cream and create only 3-4 gentle swirls. The processing action will blend flavors while maintaining visual ribbons if done correctly.
More Recipes You Will Love
👉 Perfect Strawberry Shortcake Recipe (Fluffy Biscuits)
👉 Perfect Tiramisu Recipe (Classic Italian)
👉 Perfect Lemon Blueberry Scones Recipe (Bakery Style)
👉 Perfect Brunch Board Recipe (Ultimate Grazing Guide)
This Orange Creamsicle Ice Cream Ninja Creami recipe brings childhood nostalgia to your kitchen with restaurant-quality results. The combination of creamy vanilla base and bright orange swirls creates the perfect summer dessert. Try it this weekend and share your swirl patterns in the comments – I love seeing your creations!