
- Prep: 15 Minutes
- Cook: 45 Minutes
- Total: 60 Minutes
- Servings: 6 servings
A Quick Note Before You Start
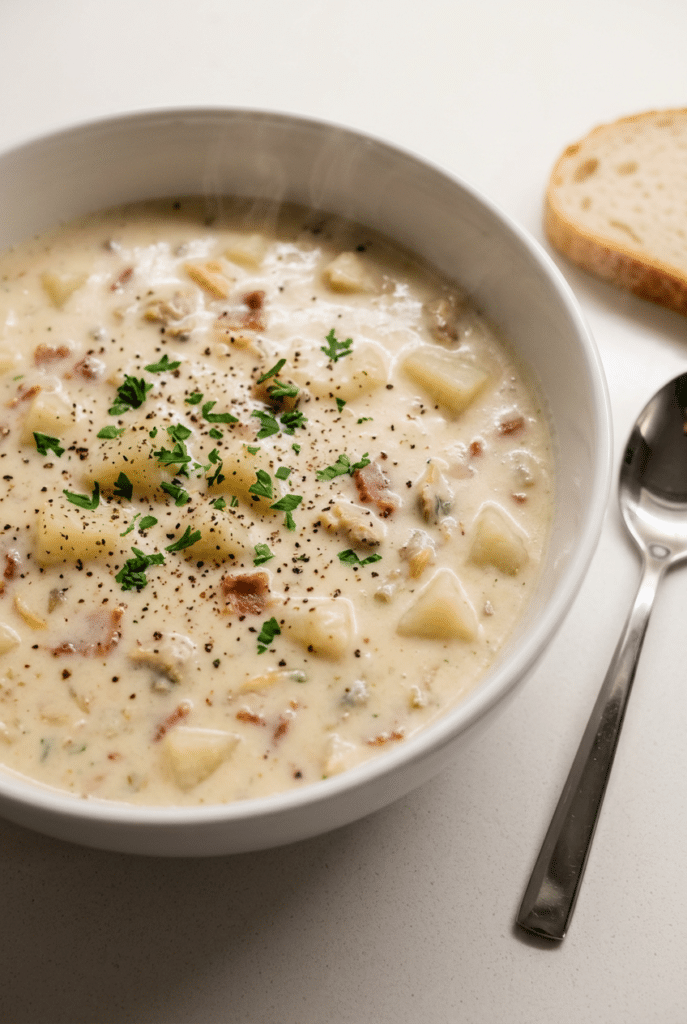
This clam chowder recipe tastes better than most restaurants and costs half the price. The secret is adding clams at the very end to keep them tender, not rubbery.
New England clam chowder recipe perfection starts with layering flavors from the ground up – smoky bacon, aromatic vegetables, and tender clams in rich, creamy broth.
Restaurant chefs use these exact techniques to create that signature thick consistency and briny-sweet flavor that makes you close your eyes on the first spoonful.
Ingredients for Perfect New England Clam Chowder
For the Base
- 6 thick-cut bacon slices — provides smoky depth and rendered fat
- 3 tablespoons butter — enriches the roux foundation
- 1 large yellow onion, diced — sweet aromatic base
- 3 celery ribs, diced — adds texture and freshness
- 3 garlic cloves, minced — enhances overall flavor complexity
For the Chowder
- 1/4 cup all-purpose flour — thickens the broth perfectly
- 4 cups chicken broth — creates flavorful liquid base
- 2 1/2 cups clam juice — essential briny seafood flavor
- 2 pounds Yukon Gold potatoes, cubed — holds shape while adding creaminess
- 1 bay leaf — subtle herbal background note
- 1 teaspoon fresh thyme — bright herbal accent
- 3 (6.5 oz) cans chopped clams, drained and juice reserved — the star ingredient
- 1 cup heavy cream — creates signature rich texture
- Salt and white pepper to taste — balances all flavors
Optional Add-Ins
- 2 tablespoons fresh parsley for garnish
- 1/4 teaspoon hot sauce for depth
- Oyster crackers for serving
How to Make Perfect Clam Chowder Recipe Step by Step
Step 1: Cook the Bacon Foundation
In a large Dutch oven or heavy-bottomed pot, cook the thick-cut bacon over medium heat for 8-10 minutes, stirring occasionally. You want the bacon deeply golden and crispy, with most of the fat rendered out. The bacon should be caramelized but not burnt – this creates the smoky base that makes restaurant-quality chowder.
Reserve half the cooked bacon on a paper towel-lined plate for garnish. Keep 3 tablespoons of the bacon fat in the pot and pour off any excess. This bacon fat becomes your flavor foundation – it’s liquid gold for building incredible depth in your chowder base.
Chopping bacon into uniform pieces while it’s cold makes cooking much easier. Most home cooks struggle with unevenly cooked bacon that turns chewy in soup. The Cuisinart Stainless Steel Chef’s Knife cuts through cold bacon like butter, giving you perfect 1/4-inch pieces that cook evenly and stay tender throughout the long simmer.

- High-Carbon Stainless Steel Blade: It is manufactured from high-quality stainless steel that maintains its functionality…
- Multi-functional Knife: The gyutou knife is classified and designed to be a multipurpose knife for professional applicat…
- Ergonomic Pakka Handle: To make it more professional and minimize any fatigue, finger numbness or aches after holding it…
Step 2: Build the Aromatic Base
Add the butter to the bacon fat and let it melt completely over medium heat. Add the diced onion and celery, cooking for 6-7 minutes while stirring occasionally. The vegetables should become soft and translucent, not browned. This gentle cooking releases their natural sugars and creates a sweet foundation.
Stir in the minced garlic and cook for just 30 seconds until fragrant. Be careful not to let the garlic burn, as it will turn bitter and ruin your entire batch. The moment you smell that beautiful garlic aroma, it’s time to move to the next step.
Sprinkle the flour evenly over the vegetables and stir constantly for 2 minutes. This creates a roux that will thicken your chowder perfectly. You should see the flour coating all the vegetables and absorbing the bacon fat, creating a paste-like consistency.

- Quality Enameled Dutch Oven: The Lodge Essential Enamel Cast Iron Dutch Oven gives you all the benefits of cast iron coo…
- Simmer in Style: This colorful enamel pot comes in a variety of colors to add a pop of interest to your kitchen or match…
- Care Instructions: Our non-toxic Dutch oven is dishwasher safe, but hand washing with warm, soapy water and a nylon scru…
Step 3: Create the Perfect Broth
Slowly pour in the chicken broth and reserved clam juice while stirring continuously with a wooden spoon. Add the liquid gradually – about 1/2 cup at a time initially – to prevent lumps from forming. Scrape the bottom of the pot constantly to incorporate all the browned bits and prevent the roux from clumping.
Most home cooks dump all the liquid in at once and end up with a lumpy disaster. The secret is patience – add liquid slowly while stirring vigorously. The KitchenAid Wooden Spoon with its flat edge scrapes every corner and prevents sticking better than any silicone spatula. Professional chefs swear by wooden spoons for building perfect roux-based soups.
Add the bay leaf, thyme, and a generous pinch of salt and white pepper. Bring the mixture to a gentle boil, then reduce to a simmer. The broth should be smooth and slightly thickened already from the roux. This forms the base that will cradle all your ingredients beautifully.

- TOP NOTCH CRAFTSMANSHIP: Our Kitchen Premium Wooden Utensils for Cooking are specially made, high-quality wooden utensil…
- EASY TO CLEAN, EASY TO STORE: This Wooden Spoon Set for Cooking is made with long-lasting outstanding quality! Teak wood…
- SCRATCH-FREE DESIGN: Our Wooden Cooking Utensil Set is made of Premium Quality Teak Wood close-grained hardwood with hig…
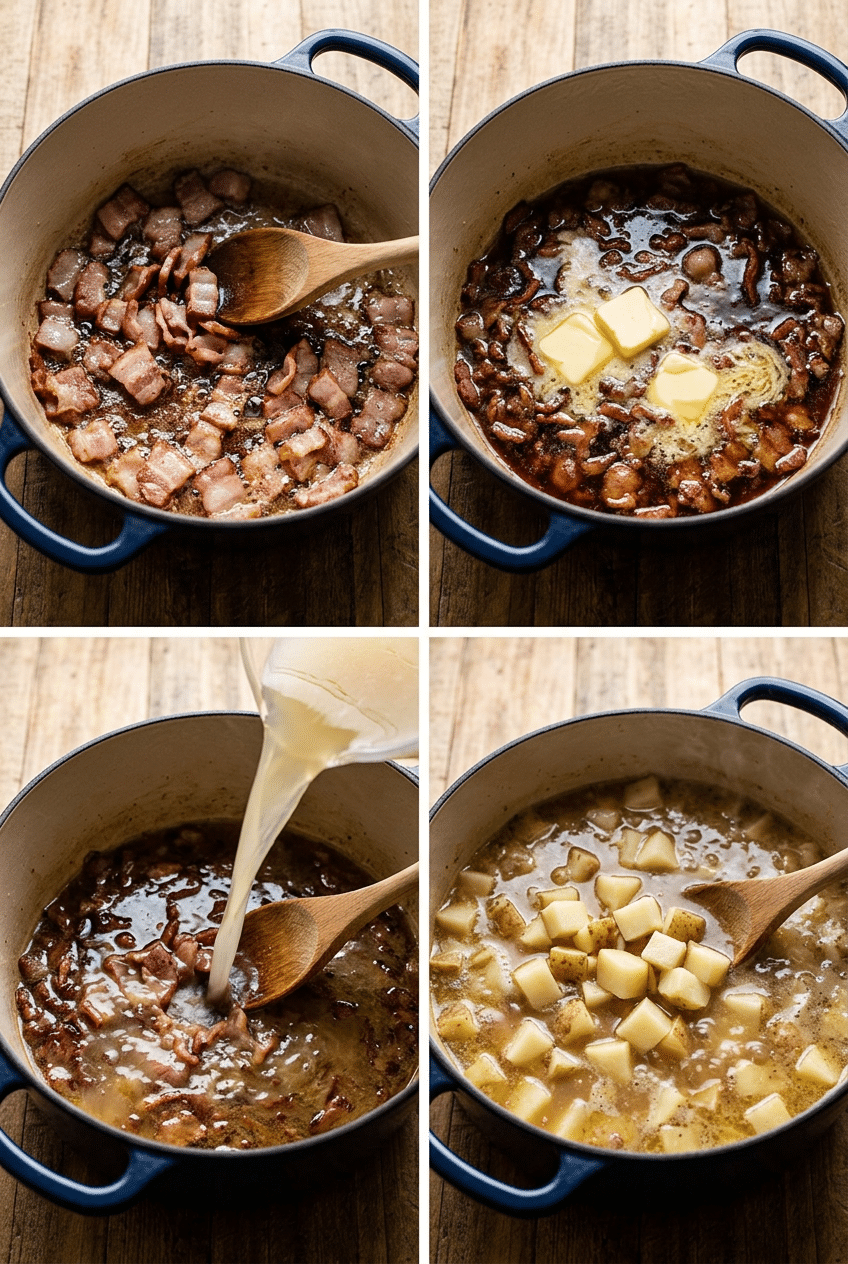
Step 4: Cook the Potatoes Perfectly
Add the cubed potatoes to the simmering broth and cook for 15-20 minutes, stirring occasionally, until they’re fork-tender but still hold their shape. Yukon Gold potatoes are perfect because they release just enough starch to naturally thicken the chowder while staying creamy and intact.
Test the potatoes by piercing with a fork – they should offer slight resistance but not be mushy. Overcooked potatoes will break apart and make your chowder gluey. The potatoes will continue cooking slightly even after you add the cream, so err on the side of slightly firm.
During this time, the flavors meld together beautifully and the broth continues to reduce and concentrate. You’ll notice the liquid level dropping slightly as the starch from the potatoes naturally thickens everything. This is exactly what you want – authentic chowder texture developing naturally.
Step 5: Finish with Cream and Clams
Remove the bay leaf and stir in the heavy cream gradually, allowing it to incorporate fully before adding more. Lower the heat to the lowest setting – you never want cream-based soups to boil vigorously or they’ll curdle and break. The chowder should be steaming but not bubbling aggressively.
Gently fold in the drained clams and heat through for just 3-4 minutes. This is crucial – canned clams are already cooked, so you’re just warming them. Overcooking makes clams tough and rubbery, which ruins the entire dish. They should be heated through but still tender.
Taste and adjust seasoning with salt and white pepper. The saltiness can vary greatly depending on your clam juice and bacon, so always taste first. The chowder should be thick enough to coat the back of a spoon but still pourable. If it’s too thick, add a splash of warm broth or cream.
Nutrition Information
- Per serving: 387 calories
- 24g fat
- 31g carbs
- 18g protein
- 3g fiber
- 892mg sodium
Pro Tips
Temperature Control is Everything: Keep the heat at medium-low once you add cream. Boiling will cause the dairy to curdle and separate, creating an unappetizing grainy texture that can’t be fixed.
Save Some Clam Juice: Reserve 1/2 cup of clam juice to thin the chowder if needed. Different brands vary in saltiness, so you can adjust consistency and flavor at the end.
Make It a Day Ahead: Chowder tastes even better the next day after flavors meld overnight. Reheat gently and add a splash of cream if it’s too thick.
Bacon Fat Management: Don’t skip removing excess bacon fat – too much makes the chowder greasy. Three tablespoons is the perfect amount for flavor without overwhelming richness.
Fresh vs Canned Clams: If using fresh clams, steam them separately first, then chop and add at the end just like canned. Save the steaming liquid to use as part of your clam juice.
Delicious Variations
Manhattan Style Twist
Add 1 can diced tomatoes and 2 tablespoons tomato paste instead of cream for the red Manhattan version. Use the same base but finish with tomatoes for a lighter, brothier chowder with bright acidity.
Seafood Medley Chowder
Add 1/2 pound each of bay scallops and medium shrimp during the last 5 minutes of cooking. The mixed seafood creates an elegant restaurant-style chowder perfect for special occasions.
Smoky Corn Chowder Hybrid
Add 1 cup of fresh corn kernels with the potatoes and use only 2 cans of clams. The sweet corn balances the briny clams and adds beautiful color and texture to each bowl.
Storage Instructions
Refrigerator
Store leftover chowder in airtight containers in the refrigerator for up to 3 days. The flavors actually improve overnight as they meld together. Reheat gently over low heat, stirring frequently to prevent curdling. Add a splash of cream or broth if it becomes too thick after chilling.
Freezer
Freezing is not recommended for cream-based chowders as the dairy will separate and create a grainy texture when thawed. The potatoes also become mushy after freezing and reheating, completely changing the desired texture of the chowder.
Make-Ahead
You can prepare the base through step 4 (without adding cream and clams) up to 2 days ahead. Store in the refrigerator and gently reheat before stirring in the cream and clams. This actually allows the flavors to develop more deeply for an even richer final dish.
For food safety guidelines, visit USDA Seafood Safety Guidelines.
Frequently Asked Questions
Can I use fresh clams instead of canned in this clam chowder recipe?
Absolutely! You’ll need about 6 pounds of fresh littleneck or cherrystone clams to yield 1 1/2 cups of chopped clam meat. Steam them separately first, strain and reserve the cooking liquid to use as clam juice, then chop the meat and add at the end just like canned clams to prevent overcooking.
Why is my clam chowder recipe too thin or too thick?
Thickness depends on how long you simmer and the starch content of your potatoes. For thicker chowder, simmer uncovered longer to reduce the liquid, or mash a few potato pieces against the pot side. For thinner consistency, add warm broth or cream gradually until you reach the desired texture.
How do I prevent my cream from curdling in clam chowder?
Always add cream to hot (not boiling) soup and reduce heat to low once cream is added. Never let cream-based soups boil vigorously. If using cold cream, temper it first by adding a ladle of hot soup to the cream, then stir this mixture back into the pot.
What’s the difference between New England and Manhattan clam chowder recipes?
New England clam chowder uses a cream or milk base creating a white, thick soup, while Manhattan clam chowder uses a tomato base for a red, brothier consistency. Both include clams, potatoes, and aromatics, but the base ingredients create completely different flavor profiles and textures.
More Recipes You Will Love
👉 Slow Cooker Broccoli Cheese Soup Best Recipe – Panera’s Got Nothing on This
👉 Crockpot Chicken Gnocchi Soup Recipe – Olive Garden Copycat Made Better
👉 Slow Cooker Potato Beef Soup Recipe – Set It and Forget It Comfort
👉 Chicken Tortellini Soup Recipe – Italian Comfort in Every Spoonful
This perfect New England clam chowder recipe delivers restaurant-quality results every single time with simple techniques and quality ingredients. The secret is patience – building layers of flavor from bacon fat to perfectly cooked vegetables to tender clams added at just the right moment. Make a batch this weekend and taste the difference homemade makes. Drop a comment below and let me know how yours turned out!